10 DIY Wall Art Ideas
The wall above my sofa was blank for eleven months. I am not exaggerating: I moved into my Munich flat, hung exactly one clock, and then stared at that enormous white rectangle every evening while telling myself I would buy “proper art” once I found the right piece. The right piece, it turned out, was always going to cost 300 EUR I did not have — so one rainy November Sunday I cleared my kitchen table, bought three canvases at the art shop near Sendlinger Tor, and started making my own. Two years later, nearly every wall in my flat is decorated with something I made, and the blank wall is a distant memory. These are the ten DIY wall art ideas I have actually tried, with the costs, the drying times, and the mistakes left in.

1. Geometric Canvas Wall Art

This was my very first attempt, and I chose it because it looked impossible to mess up — spoilers, it was still possible. I taped off big triangles and rectangles on a 60 by 80 cm canvas with painter’s tape, painted each section in muted terracotta, sage, and cream, and waited a full day before peeling the tape. The waiting is the whole technique: my first try, I peeled while the paint was still tacky and pulled little chips off with the tape, which I then had to touch up with a tiny brush for an hour. When I finally left one alone overnight, the lines came out razor sharp and the whole thing looked like something from a design shop. Total cost was one canvas (about 12 EUR) and paint I already owned. It still hangs in my hallway, and guests regularly assume I bought it.
2. Gallery Wall with Personal Photos and Prints

My staircase wall was the saddest part of my flat — a long, empty slope of white that I walked past ten times a day. So I collected frames for two months: flea markets, the 2-EUR bin at the hardware store, one proper wooden frame I splurged on. The trick that saved me from a crooked disaster was laying the whole arrangement out on the living room floor first, photographing it, and only then transferring it to the wall one frame at a time. I mixed family photos with postcards, a concert ticket, and two small prints I painted myself, keeping roughly 5 cm between frames. My one regret: I used proper nails on the first three before discovering adhesive strips that hold up to 2 kg — the nail holes are still there, a small memorial to my impatience. The wall took one Saturday and cost under 40 EUR all in.
3. Fabric Wall Art

I had a gorgeous linen scarf I never wore — too pretty to fold away, too big for my neck — so I stretched it over a wooden stretcher frame and hung it in my bedroom. It took twenty minutes and a staple gun, and it instantly became the softest thing on that wall. Since then I have made three more: a piece of burlap with stenciled numbers for the hallway, a vintage tea towel stretched over a small canvas for the kitchen, and an embroidery hoop with a scrap of indigo-dyed cotton. The stretcher frames cost about 8 EUR each at the art shop, and the fabric was all stuff I already owned. My tip: pull the fabric drum-tight and staple the back, not the sides — my first one sagged within a month because I was too gentle with the tension. Fabric art is also the kindest option for renters: one nail, zero holes in the art itself, and it comes down without a trace.
4. Canvas Painting with Abstract Designs
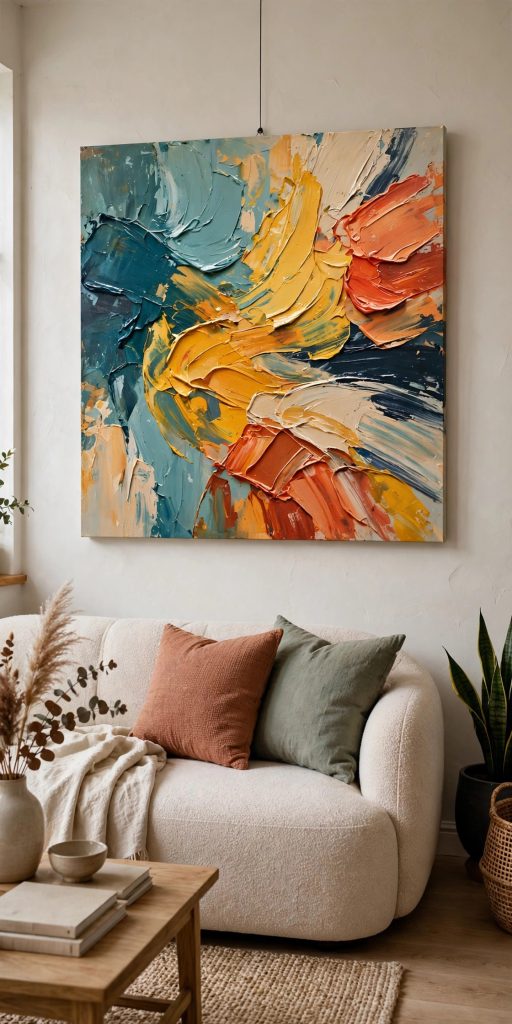
Abstract painting is where I finally gave myself permission to be bad at something in public — or at least, on my own walls. I squeezed out blobs of acrylic in dusty pink, ochre, and deep green, and pushed them around with a big flat brush with absolutely no plan. The liberating part is that there is no wrong answer; the terrifying part is knowing when to stop. I learned to walk away after thirty minutes and look at it the next morning with fresh eyes, because my evening self always wanted “one more stroke” and my morning self always regretted it. My best piece came from layering: a wash of thin color first, then bolder shapes on top once it dried, then a few fine lines in a contrasting color for energy. It cost nothing beyond a 10-EUR canvas and leftover paint, and it hangs above my desk where I see it every day.
5. Wooden Wall Art and Pallet Projects

My brother gave me a broken pallet from his workshop and I turned it into the most complimented piece in my living room. I pried off five slats, sanded them until my arm ached, stained three in walnut and painted two in chalky white, then mounted them on a backing board with small gaps between them for that slatted look. The whole thing is 120 cm wide and cost me exactly 6 EUR for the stain, since the pallet was free. My mistake was skipping the sanding on the first slat — I got excited — and a splinter caught my sleeve for a week until I took the whole thing down and sanded it properly. Wooden art has a weight and warmth that canvas never manages, and the texture catches the evening light beautifully. Just remember: sand everything, twice, and wear a mask. Pallet dust is no joke.
6. String Art and Thread Designs

I made a string-art heart for my sister’s birthday and it took one evening, one wooden board, about forty small nails, and a ball of mustard-yellow yarn. You hammer the nails along your outline — I printed a template and taped it to the board — then you just start wrapping, crisscrossing the thread until the shape fills in. It is genuinely meditative once you find the rhythm, and the result has this lovely handmade texture that photographs terribly and looks wonderful in person. My practical advice: use a proper hammer, not the back of a screwdriver like I did for the first ten nails, and keep the nails evenly spaced or the thread pattern goes lopsided. The board was an offcut, the nails cost 3 EUR, and the yarn came from my knitting basket. She hung it in her hallway immediately, which is the only review that matters.
7. Nature-Inspired Wall Art

Every autumn I press leaves between the pages of old cookbooks — maple, oak, fern fronds — and last year I finally did something with the collection. I arranged the best ones on heavyweight watercolor paper, fixed them with tiny dots of clear glue, and framed the whole thing in a simple black frame from the flea market (4 EUR, and it had glass). The result looks like a botanical print from a much more expensive shop, and it cost me nothing but patience. My tip from two seasons of trial: press the leaves for at least three weeks under something genuinely heavy, or they curl the moment the glue dries. I also painted a soft watercolor wash on the paper first for one version — pale green fading to cream — which made the leaves glow. It hangs in my bedroom, and I swap in new leaves every autumn, so it is never quite the same piece twice.
8. Typography and Quote Art

My home office needed something on the wall and I am far too cheap to buy letterpress prints, so I painted my own. I chose a line I actually live by — short, no clichés — and lettered it on a 50 by 70 cm canvas in charcoal over a warm white background. I am not a calligrapher, so I penciled the letters first, painted over them slowly with a small flat brush, and erased the pencil lines after. The whole thing took two evenings and looked so good that a friend asked which shop it was from. My honest advice: pick a quote you will not be embarrassed by in five years, keep the lettering simple and large, and do not attempt fancy script unless you have practiced. Block letters, generously spaced, always look intentional. The canvas was 10 EUR and the paint was leftover from the geometric piece — the cheapest art in my flat.
9. Mixed Media Collage Art

This is the piece I make when I have no plan and a free afternoon: a wooden panel, torn magazine pages, a wash of acrylic, some dried lavender from my balcony, and a strip of old linen, all layered and sealed with matte medium. The rule I landed on after one gluey disaster is thin layers, dried between each — I got impatient once, sealed everything wet, and the whole panel warped like a potato chip and had to be weighted under books for three days. The best corner of my current one is a scrap of floral wrapping paper I stuck down on impulse, which now looks completely intentional. Mixed media is the most forgiving art form I know: there are no mistakes, only layers. It hangs in my hallway, and every time I look at it I find something I forgot I put there. Total cost was a 7-EUR panel and scraps.
10. Gallery Grid with Small Frames

My office wall has a perfect square of nine identical black frames in a strict three-by-three grid, and it is the tidiest thing I own. I bought the frames in a multipack for 18 EUR, printed nine of my own photos at the drugstore for cents each — black and white, all from one hiking trip — and hung them with a paper template I taped to the wall first. The template is the whole secret: I cut nine paper rectangles, taped them up, lived with it for two days, adjusted twice, and only then put nails in. The symmetry does something calming to the room; my chaotic desk sits below it and the grid above makes the whole corner feel deliberate. My warning: measure twice and use a level, because in a strict grid, one frame 1 cm off is visible from the doorway. Mine has one, and I see it every single day.
Conclusion
Two years after that first rainy Sunday, my walls tell the story of everything I have tried, and not one piece cost more than a decent lunch. Start with the geometric canvas or the fabric stretch — both are cheap, forgiving, and nearly impossible to get wrong. And if your sofa wall is still blank after eleven months like mine was, consider this your sign. The table is already clear.