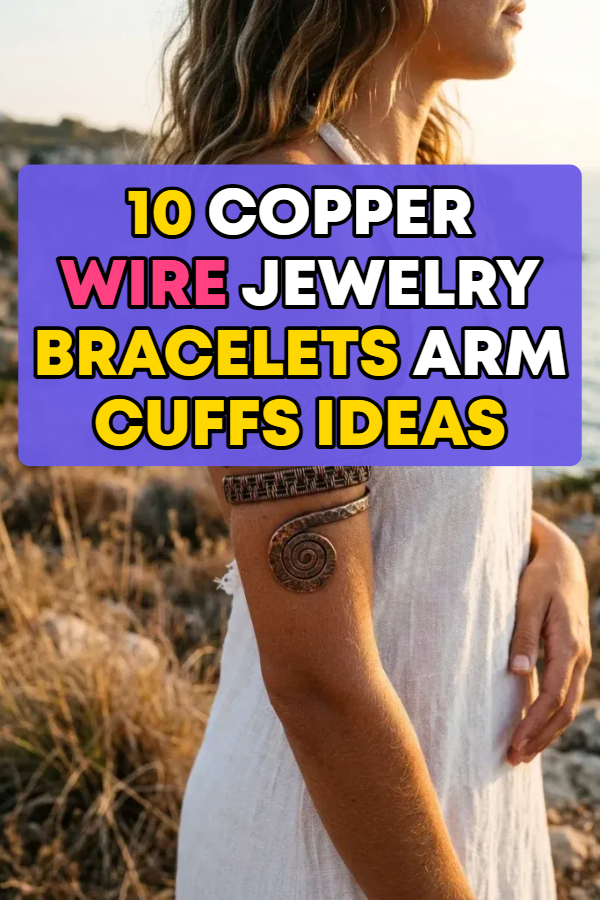
Few materials in the world of jewelry making bridge raw antiquity and modern artisanal style quite like copper. Known to ancient alchemists as the metal of Venus, copper possesses a radiant, warm red-gold luster that shifts across its lifespan, developing a rich, historic patina with age and wear. In contemporary jewelry design and bohemian fashion, handmade copper wire bracelets and upper arm cuffs have become the ultimate statement pieces.
Unlike cast, factory-molded jewelry, wire-wrapped copper pieces showcase the human touch in every curve, weave, and hammer strike. The structural malleability of copper wire allows jewelers and DIY crafters to construct sculptural wearables—from delicate filigree wrist bangles to dramatic Grecian arm cuffs that wrap gracefully around the bicep.
Whether you are an aspiring wire-wrapping artisan looking to expand your bench skills or a jewelry lover curating a bohemian festival wardrobe, copper wire offers endless creative freedom. Working with solid copper requires understanding gauge systems, temper, work-hardening properties, and chemical patinas.
This master guide explores why copper wire jewelry remains a dominant artisanal trend, outlines the essential tools, gauges, and safety preparations required for wire work, and provides a step-by-step breakdown of 10 unique copper wire bracelet and arm cuff ideas.
Why This Idea Is Trending or Useful
The surge of interest in copper wire bracelets and arm cuffs reflects broader fashion movements celebrating sustainable crafting, holistic wellness, and organic jewelry design:
- Bohemian, Festival & Fairycore Aesthetic: Arm cuffs and organic wire bracelets are staples of festival fashion, cottagecore looks, and historical-inspired styling. An upper arm cuff instantly turns bare shoulders or a sleeveless linen dress into an ethereal, goddess-inspired ensemble.
- Exceptional Affordability & Creative Freedom: Compared to sterling silver and gold-filled wire, solid bare copper is budget-friendly. This low barrier to entry lets beginner and advanced wire artists experiment with complex weaves, large-gauge sculptural arm bands, and gemstone cabochon settings without worrying about costly metal loss.
- Tactile Malleability & Work-Hardening Strength: Copper is a forgiving metal. In its dead-soft state, it bends easily with simple hand pliers. Once shaped, hammered, or woven, it undergoes work-hardening—transforming into a rigid, springy, and durable piece that holds its shape under daily wear.
- Patina Customization & Antiquing Effects: Unlike modern synthetic alloys, copper reacts beautifully to natural oxidation and chemical antiquing agents like liver of sulfur. Artisans can produce a wide spectrum of finishes—from bright polished rose-gold gleams to dark, weathered antiqued patinas that highlight intricate weave textures.
- Perceived Holism & Wellness Traditions: Across centuries of folk tradition, wearing solid raw copper against the skin has been associated with holistic balance and joint comfort, making copper cuffs popular among those who appreciate mindful, nature-inspired accessories.
Materials, Preparation & Setup Guide
Successful wire wrapping requires matching the correct wire gauge (thickness) and temper (hardness) to each functional component of the design.
+-----------------------------------------------------------------------+
|                    COPPER WIRE ANATOMY & GAUGE MAP                    |
+-----------------------------------------------------------------------+
|  [ 12 - 14 AWG ] --> Heavy Framework / Sturdy Arm Cuff Bases         |
|  [ 16 - 18 AWG ] --> Medium Structural Wires / Bangle Frames          |
|  [ 20 - 22 AWG ] --> Intermediate Connectors, Eyepins, Bezels        |
|  [ 26 - 30 AWG ] --> Fine Weaving Wires / Intricate Surface Wrapping  |
+-----------------------------------------------------------------------+
1. Essential Tools & Hardware Checklist
| Tool / Material | Recommended Type | Purpose & Function |
| Bare Copper Wire | Solid Bare Copper (Dead-Soft Temper, 12 to 28 AWG). | Pure, un-plated wire that bends smoothly and accepts chemical patinas. |
| Flush Cutters | Micro-shear flush cutters (Xuron or Lindstrom). | Produces clean, flat 90-degree cuts with zero pinched wire burrs. |
| Pliers Set | Chain-nose, round-nose, and flat-nose pliers (smooth jaws). | Forms crisp angles, loops, spirals, and secures fine weaving wire. |
| Nylon-Jaw Pliers | Dual-head nylon protective pliers. | Straightens kinked wire and hardens frames without marring the surface. |
| Chasing Hammer & Anvil | Steel bench block with chasing/ball-peen hammer. | Flattens, textures, and work-hardens structural cuffs and open bangles. |
| Mandrels | Stepped bracelet mandrel + tapered arm/cylinder form. | Ensures perfectly symmetrical, round/oval cuffs that fit arm anatomy. |
| Finishing & Patina | Liver of sulfur (gel or lump), 0000 fine steel wool, brass brush. | Darkens crevices to create high-contrast antiqued depth and polished highlights. |
2. Prepping, Work-Hardening & Sizing Calculations
- Straightening and Conditioning Wire: Cut your structural base wire and pull it through nylon-jaw pliers 2 to 3 times. The friction smooths out curves and adds slight stiffness to the wire core.
- Calculating Bracelet vs. Arm Cuff Lengths:
- Wrist Cuffs: Measure wrist circumference snugly and subtract 1 inch for the back opening gap. A 6.5-inch wrist requires a 5.5-inch structural wire base.
- Upper Arm Cuffs: Measure the bicep or upper arm circumference where the cuff will sit. For open, single-band cuffs, subtract 1.25 inches for the gap. For spiral/bypass cuffs that wrap around the arm, add 3 to 6 inches to the base measurement to account for overlapping spirals.
- Filing Wire Ends: Always use a needle file or cup burr tool on cut wire ends. Bare copper can scratch skin if raw cuts are left un-beveled.
10 Detailed Copper Wire Bracelet & Arm Cuff Ideas
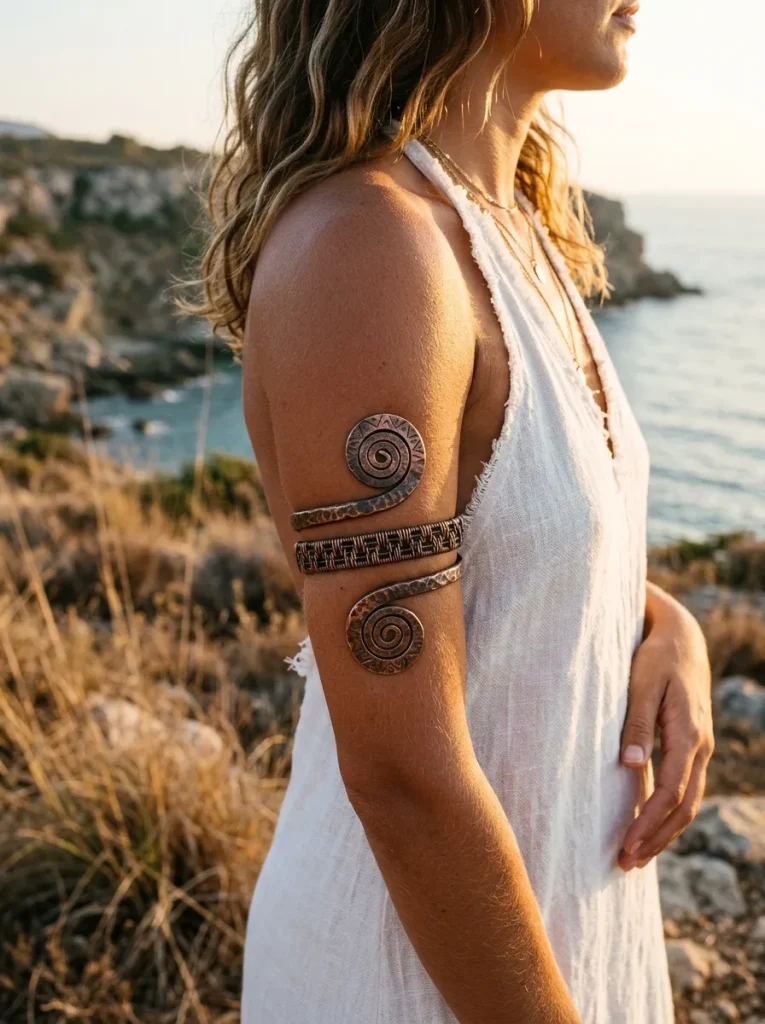
Idea 1: The Spiral Serpent Goddess Upper Arm Cuff
+-----------------------------------------------------------------------+
|                    IDEA 1: SPIRAL SERPENT ARM CUFF                    |
+-----------------------------------------------------------------------+
|                                                                       |
|                          ( @ )                                        |
|                         /     \                                       |
|               ( @ )====/  ===  \====( @ )   <-- Sculptural Triple     |
|              /        /  /   \  \        \      Coil Serpent Head     |
|             |        |  |     |  |        |                           |
|             \________\__\_____/__/________/                           |
|                         \     /                                       |
|                          \   /              <-- Graduated Tapered     |
|                           \ /                   Tail Wrap             |
|                           (@)                                         |
|                                                                       |
+-----------------------------------------------------------------------+
Concept Overview & Aesthetic Appeal
Inspired by ancient Greco-Roman and Egyptian serpent jewelry, this upper arm cuff coils around the bicep like a fluid serpent. The design balances a heavy-gauge framework with hammered decorative spirals and woven accents. Its bypass silhouette allows the cuff to expand or tighten comfortably around the arm.
Step-by-Step Execution Guide
- Cut the Base Wire: Cut two 18-inch lengths of heavy 12 AWG dead-soft solid copper wire.
- Form Terminal Spirals: Using round-nose pliers, grip the tip of each wire end and roll inward to create tight, flat Egyptian spirals on both ends.
- Bind the Core: Lay the two 12 AWG wires parallel. Using fine 26 AWG weaving wire, execute a tight “figure-eight” or “over-under” weave along a 4-inch center span to lock the dual frame wires together.
- Form and Hammer: Wrap the woven assembly around a tapered cylinder or arm mandrel. Use a chasing hammer on an anvil to flare the exterior open spirals flat, work-hardening the metal so the cuff retains its spring tension around the arm.
Pro Styling Tips
- Wear this piece high on the bicep paired with an off-the-shoulder linen top, Grecian-style halter dress, or sleeveless festival vest.
- Apply a dark liver-of-sulfur patina, then polish the raised hammer facets with 0000 steel wool to create an aged artifact appearance.
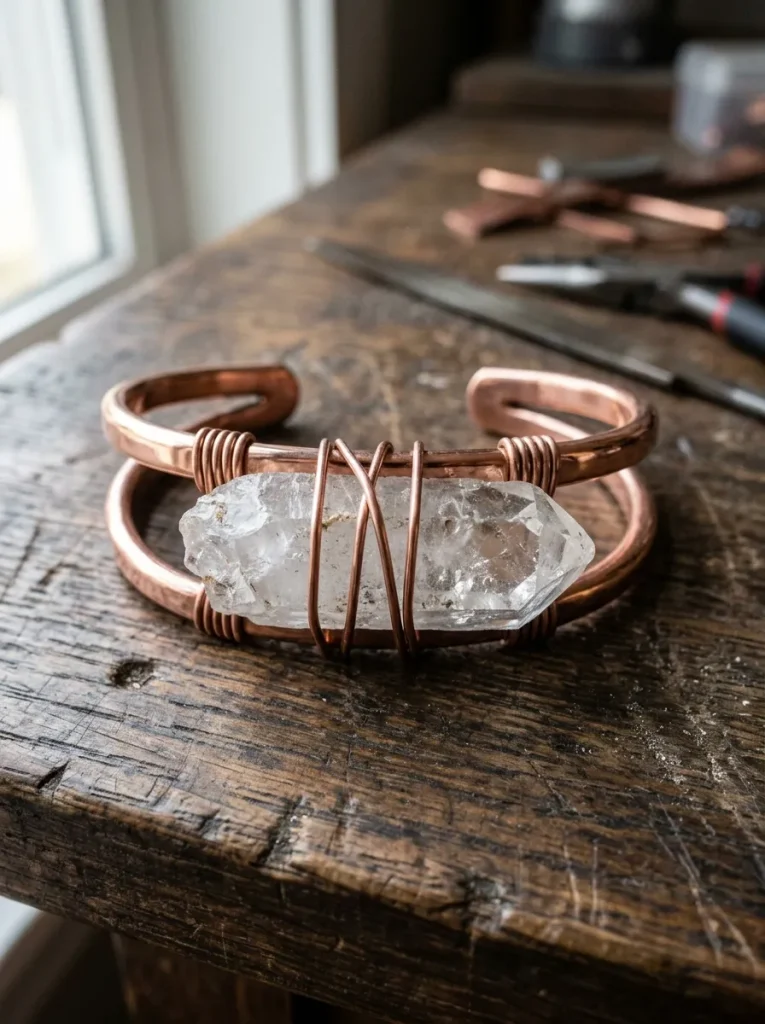
Idea 2: The Raw Crystal Quartz Wire-Wrapped Bangle
Concept Overview & Aesthetic Appeal
An organic, bohemian wrist cuff that highlights the rough texture of natural raw gemstones—such as raw clear quartz points, rough amethyst, or raw emerald. The copper wire wraps organically around the mineral’s natural contours, creating an earthy, talisman-like aesthetic.
Step-by-Step Execution Guide
- Form the Bangle Base: Shape a piece of 14 AWG wire around an oval bracelet mandrel to create a sturdy wrist hoop with two hook-and-eye clasp ends.
- Select and Seat the Crystal: Place a rough, unpolished crystal point (1.5 to 2 inches long) across the top center of the bangle frame.
- Execute the Web Wrap: Anchor a 3-foot length of 22 AWG dead-soft wire to the frame. Crisscross the wire across the crystal’s natural ridges, securing it tightly without obscuring the stone’s faces.
- Secure and Lock: Wrap the wire 5 to 6 times around the heavy base frame on both sides of the crystal, clip the ends flush on the underside, and tuck the tips inward.
Pro Styling Tips
- Stack this raw crystal bangle alongside slim, smooth copper wire bangles to create a textured wrist arrangement.
- Raw quartz looks stunning against earthy linen, olive-green utility jackets, and terracotta knitwear.
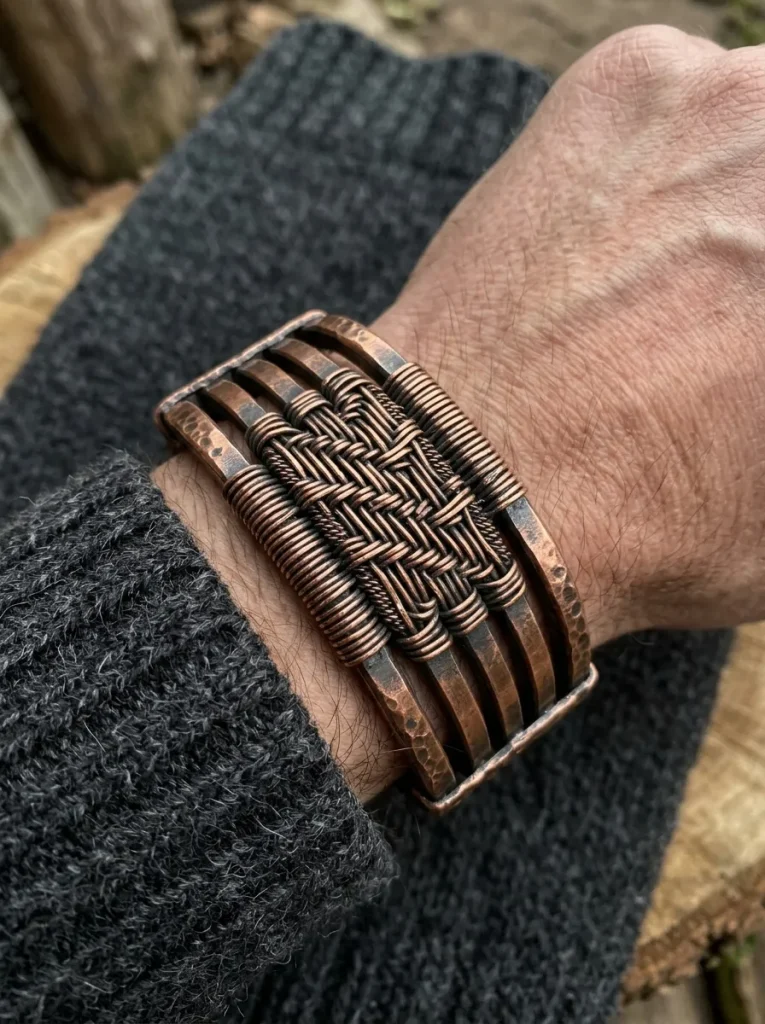
Idea 3: The Intricate Soumak Woven Viking Cuff
Concept Overview & Aesthetic Appeal
A substantial, historical wrist cuff inspired by Norse and Viking wire-weaving traditions. Utilizing three to five parallel base wires bound together by fine Soumak (basket-weave) patterns, this piece offers a dense, architectural presence on the wrist.
Step-by-Step Execution Guide
- Prepare the Base Spines: Cut four identical 7-inch lengths of 16 AWG square or round copper wire. Straighten them with nylon-jaw pliers.
- Execute the Soumak Weave: Using a long length of 28 AWG wire, wrap two turns around wire 1, wrap two turns around wires 1 and 2, then step across to wires 2 and 3 in a continuous forward-and-back woven rhythm.
- Maintain Tension: Keep the fine weaving coils compressed tightly together using a brass pusher or fingernail as you advance down the cuff.
- Curve to Fit: Once 5 inches of the frame is woven, trim and tuck the ends. Shape the band around an oval bracelet mandrel using a rawhide mallet to avoid denting the weave.
Pro Styling Tips
- The Soumak weave catches antiquing patinas exceptionally well. Darken the cuff deeply with liver of sulfur, then gently buff only the top ridges to reveal dramatic shadow lines.
- Excellent unisex piece that pairs well with heavy knits, denim jackets, and rugged leather boots.
Idea 4: The Art Nouveau Floral Vine Arm Band

+-----------------------------------------------------------------------+
|                    IDEA 4: ART NOUVEAU FLORAL ARM BAND                |
+-----------------------------------------------------------------------+
|                                                                       |
|                          ___                                          |
|                        /     \                                        |
|             ( O )-----(  LEAF )-----[ BUD ]-----( O )                 |
|            /           \ ___ /                   \                    |
|           |       ~ ~ ~ ~ ~ ~ ~ ~ ~ ~ ~ ~ ~ ~     |  <-- Flowing Vine |
|           \______/                           \___/       Whimsical    |
|                  \___( FLOWER )___( LEAF )___/           Silhouettes  |
|                                                                       |
+-----------------------------------------------------------------------+
Concept Overview & Aesthetic Appeal
A romantic upper arm band influenced by 1900s Art Nouveau botanical illustration. Asymmetrical tendrils, sweeping leaf contours, and small bezel-wrapped copper bead buds create a whimsical woodland look.
Step-by-Step Execution Guide
- Form the Flowing Vine Base: Take an 18-inch length of 14 AWG wire and use round-nose pliers to form undulating, asymmetrical S-curves that mirror a climbing ivy vine.
- Fabricate Wire Leaves: Bend small teardrop loops branching off the main stem. Use a chasing hammer on a steel block to flare the leaf edges flat, creating a dynamic paddle-leaf profile.
- Integrate Gemstone Buds: Thread small 4mm faceted carnelian or green aventurine beads onto 24 AWG wire and coil them into the leaf junctions to represent floral buds.
- Contour the Arm Band: Curve the entire vine around a circular arm mandrel, shaping the ends so they overlap without pinching.
Pro Styling Tips
- Style this piece over a flowing bell-sleeve boho dress or wear it directly on bare skin at summer outdoor garden parties.
- Pair with botanical earrings or a leafy pendant to complete the look.
Idea 5: The Industrial Minimalist Geometric Square Cuff
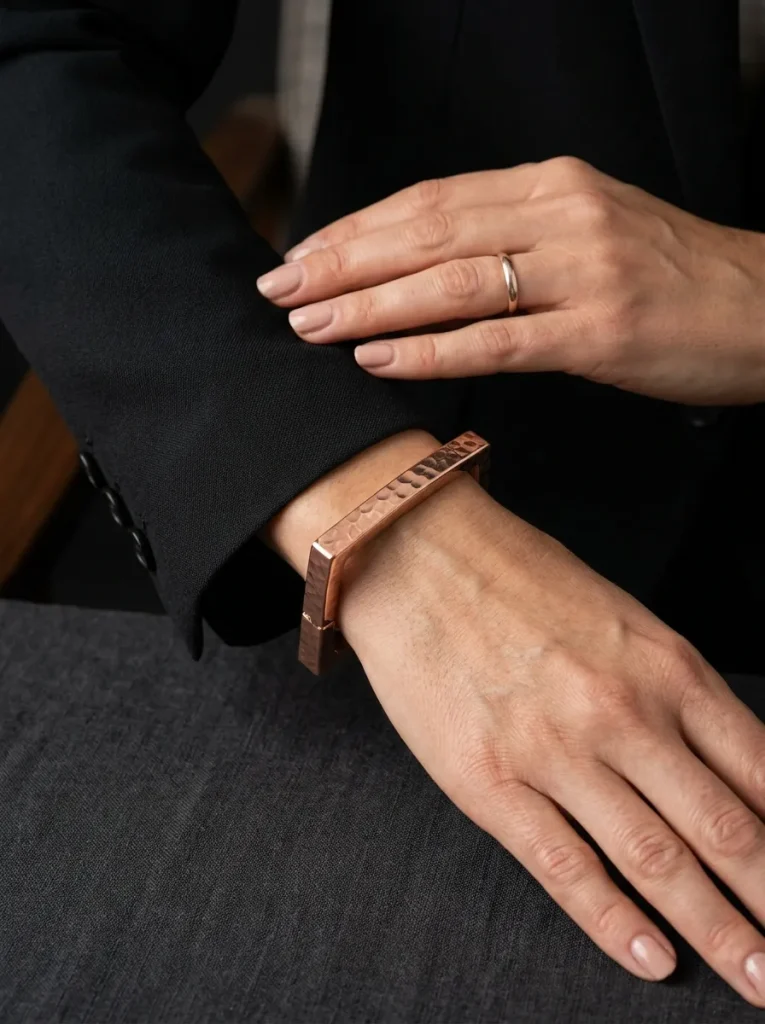
Concept Overview & Aesthetic Appeal
Sleek, architectural, and contemporary. This minimalist wrist cuff uses heavy 12 AWG square copper wire bent into clean geometric planes with hammered chisel facets. It breaks away from traditional curved filigree in favor of structured modernism.
Step-by-Step Execution Guide
- Cut Square Wire: Cut a 6.5-inch section of 12 AWG dead-soft square copper wire.
- Execute Crisp 90-Degree Bends: Using flat-nose brass-lined pliers, create clean 90-degree step angles 1.5 inches from each terminal end to form geometric end caps.
- Planishing the Surface: Place the wire on a polished steel block. Use the flat face of a chasing hammer to planish the square edges, creating reflective facets that catch the light.
- Form the Oval Profile: Shape the cuff around an oval mandrel by hand, using gentle mallet taps to set the shape without rounding off the sharp corners.
Pro Styling Tips
- Keep this piece polished to a high-shine mirror finish using a jewelry polishing cloth.
- Pairs cleanly with contemporary corporate wear, minimalist black blazers, and crisp white collared shirts.
Idea 6: The Tree of Life Filigree Open Bangle
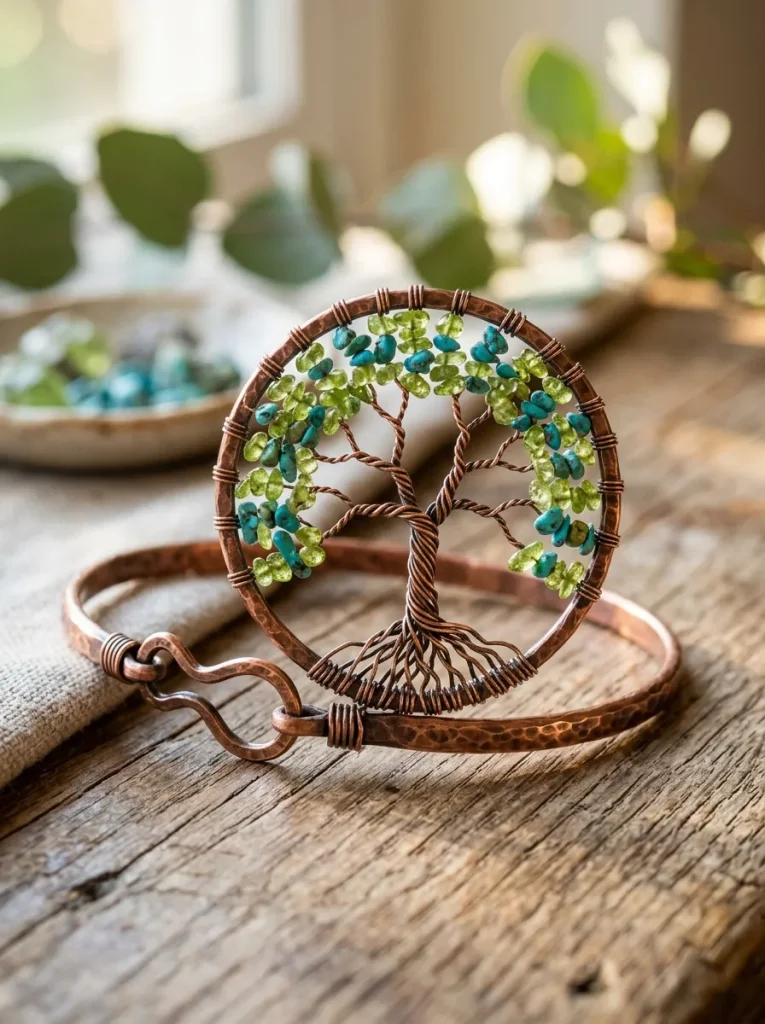
Concept Overview & Aesthetic Appeal
A timeless classic in wire artistry. The Tree of Life motif features a root system, twisted trunk, and sprawling branches woven inside a circular copper wire frame, accented by tiny gemstone chip leaves.
Step-by-Step Execution Guide
- Form the Focal Loop: Form a 1.25-inch circle out of 14 AWG wire in the center of a 10-inch base wire, securing the join with a neat wire wrap.
- Root and Trunk Weave: Cut six 5-inch pieces of 24 AWG wire. Wrap the bottom ends around the lower ring to form roots, then bundle and twist the center section 4 to 5 times to form the trunk.
- Branch and Leaf Creation: Separate the wires into pairs to form branches. Thread 2 to 3 natural gemstone chips (peridot, turquoise, or amethyst) onto each wire, wrapping the wire tips securely around the top perimeter of the circle.
- Shape the Bangle Arms: Shape the remaining lengths of the 14 AWG base wire into an open-hook wrist bangle.
Pro Styling Tips
- Choose gemstone chips that hold personal meaning (such as birthstones or chakra stones) to make the piece a personalized gift.
- Wear solo as a central statement piece on the wrist.
Idea 7: The Hammered Coil Tribal Torque Arm Cuff
+-----------------------------------------------------------------------+
|                    IDEA 7: TRIBAL TORQUE ARM CUFF                     |
+-----------------------------------------------------------------------+
|                                                                       |
|                          (===)                                        |
|                         /     \                                       |
|               ( @ )====/       \====( @ )   <-- Heavy 10 AWG Solid    |
|              /                           \      Torque Base           |
|             |     ///////////////////     |                           |
|             \____/                   \____/ <-- Dense 20 AWG Coil     |
|                  \___________________/          Sleeve Wrapping       |
|                                                                       |
+-----------------------------------------------------------------------+
Concept Overview & Aesthetic Appeal
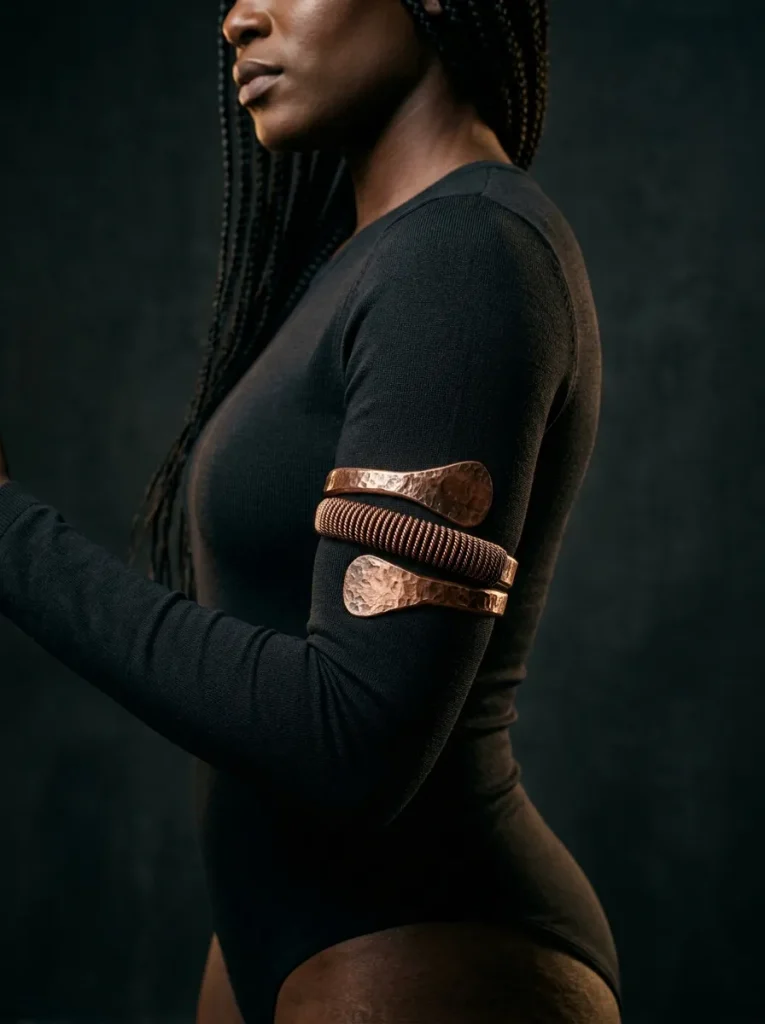
A bold, tribal-inspired torque cuff with substantial weight. Using heavy 10 or 12 AWG solid copper wire accented by dense coil sleeves and forged flat terminals, this piece carries a grounded, ancient presence.
Step-by-Step Execution Guide
- Cut the Heavy Core: Cut a 14-inch piece of thick 10 AWG solid copper wire. Anneal the wire with a small butane torch if it feels stiff, quenching it in water.
- Forge the Terminal Paddles: Place the wire ends on an anvil and hammer them with heavy, confident blows to flare the ends into wide, flattened spade paddles.
- Wrap Decorative Coil Sleeves: Tightly spin 20 AWG wire around a 16 AWG knitting needle to create a 2-inch coiled spring. Slide this coil sleeve onto the center of the 10 AWG core wire.
- Form the Torque Shape: Bend the thick wire into a smooth, rigid C-shape around an arm mandrel.
Pro Styling Tips
- Place this cuff on the mid-bicep over a fitted black long-sleeve bodysuit or high-neck tank for a bold high-fashion contrast.
- The thick gauge offers excellent durability for outdoor events and festivals.
Idea 8: The Byzantine Chainmaille & Wire Frame Bracelet
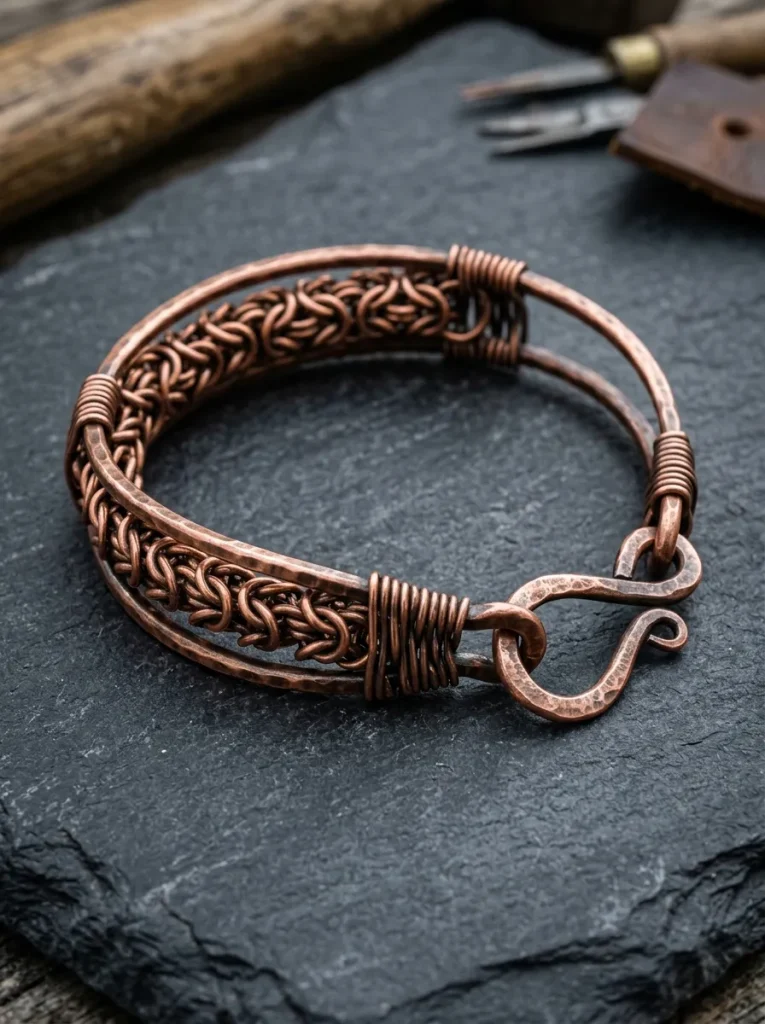
Concept Overview & Aesthetic Appeal
A hybrid design combining wire-wrapping structure with traditional chainmaille flexibility. A woven Byzantine chainmaille section is suspended inside a rigid, wire-wrapped copper frame.
Step-by-Step Execution Guide
- Weave the Byzantine Segment: Using 18 AWG copper jump rings (with an Inner Diameter of 3.5mm), weave a 3-inch length of traditional Byzantine chainmaille pattern.
- Build the Wire Outer Frame: Form two parallel 16 AWG structural side rails, curving them slightly to match the wrist.
- Anchor the Chain: Using 24 AWG wire, lash the outer rings of the Byzantine chain directly to the side rails using a secure figure-eight binding.
- Add a Hand-Forged Hook Clasp: Bend a sturdy shepherd’s hook clasp from 16 AWG wire and attach it to one end of the frame.
Pro Styling Tips
- The moving chainmaille center provides fluid tactile motion, while the rigid outer frame keeps the bracelet neatly centered on top of the wrist.
- Looks great alongside a clean leather-strap wristwatch.
Idea 9: The Double-Helix DNA Wave Wrist Cuff
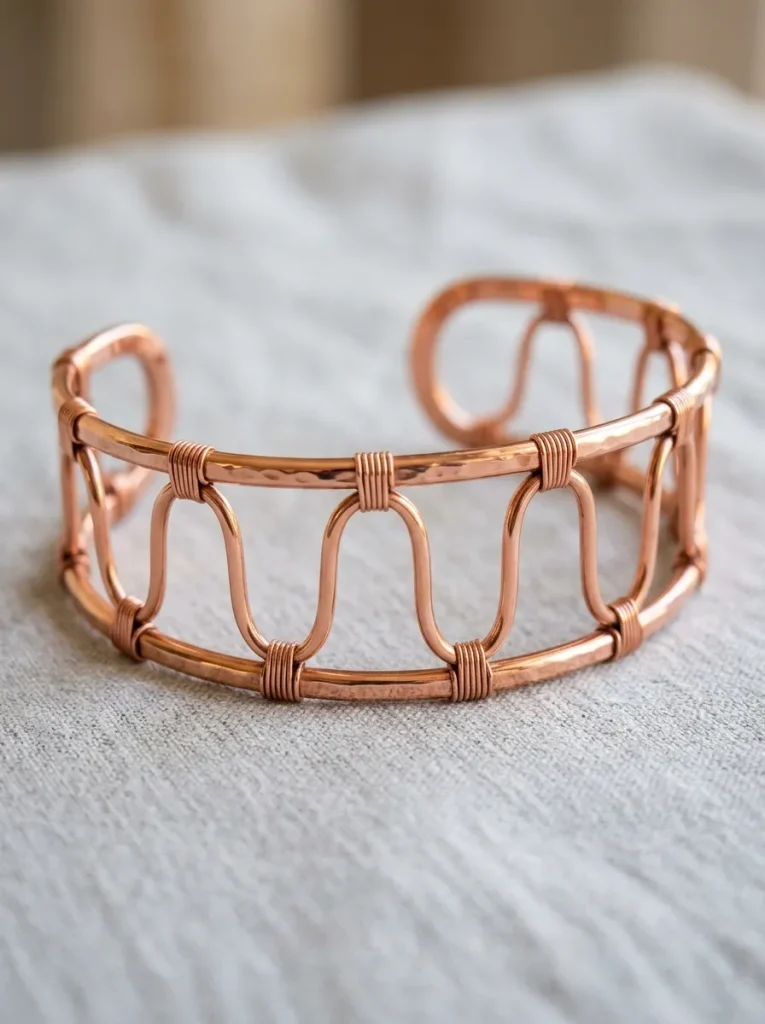
Concept Overview & Aesthetic Appeal
A dynamic, modern cuff featuring two parallel heavy-gauge wires intertwined with a wave-patterned wire core, creating the visual effect of an undulating double-helix or flowing ocean wave.
Step-by-Step Execution Guide
- Frame Setup: Cut two 7-inch lengths of 14 AWG copper wire to serve as top and bottom rails.
- Create the Center Sinusoid Wave: Take a 12-inch length of 18 AWG wire and bend it back and forth using round-nose pliers to form a clean, uniform serpentine wave.
- Lash the Assembly: Place the serpentine wave between the two 14 AWG rails. Using 26 AWG weaving wire, lash each wave crest to the top rail and each wave trough to the bottom rail with 4 tight coils per contact point.
- Form the Cuff: Shape the flat ladder assembly around an oval bracelet mandrel, flattening the wire ends into smooth loops.
Pro Styling Tips
- This airy, openwork design keeps the wrist cool in warm climates while delivering substantial visual width.
- Polish to a bright copper shine to make the undulating wave lines pop against the skin.
Idea 10: The Wrapped Gemstone Cabochon Statement Cuff
+-----------------------------------------------------------------------+
|                  IDEA 10: GEMSTONE CABOCHON CUFF                      |
+-----------------------------------------------------------------------+
|                                                                       |
|        =====================================================          |
|        [== 14 AWG UPPER FRAME WIRE ========================]          |
|                                  ||                                   |
|                    /~~~~~~~~~~~~~~~~~~~~~~~~~~\                       |
|                   |     /==================\   |                      |
|        ( O )======|    |   LABRADORITE OR   |  |======( O )           |
|                   |    |    TURQUOISE CAB   |  |                      |
|                    \    \==================/  /                       |
|                     \~~~~~~~~~~~~~~~~~~~~~~~~/                        |
|                                  ||                                   |
|        [== 14 AWG LOWER FRAME WIRE ========================]          |
|        =====================================================          |
|                                                                       |
+-----------------------------------------------------------------------+
Concept Overview & Aesthetic Appeal
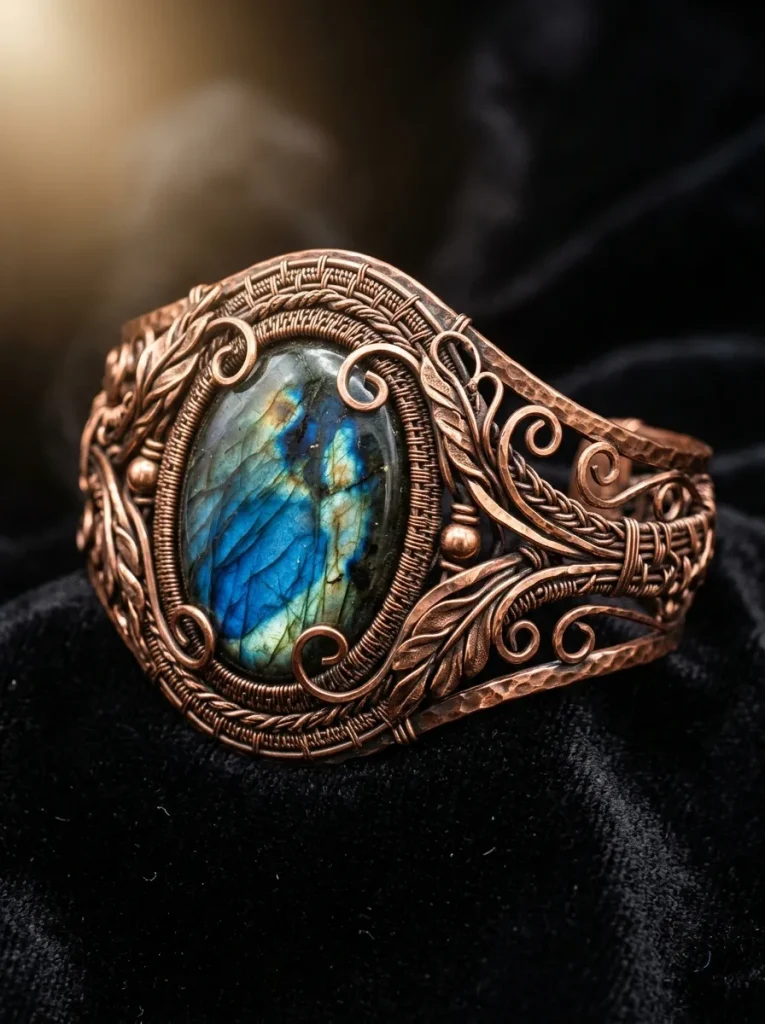
The peak of wire-wrapping craftsmanship. This statement cuff secures a large, flat-backed gemstone cabochon (such as flashy labradorite, green malachite, or turquoise) entirely with woven wire tension—requiring no glue, solder, or bezel cups.
Step-by-Step Execution Guide
- Build the Multi-Wire Frame: Align three 8-inch lengths of 16 AWG wire horizontally. Weave the outer thirds with 28 AWG wire, leaving the center 2 inches open for the stone setting.
- Form the Base Seat: Spread the unwoven center wires apart to form a secure basket that matches the oval shape of the cabochon.
- Seat the Stone: Place the cabochon into the wire cradle. Bring two front-facing 20 AWG wires across the stone’s bezel perimeter, burnishing them down firmly against the stone face to lock it in place.
- Add Sweeping Side Tendrils: Swirl the remaining wire ends into decorative Art Nouveau spirals along the cuff shoulders, weaving them back into the main frame.
- Shape the Wrist Arc: Carefully curve the cuff around a bracelet mandrel, supporting the stone setting with your thumb to ensure the cabochon remains flat.
Pro Styling Tips
- Labradorite and turquoise pop with blue and green iridescence against the warm reddish-brown of antiqued copper.
- Let this cuff be the primary statement accessory of your outfit, pairing it with neutral, solid-color clothing.
Common Beginner Mistakes & How to Avoid Them
Wire jewelry making is an accessible craft, but avoiding these common technical pitfalls will ensure your pieces look refined and hold up over time:
1. Using Plated Craft Wire Instead of Solid Bare Copper
Many beginners start with inexpensive “copper-colored” craft wire. This wire has a thin, dyed enamel coating over an aluminum or copper-alloy core. The moment you file, hammer, or apply liver of sulfur to it, the coating flakes off, ruining the piece.
- The Solution: Always buy 100% Solid Bare Copper Wire (uncoated and un-lacquered). This pure metal can be filed, hammered, annealed, and chemically antiqued without surface flaking.
2. Over-Working and Snapping the Wire
Bending copper repeatedly in the same spot causes localized work-hardening. The metal becomes brittle, stiff, and will eventually snap clean through during assembly.
- The Solution: Plan your bends before applying plier pressure. If a heavy structural wire becomes too stiff to shape smoothly, anneal it: heat the copper with a handheld torch until it glows dull red, let it air cool (or quench in water), and pickle it to remove oxidation. Annealing resets the crystalline structure back to a dead-soft state.
3. Leaving Sharp, Unfinished Wire Ends
Clipping wire with cheap cutters leaves sharp, angled burrs on the ends. When worn as a bracelet or arm cuff, these rough edges can scratch the skin or snag delicate fabrics.
- The Solution: Use flush cutters with the flat side facing the finished piece. After cutting, smooth every wire tip with a cup burr tool (wire rounder) or a fine 400-grit needle file until the edge is smooth to the touch.
4. Inconsistent Weaving Tension
Inconsistent tension while wrapping fine wire around heavy base rails leads to uneven spacing, overlapping coils, and loose sections that slide around on the frame.
- The Solution: Maintain steady, gentle thumb tension on the spool wire. After completing 4 to 5 wraps, use your fingernail or nylon-jaw pliers to slide and compress the coils tightly against previous rows for a clean, uniform weave.
Pro Tips, Maintenance & Longevity Strategies
Raw copper interacts with oxygen, moisture, and skin chemistry. Proper care keeps your handmade cuffs looking intentional and prevents unwanted skin discoloration:
- Preventing the “Green Skin” Effect: When raw copper reacts with perspiration, it forms harmless copper carbonate, which can leave a temporary greenish mark on the skin. To prevent this, apply two thin coats of Renaissance Micro-Crystalline Wax or clear jewelry-grade sealant (like ProtectaClear) to the inside surfaces of cuffs that touch the skin directly.
- Creating a High-Contrast Antiqued Finish: Dip finished copper jewelry into a warm bath of water mixed with a pea-sized drop of Liver of Sulfur gel. Within 30 to 60 seconds, the metal will turn deep charcoal-black. Rinse thoroughly in clean water with baking soda to neutralize the reaction. Buff the high spots with 0000 ultra-fine steel wool or a polishing pad to expose glowing copper highlights while leaving the deep recesses dark.
- Routine Cleaning & Storage: Store copper jewelry in airtight zip bags with anti-tarnish tabs to slow oxidation. To restore shine to a bright copper piece, soak it in a mixture of warm water, mild dish soap, and a tablespoon of lemon juice for 5 minutes, then wipe clean with a soft microfiber cloth.
Styling, Presentation & Accessory Pairings
A copper wire cuff adds warmth and texture to a wide range of outfits:
- Sleeve Silhouettes & Arm Placement: Upper arm cuffs look best paired with sleeveless tops, halter necklines, strapless summer sundresses, or swimwear cover-ups. Position the cuff around the thickest part of the bicep to keep it comfortably in place throughout the day.
- Harmonizing with Gemstone Tones: Copper’s natural red-gold undertones pair beautifully with cool blues and greens (turquoise, labradorite, malachite, amazonite) as well as warm autumnal stones (carnelian, amber, tiger’s eye, smoky quartz).
- Mixed-Metal Bohemian Styling: Pair raw copper bracelets with oxidized sterling silver rings, raw brass bangles, and natural leather wraps to create a curated, bohemian look.
Budgeting & Time Planning
Wire jewelry offers a rewarding path for DIY hobbyists and aspiring business owners:
| Tier | Estimated Setup Cost | Project Time per Piece | Value & Craft Potential |
| Beginner DIY Starter Kit | $30 – $60 (Pliers set, basic bare copper spools, cutters, files). | 1 to 2 hours per simple cuff. | Excellent starting point; low material cost makes learning stress-free. |
| Intermediate Studio Setup | $120 – $250 (Steel block, chasing hammer, mandrels, liver of sulfur). | 3 to 5 hours for woven cuffs. | Enables advanced texturing, uniform sizing, and rich antiqued patinas. |
| Artisanal Commercial Line | $400 – $800+ (High-end pliers, raw gemstone cabs, torch annealing kit). | 4 to 8+ hours for intricate cabochon cuffs. | High profit margins; pieces can retail for $65 to $250+ in craft boutiques. |
Creative Expansion & Advanced Inspiration
Once you master foundational wire-weaving patterns, explore these advanced techniques:
- Torch-Melted Copper Ball Terminals: Use a micro-butane jeweler’s torch to melt the cut tips of copper wire until surface tension draws the metal into smooth, perfect spherical balls before shaping your cuff.
- Multi-Metal Bi-Color Weaving: Intersperse bright sterling silver or raw yellow brass weaving wire across solid copper base rails to produce two-tone woven textures.
- Micro-Macramé & Wire Integrations: Weave waxed Linhasita macramé cords directly into the open frames of copper cuffs to combine metallic structure with soft textile colors.
Frequently Asked Questions (FAQs)
1. What wire gauge is best for structural arm cuffs and bracelets?
For main structural frames that must hold their shape, use 12 AWG or 14 AWG solid copper wire (dead-soft or half-hard temper). For smaller bracelet frames, 16 AWG works well. For surface weaving and gemstone wrapping, use fine 24, 26, or 28 AWG wire.
2. Why does copper jewelry turn skin green, and is it harmful?
The green tint is caused by a natural chemical reaction between copper, air, and the natural salts and acids in sweat, producing copper carbonate. It is completely harmless, non-toxic, and washes off easily with soap and water. You can prevent it by coating the inner band with Renaissance Wax or clear jewelry sealer.
3. How do you keep an upper arm cuff from sliding down?
To ensure a secure fit, use dead-soft 12 or 14 AWG wire that has been work-hardened with a hammer. Form the cuff to match the natural oval taper of the upper arm rather than a circle. A bypass or spiral design allows you to adjust the tension easily by gently squeezing the ends.
4. What is the difference between dead-soft and half-hard copper wire?
Dead-soft wire is extremely pliable and easy to bend with your fingers, making it ideal for intricate weaving, tight loops, and detailed shaping. Half-hard wire has already been drawn to introduce stiffness; it holds its shape under pressure, making it great for plain, un-woven bangle frames, clasps, and ear wires.
5. How do I seal my copper jewelry to preserve an antiqued finish?
After patinating with liver of sulfur and buffing with fine steel wool, degrease the piece with isopropyl alcohol. Apply two thin coats of Renaissance Micro-Crystalline Wax, let it dry for 15 minutes, and buff with a soft microfiber cloth. For a more permanent protective coat, use a spray-on jewelry lacquer such as ProtectaClear.