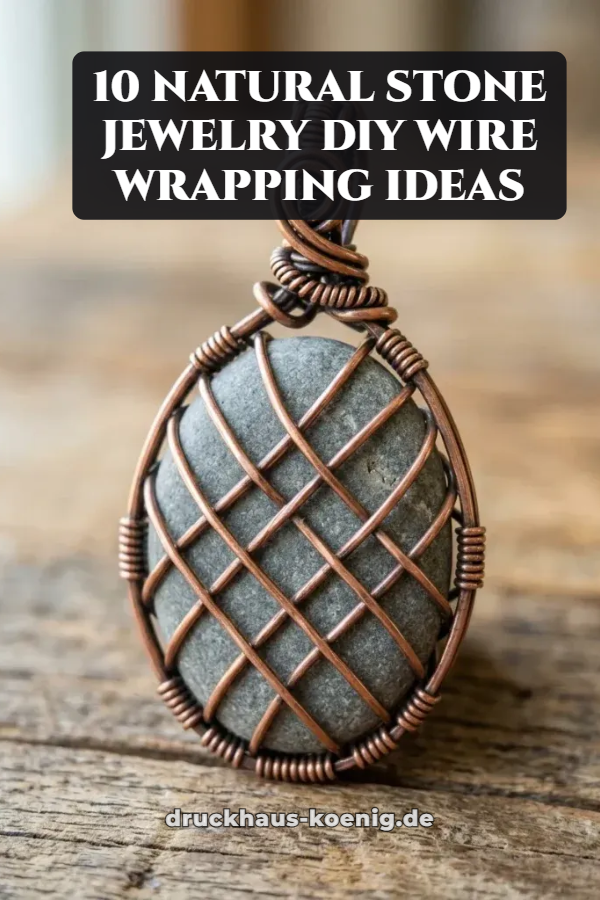
I started wire wrapping because I had a small box of stones I couldn’t bear to throw away — a river pebble from a walk along the Isar, a chunk of amethyst a friend brought back from a market in Lisbon, a piece of sea glass I picked up on a holiday and carried home in my coat pocket. Drilling them felt wrong, glue felt cheap, and soldering was far beyond what I was willing to learn in my kitchen. Wire wrapping turned out to be the answer: a pair of round-nose pliers, a spool of copper wire, and an evening at my kitchen table, and those stones became things I actually wear. Everything below is something I have tried myself, mistakes included, and every technique works without a single drop of glue or a soldering iron.
1. Raw River Stone Cage Pendant

My very first wire project was a smooth grey river stone I found on a walk near Munich, and it is still the piece I reach for most. I made a simple cage from 20-gauge copper wire, crossing four strands over the front and back of the stone and twisting them together at the top into a bail, and the whole thing took me about an hour once I stopped overthinking it. What I learned quickly is that the stone does most of the work — you just need the wire tight enough that it doesn’t rattle, but loose enough that you can still see the stone’s shape. I use a scrap of leather on my pliers now so the copper doesn’t get scratched, and I always test the cage by turning the pendant upside down and giving it a gentle shake before I call it finished. A chain from an old necklace I no longer wore finished it, and the total cost was under five euros.
2. Sliced Agate Geode Slab Wire Frame Pendant

I bought a thin slice of banded agate at a mineral fair for three euros, mostly because I loved holding it up to the light and watching the layers glow. Framing it turned out to be simpler than I expected: I wrapped 18-gauge wire around the outer edge, weaving a second, thinner wire back and forth across the rim to hold the slab snugly, a bit like lacing a shoe. The mistake I made the first time was pulling the weave too tight, which chipped a corner of the druzy edge, so now I keep the tension firm but never forceful. Silver-filled wire looks beautiful against the grey-blue bands, and I wear this one on a long cord so the light catches it when I move. It gets more compliments than anything else I have made, and people are always surprised it started as a three-euro offcut.
3. Freeform Raw Amethyst Cluster Prong Setting
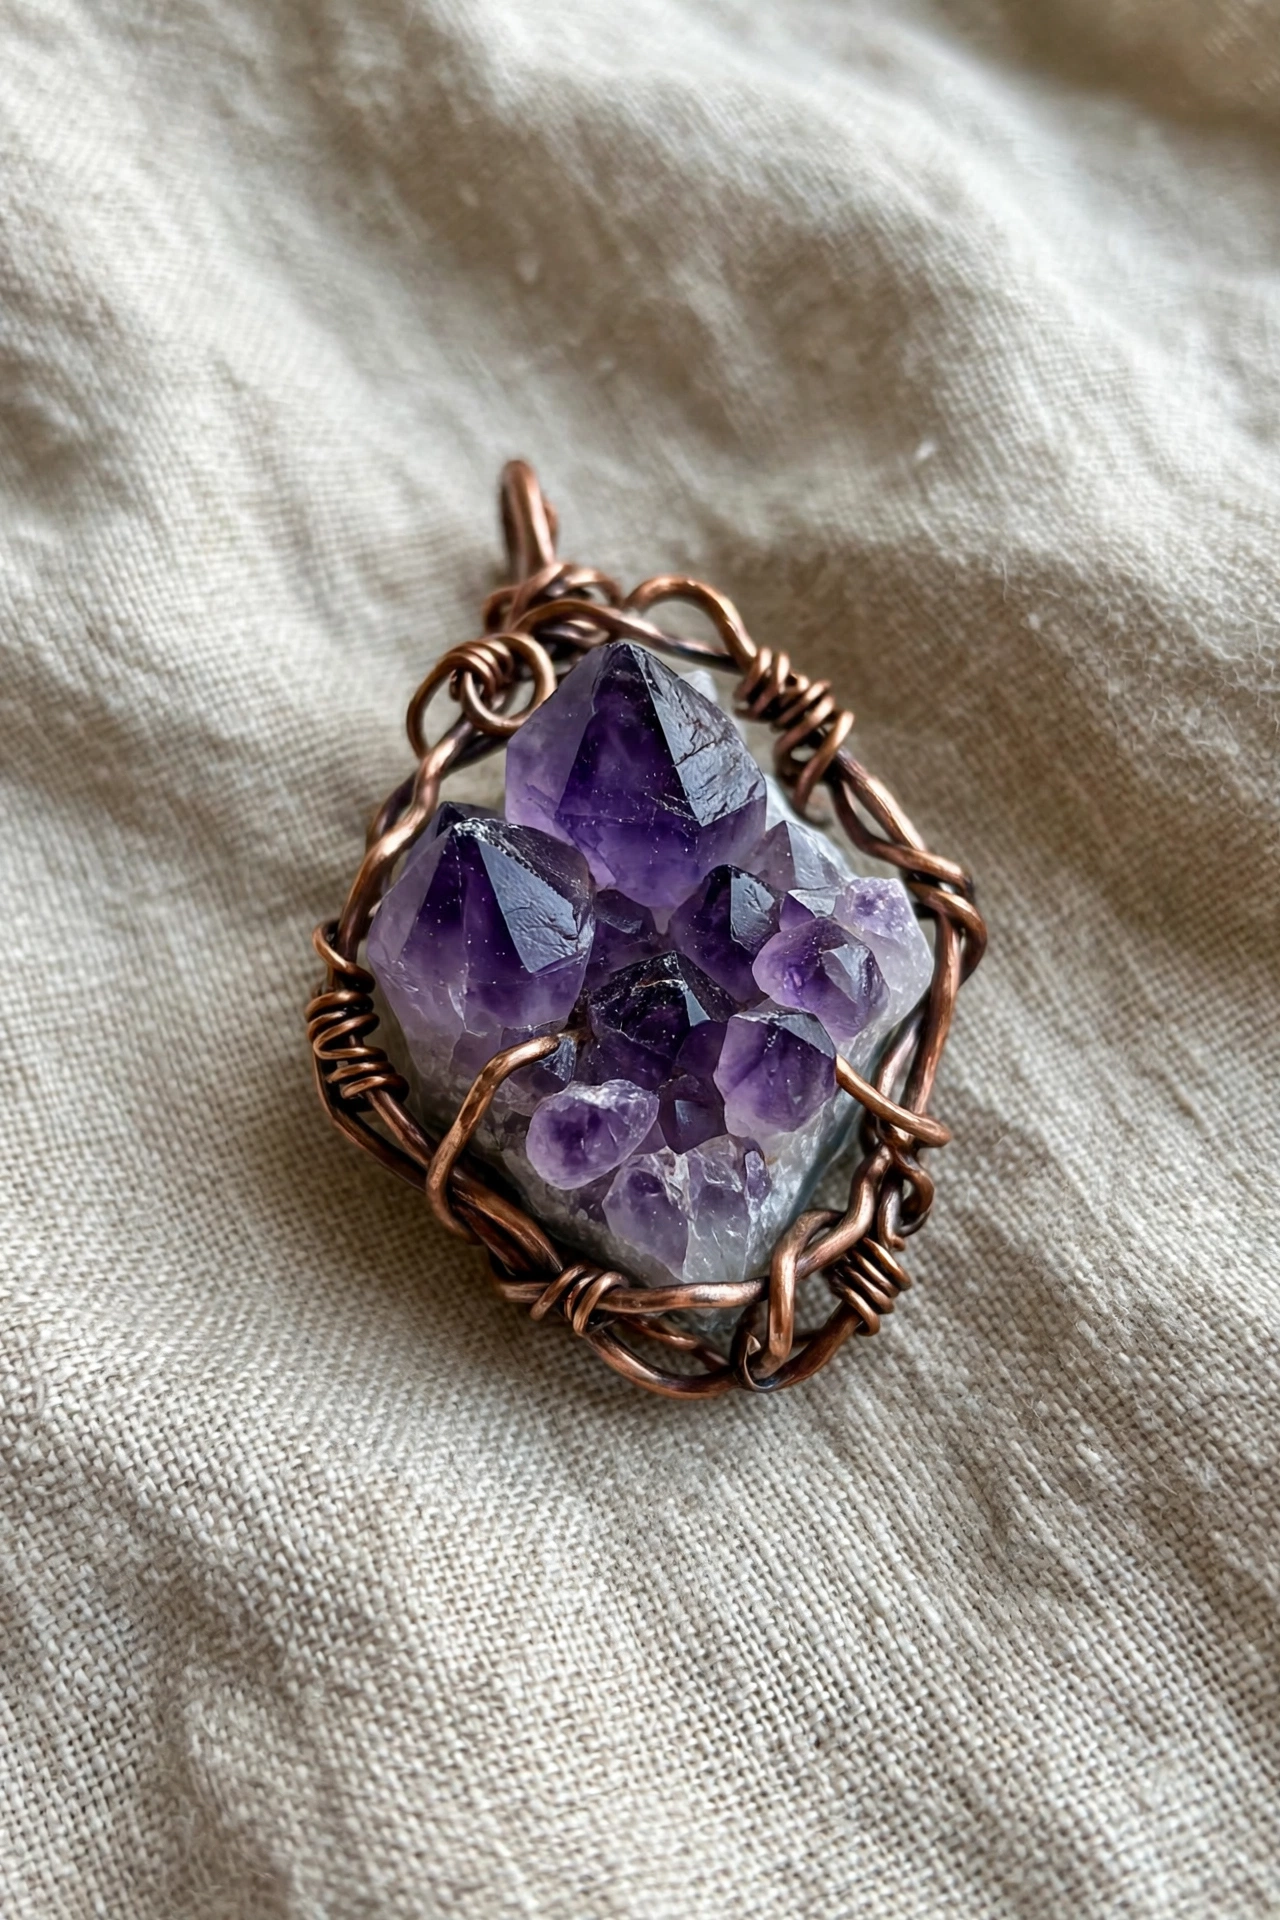
Raw amethyst clusters are the hardest stones to set, because every point sticks out at a different angle and there is no flat edge to hold onto, and my first attempt slid apart in my hands twice before I figured out the trick. What finally worked was building three separate prongs from 20-gauge wire, each one wrapping around a different point of the cluster and meeting in a small spiral at the base, so the stone is held from three directions at once instead of being squeezed from two. I sit with the cluster in my palm and bend each prong slowly, checking the fit after every bend, because amethyst points snap more easily than you would think. I used silver wire for mine and left the metal bright, which suits the pale lilac colour, and I mounted it as a pendant rather than a ring because the cluster is too lumpy to sit comfortably on a finger. It looks wild and a little untamed, which is exactly why I love it.
4. Tumbled Gemstone Herringbone Wire Pendant

The herringbone weave looks far more complicated than it is, and that is half its charm. I practised on a tumbled piece of tiger’s eye first, using two thicker frame wires and one thin weaving wire, and after about twenty minutes my hands had learned the rhythm — over one, under two, over one, under two — and the pattern started to grow evenly down the sides of the stone. My early rows were uneven because I kept pulling the weaving wire too hard, so now I let the wire fall naturally and only snug it up with my fingers instead of yanking it with pliers. A teardrop-shaped stone works best because the weave follows the curve, and jasper, aventurine, and tiger’s eye all take to it beautifully. I finished mine with a small wrapped loop at the top and a simple spiral at the bottom, and it has become the pendant I make when I want something that looks genuinely skilled without an afternoon of struggle.
5. Natural Beach Glass & Wire Wrapped Driftwood Brooch

This brooch came from a beach holiday in northern Germany, where I came home with a pocket full of frosted sea glass and a small piece of driftwood that looked like a tiny branch. I wrapped a piece of soft green sea glass to the driftwood with thin copper wire, crossing the wire in an X over the glass and twisting the ends into two small curls that look like little waves. The driftwood is so light that the brooch pins easily onto a jacket lapel or a linen tote bag without dragging it down, which I learned after trying it on a thin blouse first and watching it sag. I used a proper brooch pin back rather than a safety pin, because the weight distribution is better, and I sealed the driftwood with a dab of beeswax so it doesn’t snag on wool. It is the most sentimental piece I own, and every time I wear it I think of that grey windy beach.
6. Minimalist Raw Crystal Point Wire Ring

I was sceptical about wire rings because so many of them look bulky, but this one changed my mind completely. I used a small raw quartz point, about two centimetres long, and set it horizontally along a band made from three strands of 20-gauge wire twisted together, which keeps the ring slim and comfortable instead of digging into the finger. Sizing was the part I got wrong the first time — I wrapped the band around a wooden dowel instead of a proper ring mandrel and the ring came out a size too small — so I now measure my finger with a strip of paper first and add a millimetre for comfort. The crystal sits low and flat, so it doesn’t catch on jumpers or pockets, and I wear it almost every day. A Herkimer diamond or a small tourmaline point works just as well, and the whole ring takes less than half an hour once you have the materials laid out.
7. Swirled Fossil Shell Wire Medallion

I found my ammonite fossil in a small shop in the Alps, and it sat on my desk for months before I dared to wrap it, because fossils feel ancient and fragile and I was afraid of cracking it. In the end I used soft 20-gauge copper wire and let the wire follow the shell’s natural spiral, making loose coils that echo the fossil’s own curves instead of fighting them. The key, I discovered, is to never pull wire across the raised ridges of the shell, because that is where it chips, and to anchor everything at the back where the stone is thickest. I added a small spiral bail at the top and hung it on a leather cord, and the warm copper against the dark brown fossil looks like the two were made for each other. It is a statement piece, heavier than my other pendants, but it is the one I wear when I want to feel like I am carrying a small piece of history around my neck.
8. Delicate Wire-Wrapped Natural Stone Bead Hoop Earrings

These are the earrings I make when I want a quick win, because a pair takes me about forty minutes from start to finish. I thread tiny three-to-four-millimetre stone beads — turquoise, garnet, or lapis lazuli, whatever I have in my bead box — onto thin 26-gauge wire and wrap them one by one around a plain wire hoop, spacing them evenly so the colour runs all the way around. The trick I learned the hard way is to wrap each bead snugly against the last one, because even a millimetre of slack lets the beads slide and bunch together at the bottom. I use sterling silver ear wires now, after a cheap pair of hooks irritated my ears, and I always make the second earring immediately after the first, while the spacing is still fresh in my fingers, so the pair actually matches. They are light enough to wear all day, and the stone beads catch the light in a way that makes them look far more expensive than they are.
9. Multi-Stone Cluster Wire-Wrapped Statement Bracelet

This bracelet started as a clean-out of my leftover materials: a handful of raw mineral chips, a few river pebbles, some freshwater pearls, and a length of heavy 16-gauge wire I had no other use for. I bent the wire into a cuff shape around a jam jar to get the curve right, then wrapped each stone onto the base with thin wire, clustering them close together so the bracelet looks lush and full rather than sparse. It took me a whole Sunday afternoon, and my fingers were sore by the end, but the result is the piece I reach for when I want something bold. One thing I would do differently is to file the wire ends more carefully, because a sharp end scratched my wrist the first time I wore it, and now I tuck every end into a tiny spiral. It is not a delicate piece, but it is honest and handmade, and I love that no two bracelets made this way could ever look the same.
10. Floating Raw Nugget Wire-Caged Keyring

My keys used to live on a plain metal ring, until I wrapped a rough chunk of rose quartz in a wire cage and attached it to a heavy-duty key ring, and now it is the first thing I reach for when I leave the flat. I used 16-gauge wire for the cage because anything thinner would bend out of shape in a bag full of keys, and I made the cage deliberately loose so the nugget moves and catches the light instead of sitting rigid. A raw pyrite nugget or a piece of black tourmaline works just as well, and the weight of the stone actually makes the keyring easier to find at the bottom of a tote. I learned to double-check the clasp after my first version came undone in a coat pocket — now I use a proper split ring and a soldered jump ring, and it has held for over a year. It is the most practical thing I have made with wire, and the only one I use every single day.
Conclusion
Wire wrapping taught me that the stones I already had were enough, and that a spool of wire and an hour at the kitchen table can turn a pocketful of pebbles into jewellery I genuinely love wearing. Start with the river stone cage, because it forgives mistakes and teaches you how wire behaves, and work your way up to the herringbone and the amethyst cluster once your hands know what they are doing. Keep your first pieces for yourself, wear them until the wire softens and darkens a little, and enjoy the fact that nobody else in the world has one quite like yours.