10 DIY Wire Wrapping Jewelry Ideas
Wire wrapping is a versatile and beginner-friendly jewelry-making technique that transforms pliable wire into stunning accessories. This craft requires minimal tools and materials but offers endless creative possibilities. From simple pendants to intricate bracelets, wire-wrapped jewelry combines artistic flair with practical craftsmanship. Whether you’re a hobbyist or looking to sell handmade pieces, mastering these 10 DIY techniques will elevate your designs. Below, we’ll explore essential methods, design tips, and innovative ideas to inspire your next project.

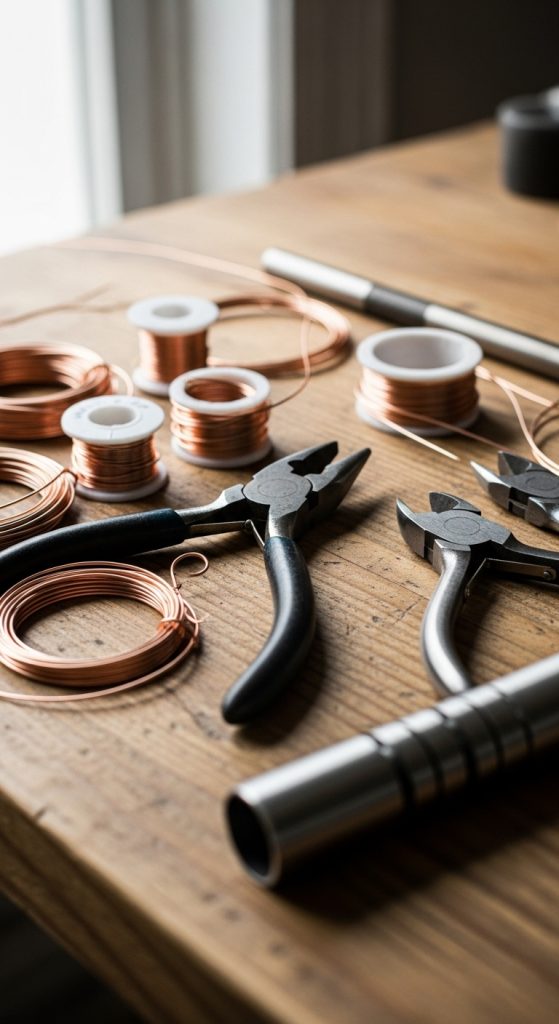
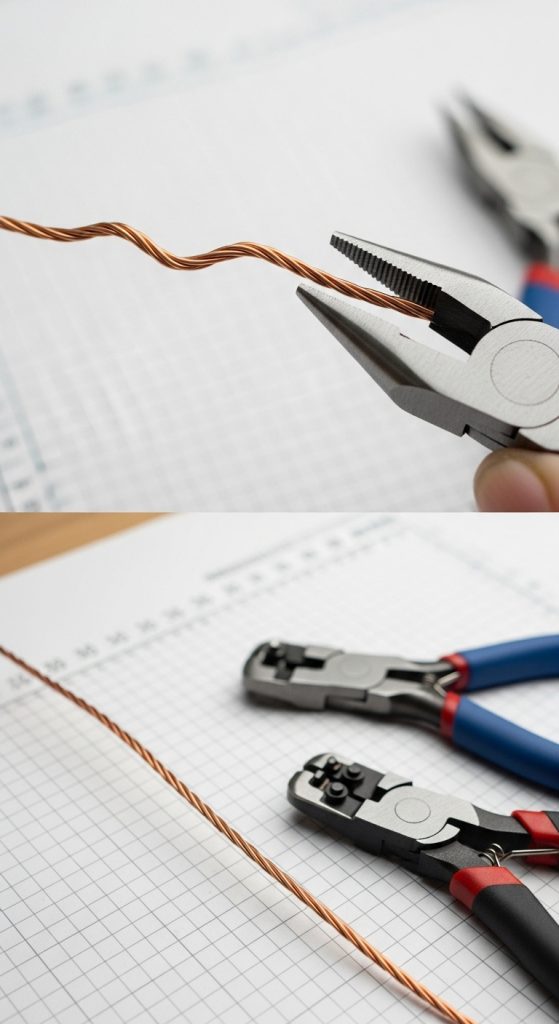
1. Essential Tools for Wire Wrapping
Start with quality tools: round-nose pliers for loops, chain-nose pliers for bending, and wire cutters for trimming. A nylon-tip tool smooths sharp edges, while a mandrel ensures consistent ring sizing. Beginners can use budget-friendly kits, but investing in ergonomic tools improves precision. Organize supplies in a dedicated workspace with measuring tapes and bead boards. Clean tools regularly to prevent wire corrosion. Proper maintenance extends tool lifespan and ensures professional results. With these basics, you’re ready to tackle any wire-wrapping project.
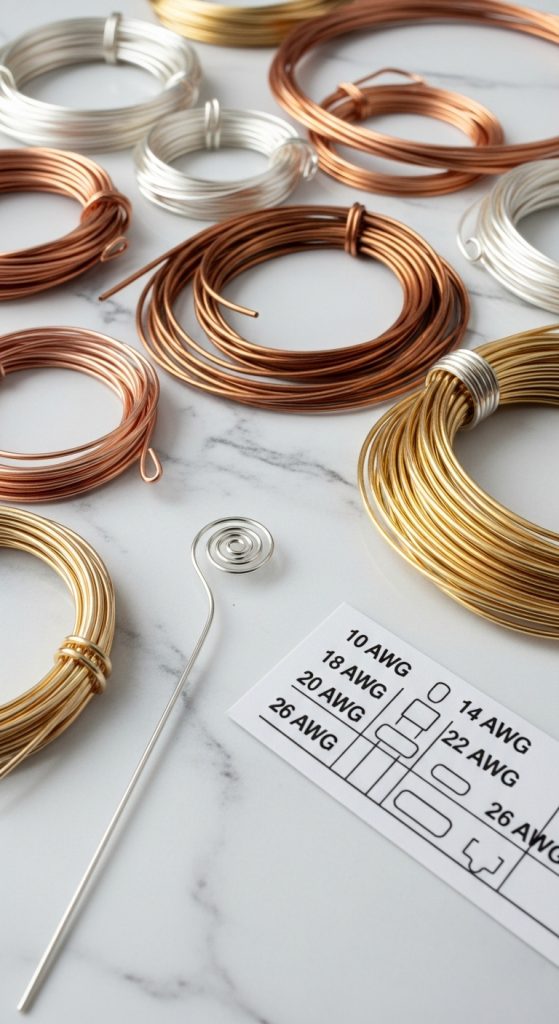
2. Choosing the Perfect Wire Type
Selecting wire depends on project needs. Soft temper copper or sterling silver is ideal for beginners, while half-hard wire holds complex shapes. Dead-soft wire suits intricate weaves, and memory wire works for rigid structures. Consider gauge thickness: 20–24 gauge for delicate designs, 16–18 gauge for structural elements. Colored copper or anodized aluminum adds vibrant accents. Always match wire material to skin sensitivity—nickel-free options prevent allergic reactions. Experiment with mixed metals for contrast. Understanding wire properties ensures durability and aesthetic appeal in finished pieces.
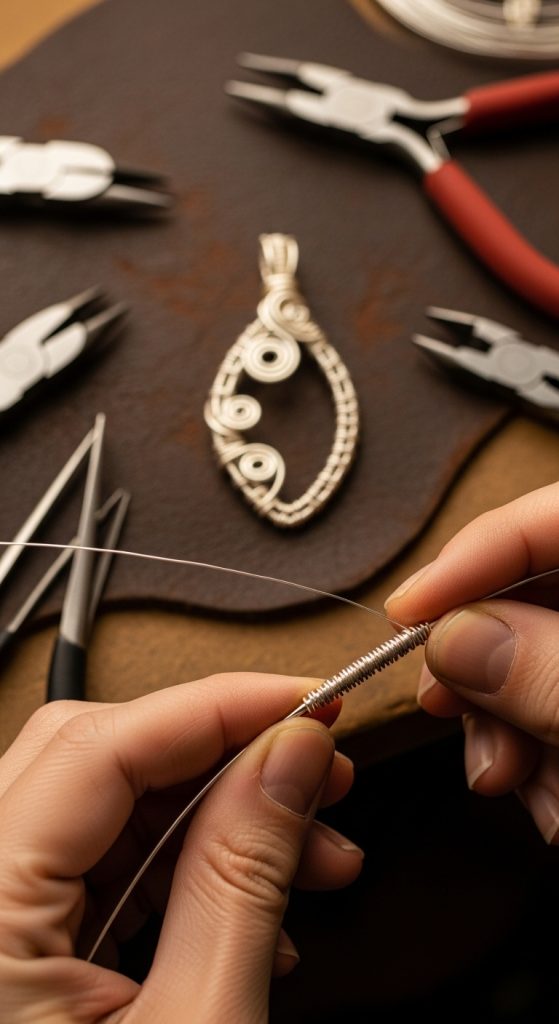
3. Mastering Basic Coiling Techniques
Coiling creates texture and strengthens wire connections. Start by wrapping thinner wire around a base wire or bead frame. Use a coiling gizmo for uniform spirals, or hand-wrap for organic patterns. Secure ends with a dab of glue or tight loops. Combine coils with beads for dimension. Practice tension control to avoid kinks. This technique works beautifully for pendant bails, earring hoops, and bracelet accents. Once mastered, experiment with double coils or alternating wire gauges. Coiling adds professional polish to even the simplest designs.
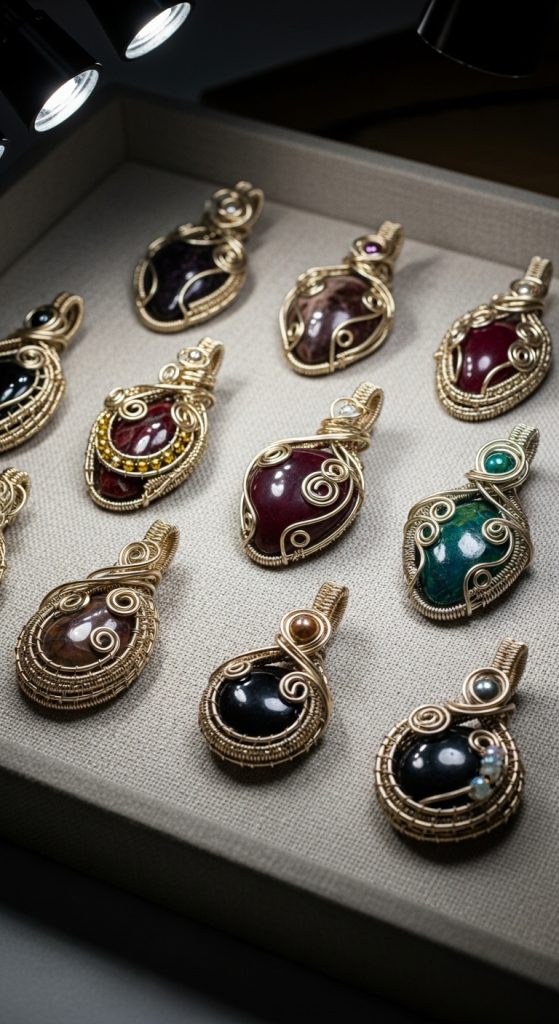
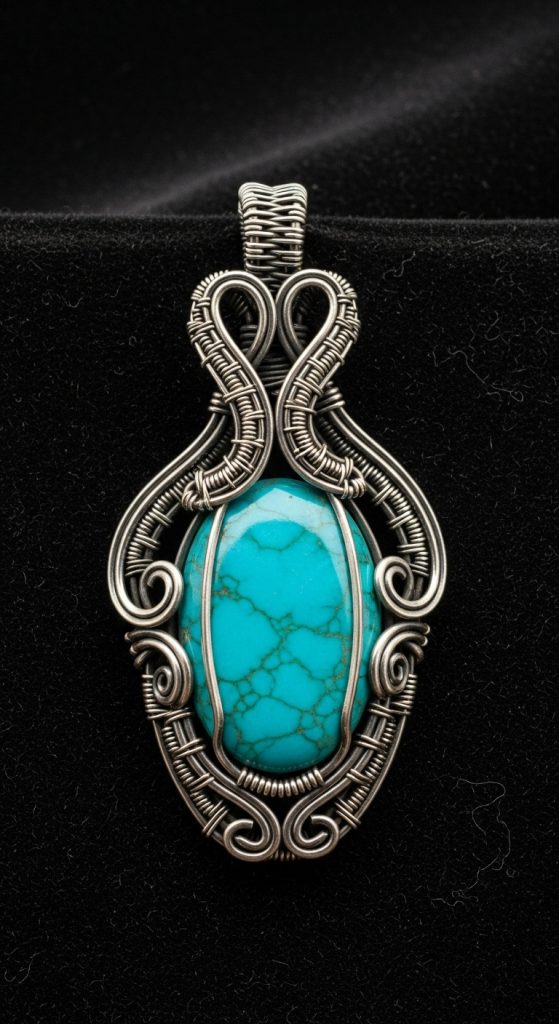
4. Creating Wire-Wrapped Stone Pendants
Showcase focal stones with secure wire cages. Beginners should start with flat cabochons. Cross two base wires behind the stone, weaving vertical wraps around all sides. Finish with a spiral bail for hanging. For irregular stones, use the “captured wrap” technique, letting the wire follow natural edges. Incorporate seed beads within the wrapping for extra sparkle. Always check stone stability before finalizing wraps. This method transforms any gem into a statement necklace centerpiece. Advanced crafters can experiment with geometric or asymmetrical frameworks.
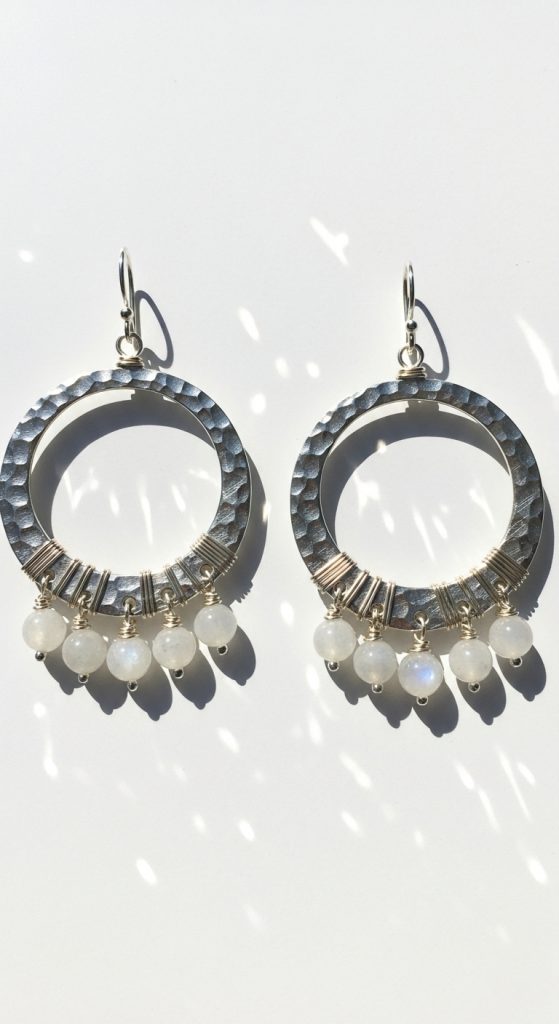
5. Designing Wire-Wrapped Earrings
Lightweight designs prevent drooping. Create French hooks using 20-gauge wire, adding beads or coils for embellishment. For studs, construct a secure base with wrapped loops. Dangle designs benefit from double-wrapped jump rings. Mix wire textures—hammered elements add rustic charm, while polished sections offer elegance. Match earring components to wire gauge: thicker wires for structural elements, thinner for details. Always balance weight distribution. These techniques yield professional earrings suitable for casual or formal wear. Customize with birthstones or themed charms for personalized gifts.
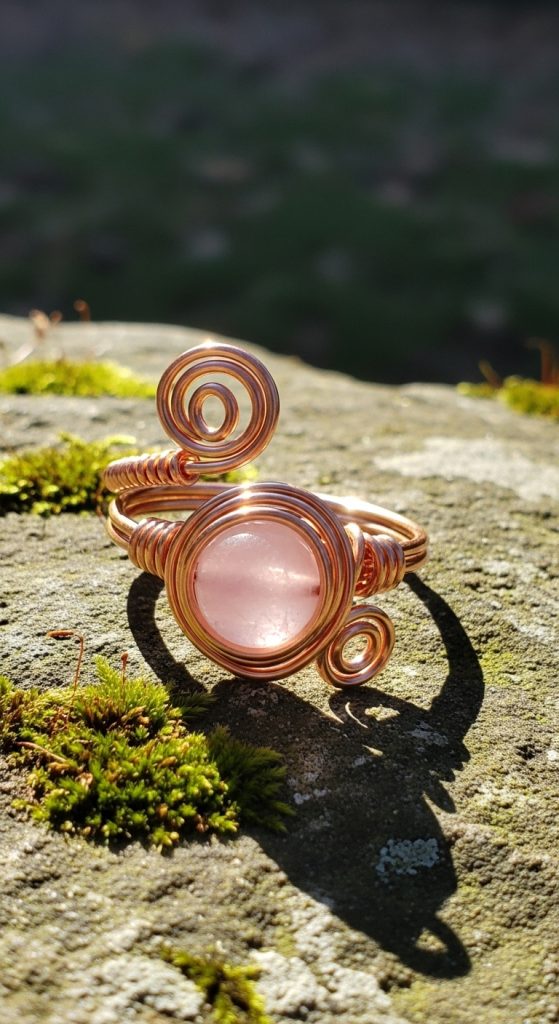
6. Crafting Adjustable Wire-Wrapped Rings
Form rings using 16–18 gauge wire for durability. Create an adjustable band by coiling the ends into spirals that slide along a base wire. Add gemstones using prong settings or bead cages. For statement rings, layer multiple wrapped bands. Measure finger size with a ring mandrel, leaving room for comfort. Texturize surfaces with hammers or files for a matte finish. This project works well with copper or brass for a vintage look. Always round sharp edges to prevent snagging. Adjustable designs eliminate sizing issues and make perfect gifts.
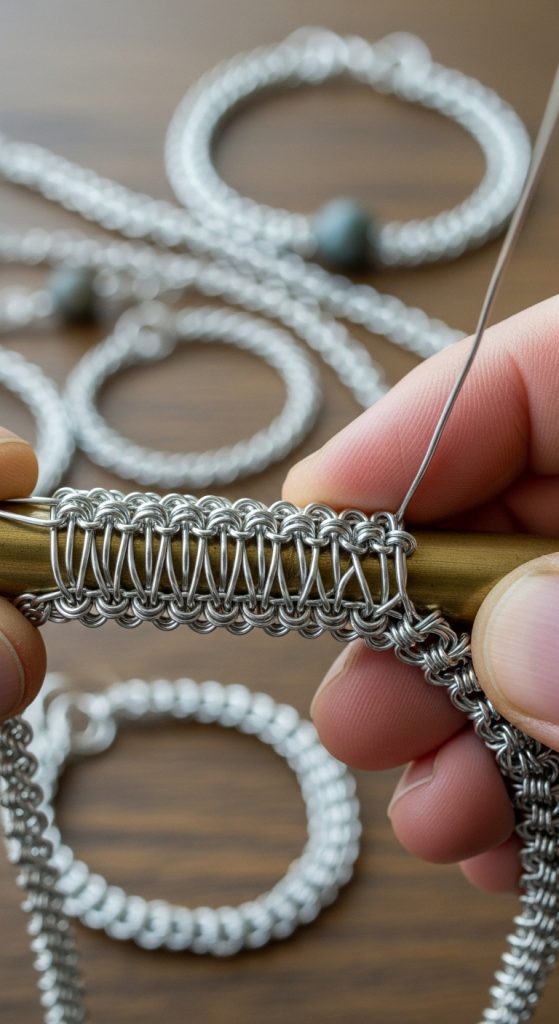
7. Advanced Wire Weaving Patterns
Move beyond basics with Viking knit, ladder stitches, or Celtic weaves. These techniques require patience and thin gauge wires (26–28). Start with simple four-wire braids before attempting complex patterns. Use a knitting dowel for consistent tubular weaves. Integrate beads within woven sections for added intricacy. This method creates luxurious necklaces, cuffs, or chokers. Weaving tightens wire, so anneal pieces periodically if using non-plated metals. Perfect for creating heirloom-quality jewelry, these patterns showcase advanced craftsmanship. Record measurements meticulously to maintain symmetry in repeating designs.
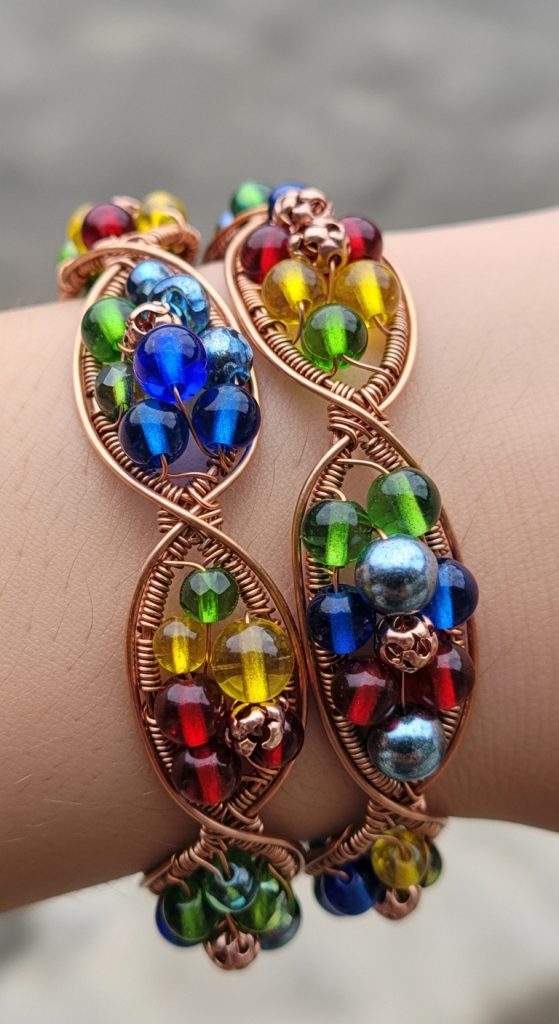
8. Incorporating Beads Into Wire Designs
Thread beads onto headpins for instant dangles or embed them directly in wire frames. Use crimp beads to secure strands within wire structures. For focal pieces, stack beads on thick gauge wires, separating them with coiled spacers. Create bead clusters by wiring multiple strands together. Ensure bead holes accommodate wire thickness—ream stones if needed. Combine glass, metal, and natural beads for textural contrast. This technique adds color and movement to any design. Always balance bead weight with wire strength to prevent breakage. Perfect for bohemian-style necklaces or layered bracelets.
9. Fixing Common Wire Wrapping Mistakes
Rescue kinked wires by annealing with a torch (for non-coated metals). Smooth rough edges with nail files or rotary tools. Tighten loose wraps using chain-nose pliers—apply pressure gradually to avoid snapping. If a stone shifts, reinforce with additional wraps. Remove oxidation with lemon juice dips or commercial cleaners. For broken soldered joints, rewrap with matching wire. Keep a scrap wire stash for quick repairs. Learning error correction builds confidence and reduces material waste. Document solutions to common issues for future reference. Embrace imperfections—some become signature design elements.
10. Professional Finishing Techniques
Polish pieces with jewelers’ rouge and microfiber cloths. Use liver of sulfur for antiqued patinas on silver or copper. Seal shiny finishes with lacquer to prevent tarnish. Attach secure clasps using wrapped loops or split rings. For consistent findings, create your own jump rings. Photograph finished jewelry against neutral backgrounds for portfolios. Package delicate items in anti-tarnish bags. These final touches transform handmade pieces into market-ready products. Develop a signature style through consistent finishing methods. Quality presentations justify premium pricing for artisan jewelry.