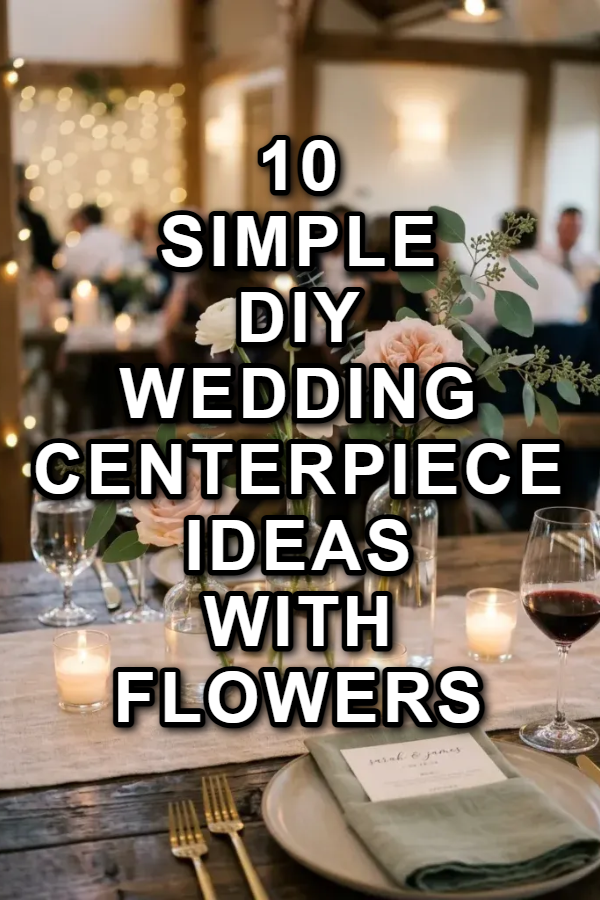
Creating your own floral wedding centerpieces is one of the most effective ways to personalize your reception tables while keeping your wedding budget under control. Professional wedding floral arrangements can cost anywhere from $75 to $200+ per table, but DIY floral centerpieces can achieve a high-end, garden-inspired aesthetic for a fraction of that price.
The secret to successful DIY wedding florals lies in choosing forgiving design techniques, selecting hardy blooms, and using clever structural vessel choices that make assembling 10 to 20 tables fast, stress-free, and beautiful.
Below is a complete, master-level guide featuring 10 simple DIY floral wedding centerpiece ideas, complete with step-by-step recipes, vessel choices, prep timelines, and floral care strategies.
Why DIY Floral Centerpieces Are Essential for Budget-Conscious Couples
The surge in DIY wedding florals stems from a blend of affordability, creative freedom, and sustainable event planning.
- Significant Cost Savings: DIYing your table arrangements can reduce your floral budget by 60% to 80%, allowing you to reallocate funds toward catering, photography, or your honeymoon.
- Personalized Creative Expression: Hand-selecting your bloom varieties, color palettes, and vessels ensures your tables match your aesthetic vision—whether that is rustic farmhouse, modern minimalist, or moody bohemian.
- Manageable Execution with Strategic Design: By focusing on low-profile, simple vessel designs (like mason jars, bud vases, or flower frogs), you don’t need professional floristry experience to create breathtaking tables.
Materials, Preparation & Setup Guide
Proper preparation, tool selection, and stem conditioning are critical to ensuring your DIY centerpieces look fresh, hydrated, and vibrant throughout your wedding day.
1. Essential Tool & Supply Checklist
| Category | Recommended Items | Purpose & Function |
| Floral Tools | Sharp floral snips/shears, thorn strippers, clean bucket supply. | Clean cuts ensure stems absorb water; shears prevent stem crushing. |
| Structural Mechanics | Waterproof floral tape (1/4-inch), pin frogs (kenzan), chicken wire (plastic-coated), floral foam (optional for specific vessels). | Secures stems in place inside wide-mouth bowls or vases. |
| Hydration & Care | Flower food packets, Quick Dip hydration solution, Crowning Glory finishing spray. | Extends bloom life and seals moisture in petals on event days. |
| Vessels & Base | Bud vases, mason jars, terracotta pots, glass compotes, metallic pedestal bowls. | Serves as the structural anchor for your table arrangements. |
2. Primary Floral Prep & Care Rules
- Hydrate Stems Immediately: When wholesale or bulk flowers arrive (typically 2 to 3 days before the wedding), re-cut stems at a 45-degree angle under lukewarm water and place them in clean buckets filled with water and flower food for at least 4 to 6 hours before arranging.
- Strip Lower Foliage: Remove all leaves and foliage that sit below the water line in your vessels. Submerged foliage rots quickly, breeding bacteria that clogs stem vessels and causes flowers to wilt prematurely.
- Keep Out of Direct Heat/Sunlight: Store assembled floral arrangements in a cool, dark room (50°F to 60°F) away from direct sunlight, air conditioning drafts, and ripening fruit (which releases ethylene gas that ages flowers).
10 Simple DIY Floral Wedding Centerpieces
+-----------------------------------------------------------------------+
|                    CENTERPIECE PROPORTION & LAYERING GUIDE            |
+-----------------------------------------------------------------------+
|  [ Focal Blooms ]      --> Eye-catching main flowers (Roses, Peonies) |
|  [ Filler & Texture ]  --> Secondary accents (Baby's Breath, Scabiosa)|
|  [ Foliage Frame ]     --> Greenery drape (Eucalyptus, Ruscus, Ferns)  |
|  -------------------------------------------------------------------  |
|  [ Rule of Height ]    --> Keep under 12" tall so guests can converse |
+-----------------------------------------------------------------------+
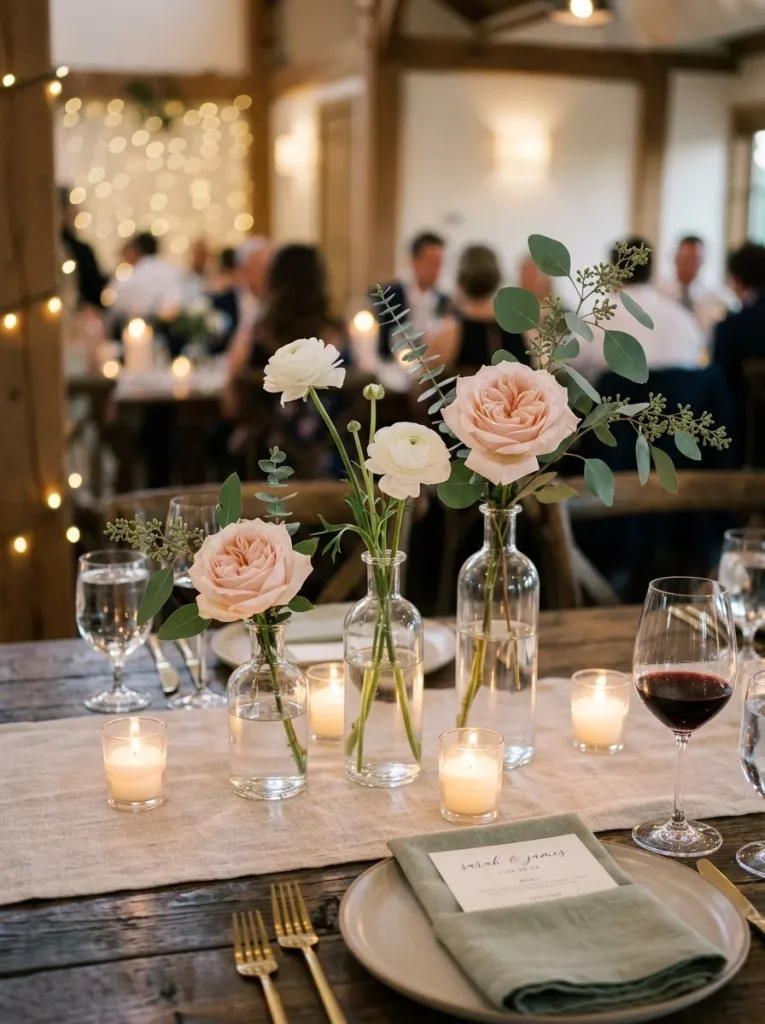
Idea 1: The Multi-Height Bud Vase Trio Cluster
Concept Overview & Aesthetic Appeal
Effortlessly modern, delicate, and forgiving. Instead of one large arrangement, each table features a cluster of 3 to 5 slender glass bud vases at varying heights, each holding 1 to 3 select stems.
Step-by-Step Execution Guide
- Gather Vessels: Collect 3 clear or amber glass bud vases per table in varying heights (e.g., 4-inch, 6-inch, and 8-inch).
- Stem Selection: Cut 1 large focal bloom (e.g., garden rose or ranunculus) for the tallest vase, a secondary accent bloom (e.g., spray rose or carnation) for the medium vase, and a textured stem (e.g., astilbe, chamomile, or eucalyptus) for the shortest vase.
- Arrangement: Fill vases 3/4 full with water and flower food. Snip stems so blooms sit just above the vase rims at staggered heights. Cluster them in the center of the table surrounded by votive candles.
Pro Styling & Application Tips
Group 3 bud vases on top of a round wooden slice or velvet runner to tie the cluster together into a single visual focal point.
Common Mistakes to Avoid
- Mistake: Cutting stems all the same height, which creates a flat, monotonous tabletop profile.
- Fix: Stagger stem lengths so flowers sit at distinctly low, medium, and tall levels across the cluster.
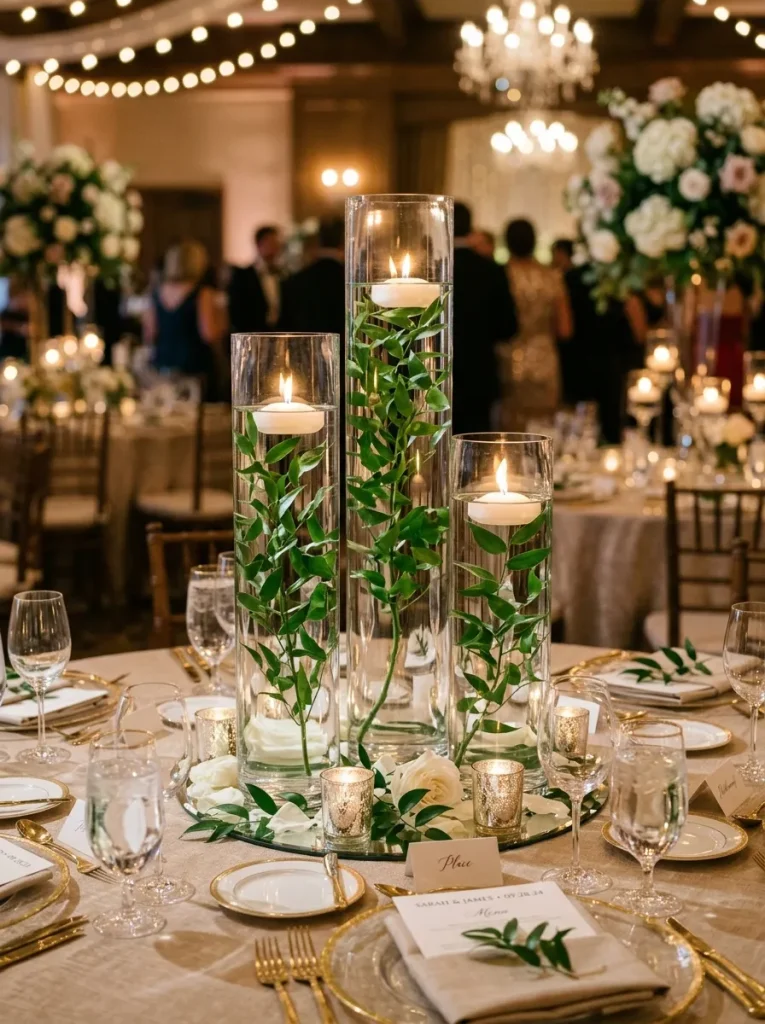
Idea 2: The Floating Bloom & Pillar Candle Glass Cylinder Trio
Concept Overview & Aesthetic Appeal
Romantic, long-lasting, and virtually fail-proof. Glass cylinder vases filled with water showcase floating flower heads or submerged greenery stems below flickering pillar candles.
Step-by-Step Execution Guide
- Select Cylinders: Use a set of 3 glass cylinder vases per table in staggered heights (6-inch, 8-inch, 10-inch).
- Submerged Stems or Floating Heads:
- Option A: Submerge a sturdy greenery stem (like Italian Ruscus or Mokara orchids) inside the cylinder, weighting the base with a clean glass pebble, then fill with distilled water and top with a floating candle.
- Option B: Fill cylinders with water, float a single large bloom (like a headless gardenia, open rose, or bloom head) on top, and place pillar candles around the base.
- Final Touch: Light floating candles right before doors open for the reception.
Pro Styling & Application Tips
Use distilled water inside glass cylinders to prevent unsightly micro-bubbles from forming along the glass walls and greenery stems.
Common Mistakes to Avoid
- Mistake: Using delicate flowers (like sweet peas or poppies) for submersion, which break down and cloud the water quickly.
- Fix: Stick to sturdy, waxy blooms (orchids, calla lilies, thick roses) or resilient greens for underwater submerged designs.
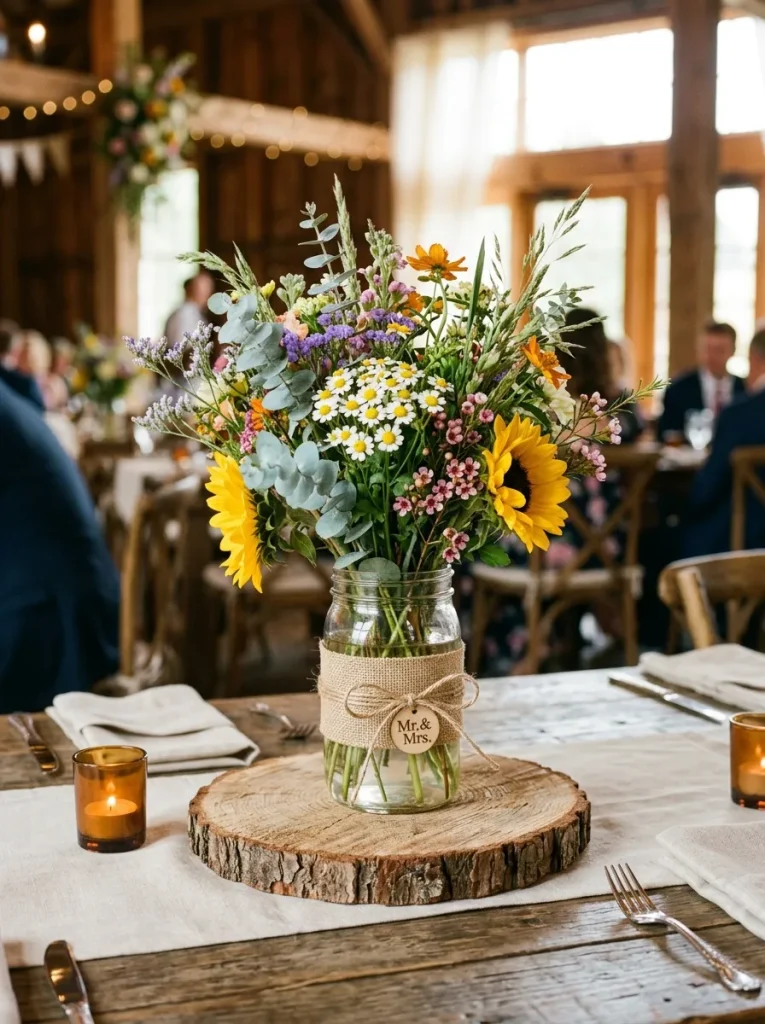
Idea 3: The Rustic Mason Jar & Wildflower Bundle
Concept Overview & Aesthetic Appeal
Charming, cozy, and perfect for barn, rustic, or outdoor garden weddings. Classic pint or quart mason jars filled with a loose, organic mixture of fresh wildflowers and textured filler.
Step-by-Step Execution Guide
- Prepare Mason Jars: Wrap clear quart mason jars with burlap ribbon, lace, or twine around the neck.
- Tape Grid Method: Create a 4×4 tape grid across the mason jar mouth using 1/4-inch waterproof floral tape. This keeps stems standing upright instead of flopping to the sides.
- Build Arrangement: Insert greenery (e.g., silver dollar eucalyptus) into the outer grid squares first to establish width. Add secondary filler (baby’s breath, feverfew) in the middle, and place 3 to 5 focal wildflowers (sunflowers, zinnias, cosmos, or dahlias) in the center.
Pro Styling & Application Tips
Tint clear mason jars in subtle sea-glass blue or soft blush using glass paint for a vintage antique feel.
Common Mistakes to Avoid
- Mistake: Overcrowding mason jars with too many thick stems, which chokes water intake and speeds up wilting.
- Fix: Keep stem counts to 10–12 stems per jar so every bloom gets adequate water flow.
Idea 4: The Low-Profile Footed Compote Bowl Arrangement
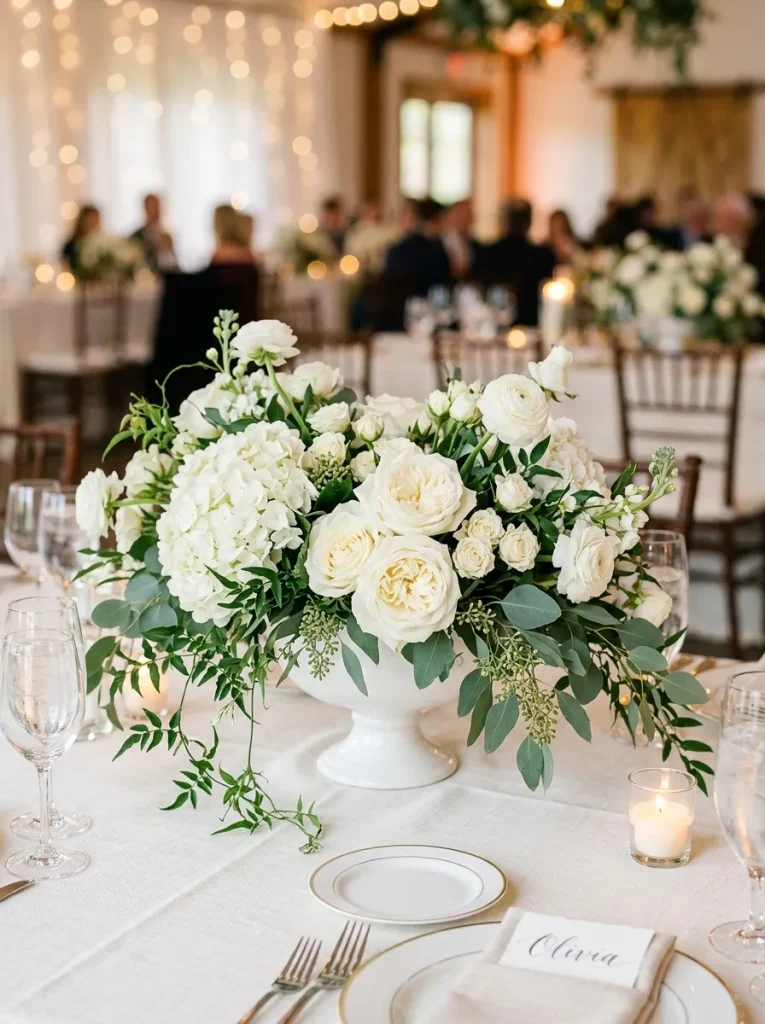
Concept Overview & Aesthetic Appeal
Elegantly garden-gathered and high-end. A footed glass, ceramic, or pedestal bowl holds a wide, low, sweeping arrangement that allows guests to easily converse across the table.
Step-by-Step Execution Guide
- Vessel Mechanics: Place a reusable metal flower frog (kenzan) or a taped ball of plastic-coated chicken wire inside a 6-inch low compote bowl. Secure to the bowl bottom with floral putty.
- Greenery Base: Insert sturdy greenery (parvifolia eucalyptus, salal) horizontally into the chicken wire grid so greens spill gracefully over the bowl edges.
- Bloom Placement: Insert focal blooms (hydrangeas, open garden roses) at 45-degree angles toward the center. Fill remaining gaps with airy textured stems (delphinium buds, ranunculus, scabiosa).
Pro Styling & Application Tips
Use a large single stem of white or blue hydrangea as a central “pillow” base inside the compote bowl—it fills space quickly and supports smaller delicate stems effortlessly.
Common Mistakes to Avoid
- Mistake: Making the arrangement too tall, blocking eye contact across the reception table.
- Fix: Keep the total height of the arrangement under 12 inches from table surface to top bloom.
Idea 5: The Ethereal Baby’s Breath Cloud Bowl
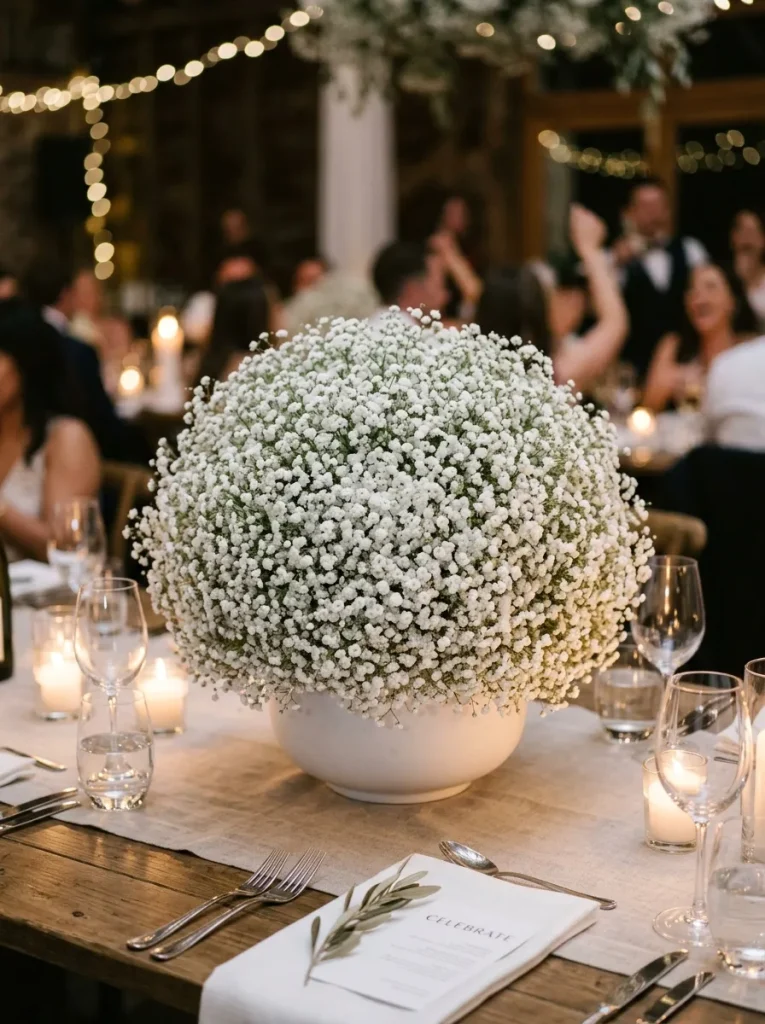
Concept Overview & Aesthetic Appeal
Dreamy, budget-friendly, and high-volume. Masses of white baby’s breath (Gypsophila) arranged densely into a foam-free bowl form a soft, cloud-like centerpiece that looks modern and luxurious.
Step-by-Step Execution Guide
- Vessel Setup: Fill a low white ceramic bowl or metallic bowl with water and flower food.
- Cluster Preparation: Cut fresh baby’s breath stems into smaller 4-to-6-inch bushy sprigs.
- Density Building: Insert sprigs tightly into the bowl, weaving stems together so they lock into place. Continue layering sprigs until a dense, seamless spherical cloud shape is formed.
Pro Styling & Application Tips
Spray-paint portions of the baby’s breath in subtle blush pink, champagne gold, or terracotta tones using floral specialty spray paint for a custom color-blocked palette.
Common Mistakes to Avoid
- Mistake: Leaving baby’s breath stems long and sparse, which makes the arrangement look see-through and thin.
- Fix: Pack sprigs closely together at shorter lengths to achieve an opaque, pillowy cloud texture.
Idea 6: The Italian Ruscus & Eucalyptus Table Runner with Nestled Blooms
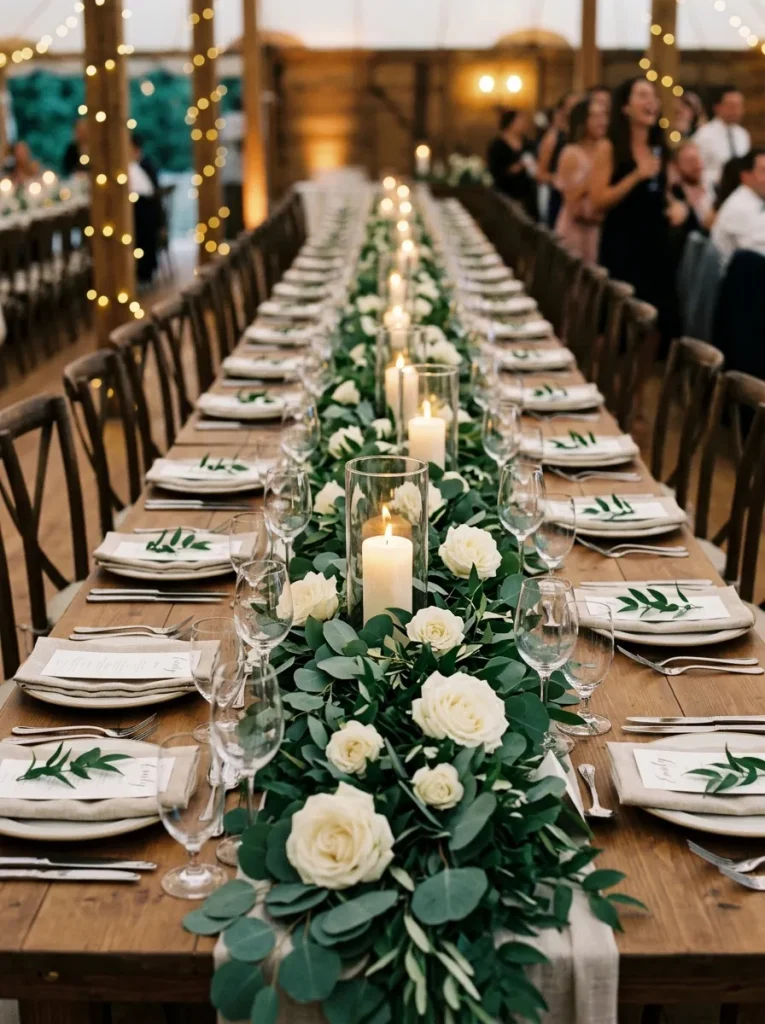
Concept Overview & Aesthetic Appeal
Ideal for long banquet or family-style trestle tables. A lush, laying foliage garland laid flat down the table center, sprinkled with fresh blooms and pillar candles.
Step-by-Step Execution Guide
- Lay Greens: Lay branches of Italian Ruscus and silver dollar eucalyptus flat along the center of the table, overlapping the stem ends in opposite directions so the runner looks seamless.
- Pillar Placement: Nestled 3 to 5 glass hurricane candles or pillar candles at staggered intervals along the greenery length.
- Tuck Flowers: Cut fresh flower stems (like roses or carnations) short to 2 inches and insert them into tiny water tubes (floral vials). Tuck the water-tubed blooms under the greenery leaves throughout the runner to keep them fresh all night.
Pro Styling & Application Tips
Using water vials for tucked blooms prevents flowers from wilting out of water over a 6-to-8-hour reception.
Common Mistakes to Avoid
- Mistake: Laying greenery flat without fluffing, resulting in a flat, lifeless ribbon of leaves.
- Fix: Interweave different foliage varieties (e.g., feathery plumosa fern mixed with broad salal leaves) to add dimensional height and texture.
Idea 7: The Terracotta Pot & Potted Herb Garden Centerpiece
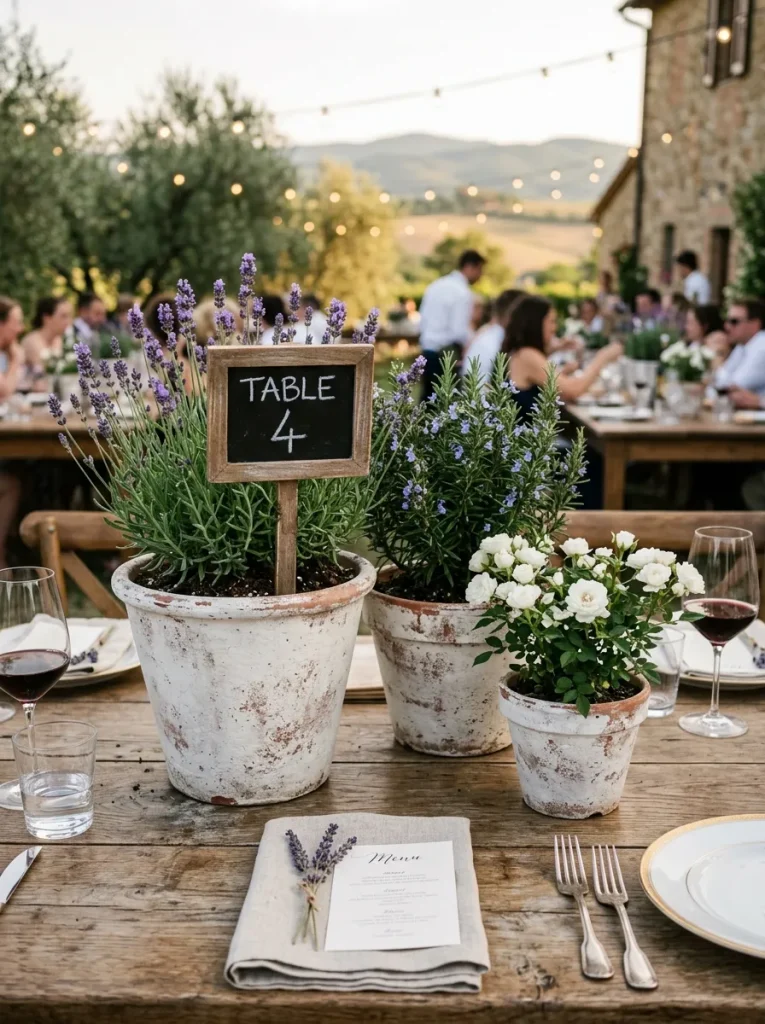
Concept Overview & Aesthetic Appeal
Perfect for Mediterranean, Tuscan, or eco-friendly outdoor weddings. A collection of aged terracotta pots planted with flowering herbs and living blooms that double as guest favors.
Step-by-Step Execution Guide
- Pot Selection: Gather aged or whitewashed terracotta pots in varying small-to-medium sizes.
- Planting Prep: Plant living flowering herbs (rosemary, lavender, thyme, mint) alongside small blooming plants (mini miniature roses, pansies, or pansy blooms).
- Table Assembly: Place 3 potted herbs on a rustic linen runner in the center of each table. Stick small wooden chalkboard stakes into the soil with table numbers or sweet love quotes.
Pro Styling & Application Tips
Gently rub white wax or lime wash onto new terracotta pots a week before the wedding to give them an antique, weathered French-country patina.
Common Mistakes to Avoid
- Mistake: Forgetting that unglazed terracotta absorbs water quickly, leaving soil dry.
- Fix: Water living potted centerpieces thoroughly the morning before the wedding day so plants stay perky.
Idea 8: The Monochromatic Single-Variety Carnation & Rose Bowl
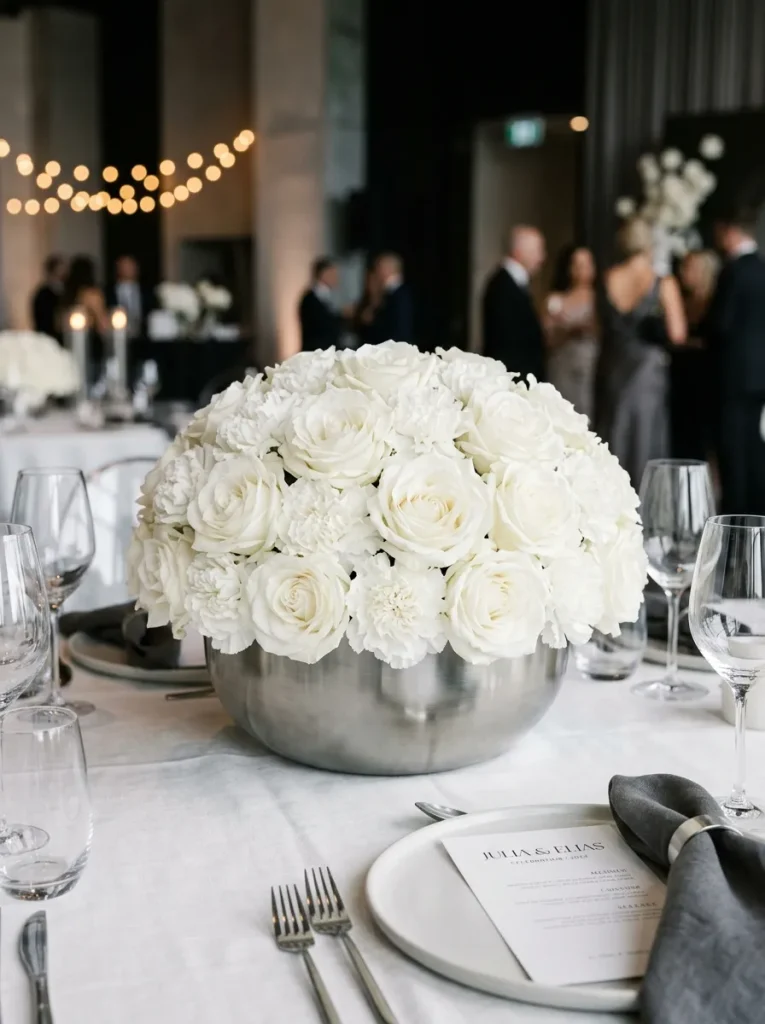
Concept Overview & Aesthetic Appeal
Chic, impactful, and surprisingly affordable. Packing a single flower variety in a solid monochromatic color (like all-white, deep burgundy, or dusty blush) into a low vessel creates a sleek, high-fashion statement.
Step-by-Step Execution Guide
- Choose Your Bloom: Select a budget-friendly yet sturdy flower in a single color scheme (carnations, spray roses, or tulips).
- Grid Vessel: Create a tape grid over a low round glass dish or metallic bowl filled with water.
- Pack Tightly: Cut bloom stems short so heads sit just above the vessel rim. Pack 20 to 30 bloom heads tightly into the tape grid until no gaps or stems are visible, creating a smooth dome of solid color.
Pro Styling & Application Tips
Carnations are exceptionally durable and affordable. When fully fluffed by hand before arranging, a tight dome of white carnations mimics the luxurious look of expensive hydrangeas or peonies at a fraction of the cost.
Common Mistakes to Avoid
- Mistake: Mixing multiple mismatched shades within a single-color concept.
- Fix: Stick strictly to one precise shade (e.g., pure white or deep crimson) for a clean, editorial impact.
Idea 9: The Vintage Wooden Box & Hydrangea Hearth
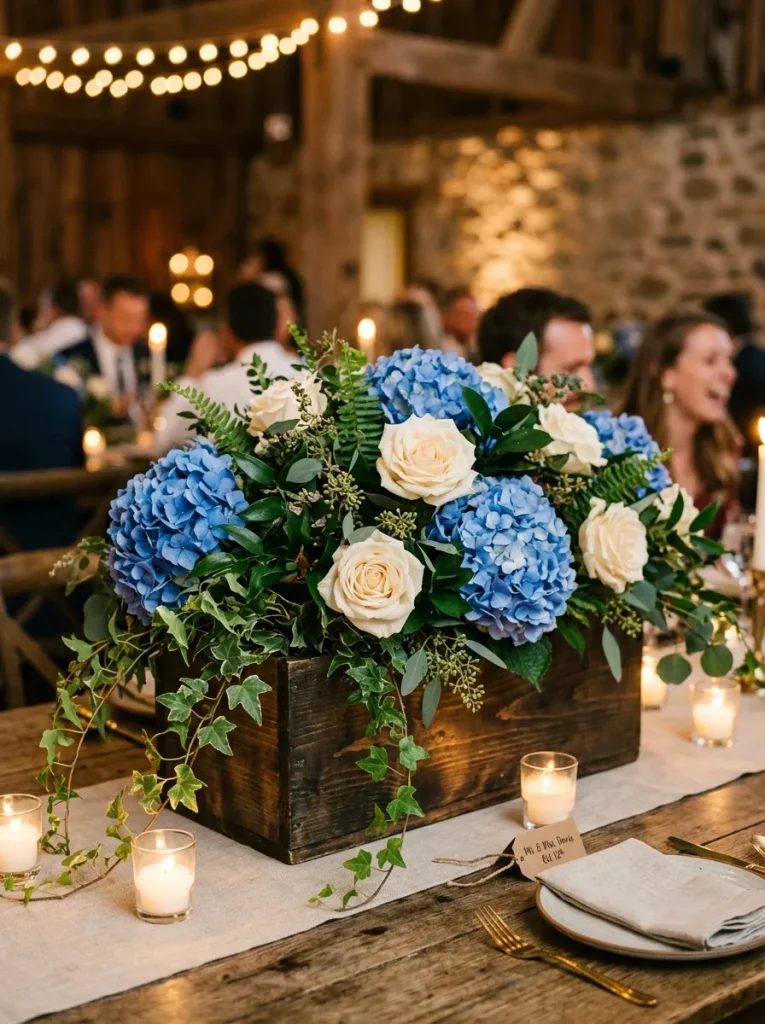
Concept Overview & Aesthetic Appeal
Warm, rustic, and generous in scale. Stained wooden planter boxes filled with lush, overflowing hydrangeas, roses, and trailing greenery.
Step-by-Step Execution Guide
- Box Preparation: Line the inside of a narrow wooden planter box (12 to 16 inches long) with heavy plastic sheeting to prevent water leaks.
- Water Container: Place plastic floral trays or low rectangular plastic containers filled with water and flower food inside the plastic lining.
- Arrangement: Insert 2 large hydrangea stems into the box first to establish a full, soft base layer. Tuck garden roses, stock flowers, and trailing ivy around the hydrangeas to spill over the wooden edges.
Pro Styling & Application Tips
Hydrangeas are heavy drinkers. Dip freshly cut hydrangea stem ends into Alum powder (found in the grocery spice aisle) before placing them in water—this prevents stem clogging and keeps hydrangeas crisp all day.
Common Mistakes to Avoid
- Mistake: Unlined wooden boxes leaking water directly onto formal reception table linens.
- Fix: Always double-line wooden containers with thick plastic liner bags before adding water or wet floral foam.
Idea 10: The Modern Minimalist Single-Stem Calla Lily Cylinder
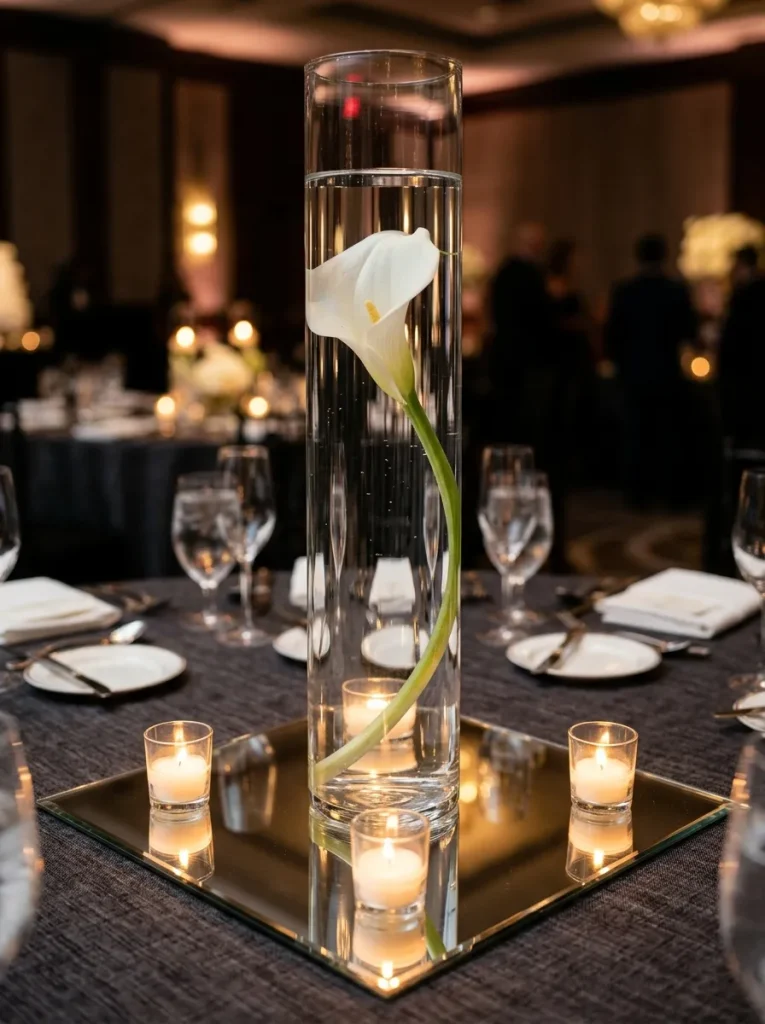
Concept Overview & Aesthetic Appeal
Sleek, architectural, and ultra-modern. A single long-stemmed Calla Lily or Anthurium submerged gracefully inside a tall, narrow clear glass cylinder vase.
Step-by-Step Execution Guide
- Vessel Prep: Clean tall 12-inch or 14-inch glass cylinder vases until crystal clear.
- Stem Preparation: Choose a long, pristine Calla Lily stem. Gently bend and flex the thick stem by hand to give it an organic, curved silhouette.
- Submersion: Anchor the base of the Calla Lily stem to a small glass marble or lead sinker weight at the bottom of the cylinder vase. Fill the cylinder completely with distilled water so the bloom rests submerged below the surface.
- Top Accent: Place a floating candle at the top water line if desired.
Pro Styling & Application Tips
Pair this sleek single-stem look with polished mirror trays placed beneath the cylinder base to reflect ambient candle light across modern reception tables.
Common Mistakes to Avoid
- Mistake: Using cloudy tap water with mineral sediment that detracts from the clean glass aesthetic.
- Fix: Fill cylinder vases using room-temperature distilled or filtered water for crystal-clear clarity.
Common Beginner DIY Mistakes & How to Avoid Them
| Common DIY Error | Root Cause | Practical Solution & Prevention |
| Flowers Wilting Before Reception | Arranging blooms in plain water without flower food, or leaving stems in hot sun during setup. | Always use floral hydration food packets; assemble arrangements in a cool room 24 to 36 hours before event time. |
| Blocking Guest Sightlines | Centerpieces made between 14 to 20 inches tall sit directly at eye level across dining tables. | Keep arrangements strictly under 12 inches tall or elevated above 24 inches on slender pedestals. |
| Leaking Vessels on Linens | Unsealed ceramic pots or unlined wooden boxes leaking water through porous bottoms. | Line all wooden or porous vessels with heavy-duty plastic liners or inner plastic water trays. |
| Last-Minute Setup Panic | Attempting complex floral mechanics on the morning of the wedding day without assistance. | Assemble all centerpieces 1 to 2 days prior; assign a trusted coordinator or bridal party team to transport and place centerpieces on wedding morning. |
Pro Tips, Timeline & Assembly Strategy
To ensure your DIY wedding floral project runs smoothly without wedding-week stress, follow this proven 4-day assembly schedule:
                  [ 4-DAY DIY FLORAL ASSEMBLY TIMELINE ]
                                   |
  [ 3 Days Before ]  --> Flowers arrive; trim stems 1", hydrate in buckets
                                   |
  [ 2 Days Before ]  --> Prep vessels (tape grids, liners); build foliage bases
                                   |
  [ 1 Day Before ]   --> Insert focal blooms into vessels; mist & store cool
                                   |
  [ Wedding Morning] --> Transport to venue; top off water level; light candles
- Floral Spray Sealant: Once centerpieces are completed, mist all bloom heads with Crowning Glory or Finishing Touch floral sealant spray. This locks in moisture and prevents petal drying, especially for outdoor summer receptions.
- Water Level Check: Flowers drink a significant amount of water during their first 24 hours in an arrangement. Top off every vessel with fresh water solution on wedding morning using a long-spout watering can.
Styling, Presentation & Accessory Pairings
Elevate simple floral centerpieces into cohesive table landscapes by surrounding them with thoughtful tabletop accents:
- Votive Candle Trios: Frame every floral centerpiece with 3 to 5 votive candles or tea lights in ribbed mercury glass holders to add warm ambient glow.
- Textured Table Runners: Lay gauze cheesecloth, crushed velvet, or woven linen runners down table centers beneath your arrangements to define the floral anchor space.
- Table Number Integration: Tuck wooden, acrylic, or calligraphed card table numbers directly into the floral base greenery using floral cardholder picks.
Budgeting & Time Planning
| Project Scope | Estimated Cost per Table | Time Commitment | Skill Level Required |
| Bud Vase Clusters (Idea 1) | $12 – $22 per table | 10 mins per table | Beginner |
| Submerged Candle Cylinder (Idea 2) | $15 – $25 per table | 8 mins per table | Beginner |
| Footed Compote Bowl (Idea 4) | $28 – $45 per table | 20 mins per table | Intermediate |
| Greenery Table Runner (Idea 6) | $20 – $35 per table | 15 mins per table | Easy |
- Pro Sourcing Strategy: Order bulk wholesale flowers from reputable online floral distributors or local flower farms 3 to 4 weeks in advance. Stick to 3 primary flower varieties and 2 greenery types across all tables to streamline wholesale purchasing and reduce waste.
Frequently Asked Questions (FAQs)
1. How far in advance can I assemble DIY floral centerpieces for a wedding?
You can assemble centerpieces 24 to 36 hours before the wedding (typically on Thursday for a Saturday wedding). Keep finished arrangements in a cool room away from sunlight and ensure water vessels remain filled to the top.
2. How many flowers do I need per centerpiece table?
- Bud Vase Cluster: 5 to 9 total stems per table across 3 vases.
- Mason Jar / Small Vase: 10 to 15 total stems per table.
- Full Compote / Bowl Arrangement: 18 to 25 total stems per table.
3. What are the most durable DIY wedding flowers that won’t wilt easily?
Roses, spray roses, carnations, ranunculus, chrysanthemums, hypericum berries, stock, and alstroemeria are extremely hardy and survive well out of water for short periods or in DIY arrangements. Avoid delicate blooms like sweet peas, poppies, or hydrangeas unless using proper hydration techniques (like Alum powder for hydrangeas).
4. How do I transport assembled DIY floral centerpieces to the venue safely?
Place finished centerpiece vessels side-by-side inside shallow cardboard fruit boxes or plastic milk crates. Fill empty gaps between vessels with crumpled paper or pool noodle cutouts so vases cannot tip or slide during transport.
5. Is floral foam necessary for DIY wedding centerpieces?
No! You can easily avoid single-use floral foam by using eco-friendly, reusable mechanics such as metal pin frogs (kenzan), plastic-coated chicken wire balls, or waterproof tape grids across vase openings. These alternatives hold stems securely while allowing better water absorption.