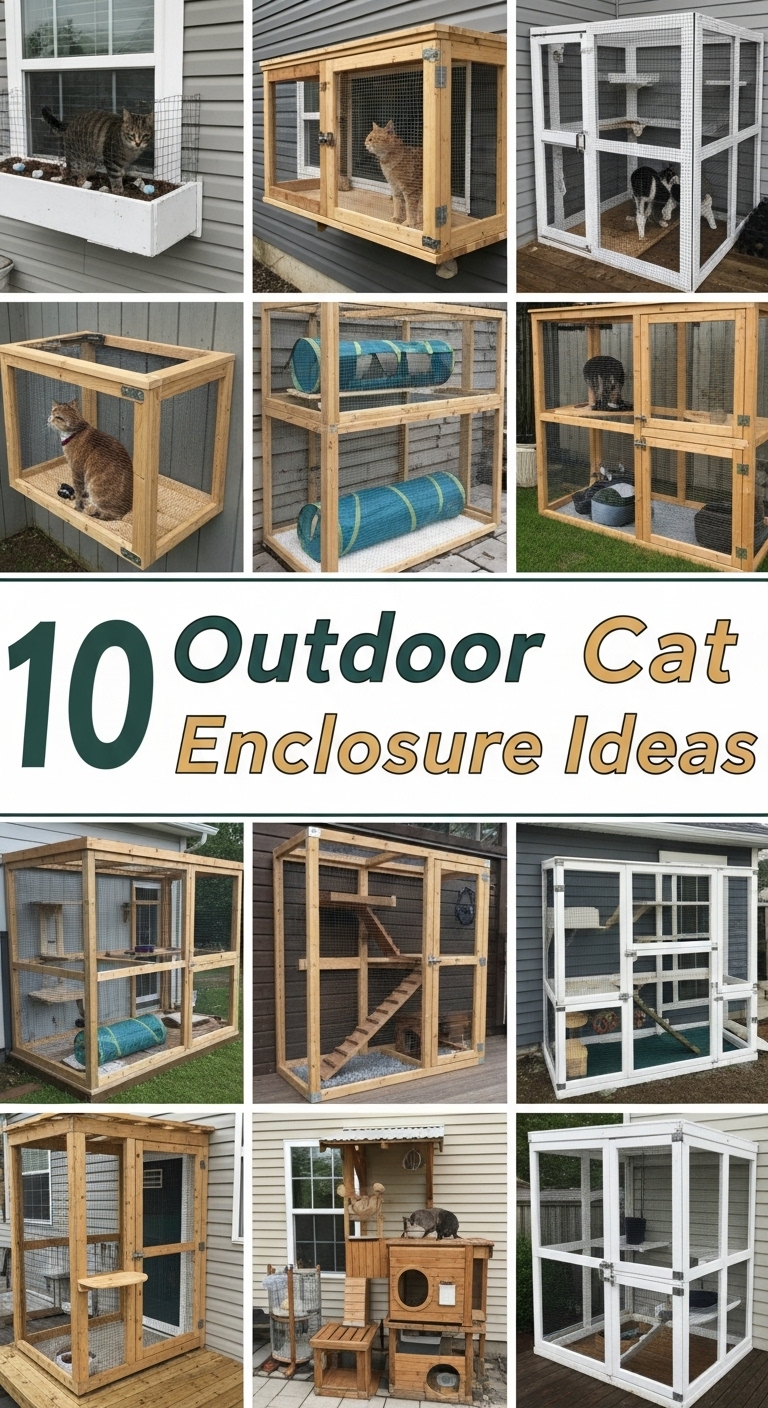
I got my cat Miso as an indoor kitten, and for two years I watched her press her nose against the balcony glass every single morning like it was a television she wasn’t allowed to watch. The guilt got to me, so I built her a catio — and then, because I am who I am, I kept improving it, borrowing ideas from other cat people, and learning which designs actually get used and which ones just look impressive in photos. These are the ten enclosure styles I’d recommend, with the unvarnished verdicts from someone who has scrubbed, repaired, and re-thought every one of these setups.

1. Balcony Cat Enclosure

This is where I started, and honestly it’s where most apartment cat people should start. I netted our entire balcony with cat-proof mesh — floor to ceiling, anchored to the railing and the wall above — and suddenly Miso had six square meters of outdoor life. The mesh cost me about ninety euros and a Saturday. Key lessons: use proper pet mesh, not garden netting, because a determined cat will chew through garden netting in a week; and secure the bottom edge, because cats test the bottom first. I ran a cable tie every fifteen centimeters along the railing and Miso has never found a gap in two years. Add a weatherproof shelf at sitting height and a scratching post, and a balcony becomes a full-time catio. For renters, this is usually the most landlord-friendly option since it’s fully reversible.
2. Free-Standing Cat Enclosure

My sister has a garden but no suitable wall to attach anything to, so she bought a free-standing catio — basically a big mesh gazebo for cats — and I helped her assemble it one very long Sunday. The advantage is obvious: no drilling, no landlord negotiations, and you can move it when you rearrange the garden. The thing nobody tells you: anchor it like your life depends on it. Hers lifted in the first autumn storm and ended up against the fence; we staked it down with ground anchors the next weekend and it’s been solid since. Get one with a proper roof, not just mesh top — rain pooling on flat mesh stretches it and creates a saggy hammock that scares the cats. Hers has a polycarbonate roof panel and the cats use it daily, rain or shine, which tells you everything about the roof question.
3. Cat Tunnel Systems

Tunnels are the part of the catio world that looks like a gimmick and turns out to be genius. I connected Miso’s balcony enclosure to a small ground-level run with a mesh tunnel along the wall, and she uses that tunnel more than any other single feature — it’s her highway, her lookout, and her favorite ambush spot. The key to getting cats to actually use a tunnel: cats won’t use a tunnel that wobbles or sags. Mine is rigid-framed with a solid floor, and I draped a light cloth over part of it so there’s a covered section. Modular tunnel kits exist and they click together, but measure your route first; I had to reroute mine around a drainpipe and was glad I’d bought two extra corner pieces. In winter I stuff the tunnel with straw — not hay, straw — and it becomes the warmest spot in the whole setup.
4. Roof-Top or Elevated Catio

A friend in a top-floor flat built her catio on the roof terrace, and visiting it changed how I think about vertical space. Elevated enclosures give cats the two things they want most: height and a view. Hers is a mesh box on the terrace with a solid floor, a shaded corner, and perches at three heights, and her two cats spend entire afternoons up there watching the street like furry gargoyles. The engineering matters more here than at ground level: wind load is real, so the frame needs to be properly fixed to something structural, and the floor must be genuinely solid — mesh flooring at height makes cats nervous and is hard on their paws. She added outdoor carpet tiles on the floor and a windbreak panel on the prevailing-wind side, and the cats now prefer it to the flat even in light rain.
5. Garden-Integrated Cat Enclosure

The dream version: an enclosure built around existing garden features instead of plonked on top of them. I helped a neighbor design one that wraps around her apple tree — the tree grows up through a mesh roof collar, and the cats climb the lower branches inside the enclosure. It is, objectively, the coolest catio I’ve ever seen, and the cats are out there from March to November. Building around a tree takes planning: the mesh collar around the trunk needs to flex as the tree grows, so we used a loose sleeve of mesh with a drawstring rather than a fixed ring. Plant cat-safe greenery inside — cat grass, valerian, a little patch of lawn — and avoid lilies, which are genuinely dangerous to cats. The enclosure basically became the cats’ private garden, and the neighbor says it’s the best money she’s spent on the house.
6. Enclosure with Sun and Shade Zones

Miso taught me this one by voting with her paws: she sunbathes for twenty minutes, then retreats to shade, then goes back out. A catio that’s all sun becomes an oven by noon; all shade and the cats get bored. I divided our balcony enclosure into zones — a sunny shelf by the railing for morning basking and a shaded corner under a canvas sail for afternoons — and her usage basically doubled. The shade sail was the best ten euros I spent: it cuts the heat dramatically and the cats sleep under it for hours. Make sure there’s always fresh water in the enclosure; I use a heavy ceramic bowl that can’t be tipped. And in high summer, I freeze a damp towel and lay it in the shade zone — Miso lies on it like it’s a luxury spa treatment. Zones aren’t a luxury feature; they’re the difference between an enclosure cats tolerate and one they live in.
7. Multi-Level Cat Playhouse Enclosure

Cats think in three dimensions, and a flat enclosure bores them. When I added a second level to Miso’s balcony setup — a sturdy shelf at chest height with a ramp — it was like I’d doubled the size of the space. Multi-level designs are just shelves, ramps, and boxes at different heights inside the mesh, but the effect on cat happiness is enormous. Build the levels from the cats’ perspective: they want a high lookout, a mid-level lounging shelf, and a ground-level hiding spot. I used sealed plywood for the shelves (easy to wipe clean) and wrapped one ramp in sisal so it doubles as a scratcher. Make every level reachable by a less-athletic cat — Miso is no athlete and she manages fine, but a senior cat would need gentler ramps. The whole upgrade took an afternoon and cost less than the mesh itself.
8. Enclosures with Natural Enrichment

The cheapest enrichment is a log. I dragged a birch log into the enclosure, and Miso spent a week investigating every centimeter of bark before deciding it was her favorite scratching surface. Natural elements — logs, branches, stones, a patch of real grass in a tray — give cats textures and smells that plastic toys never will. I rotate a few items: a branch with leaves in spring, a pile of autumn leaves in a box in October (she goes feral for leaf piles), pinecones to bat around. A shallow tray of soil with cat grass growing in it gets chewed down to stubs within days, which is the point. Just check everything for pesticides and sharp edges first. My rule: if I wouldn’t let a toddler chew on it unsupervised, it doesn’t go in the enclosure. The cats engage with this stuff ten times more than with anything I bought at a pet shop.
9. DIY Modular Cat Enclosures

When my brother wanted a catio but couldn’t afford a kit, we built one from wire storage cubes — those modular shelving grids — cable-tied together into a box, and it worked brilliantly. Modular DIY is the budget path: storage cubes, zip ties, and mesh panels can become any shape you need, and you can expand it later by just adding more cubes. Our cube catio cost about sixty euros and took an evening. The weak points are the joints — zip-tie every connection point, not every other one, and double up at corners — and the door, which needs a proper latch because cats learn to nose open weak closures terrifyingly fast. We added a wooden frame door with a bolt latch and it’s escape-proof. It’s not the prettiest catio on the street, but the cats don’t care about pretty, and neither does my brother’s wallet.
10. Indoor-Outdoor Connected Cat Enclosure

The gold standard, and what I eventually did: a cat flap in the balcony door connecting the flat directly to the enclosure, so Miso comes and goes as she pleases. A connected enclosure stops being a “feature” and becomes just part of the house — she naps outside, eats inside, and decides for herself. The flap needs to be lockable (I lock it at night and in storms), and the enclosure side needs a draft excluder around the flap or you’ll heat the balcony all winter. I fitted a microchip flap so neighborhood cats can’t follow her in — worth every cent, because before that we had a very bold tabby helping himself to her food. If you’re renting, a flap in a removable door panel avoids drilling the actual door. This is the setup I’d recommend to anyone who can manage it; it’s the closest an indoor cat gets to having a garden.
Conclusion
Two years in, Miso’s catio is the most-used square footage of our flat, and every euro and Saturday I put into it paid back in a calmer, happier cat. Start with the balcony net and a shelf — that’s eighty percent of the value — then add levels, tunnels, and greenery as the mood takes you. Your cat will tell you what matters by where she chooses to sleep.