10 Western Home Decor DIY Ideas
When we moved into our flat in Munich, the living room felt like a blank white box, and nothing I put in it looked like it belonged to us. Then my husband came home from a work trip to Texas with a small wooden sign that read “Home Sweet Home” in burned ranch lettering, and the moment I hung it by the door, the whole room started to make sense. That one piece gave me permission to lean into the warm, rugged western look I had always loved, and I have been making pieces for our home ever since, one weekend project at a time.
Every idea below is something I have actually built or sewn in my own home, with real tools, real mistakes and real costs included. You do not need a workshop or a big budget, just a free afternoon, a few basic supplies and a willingness to let things look handmade, because that is exactly what makes western decor feel warm instead of store-bought.
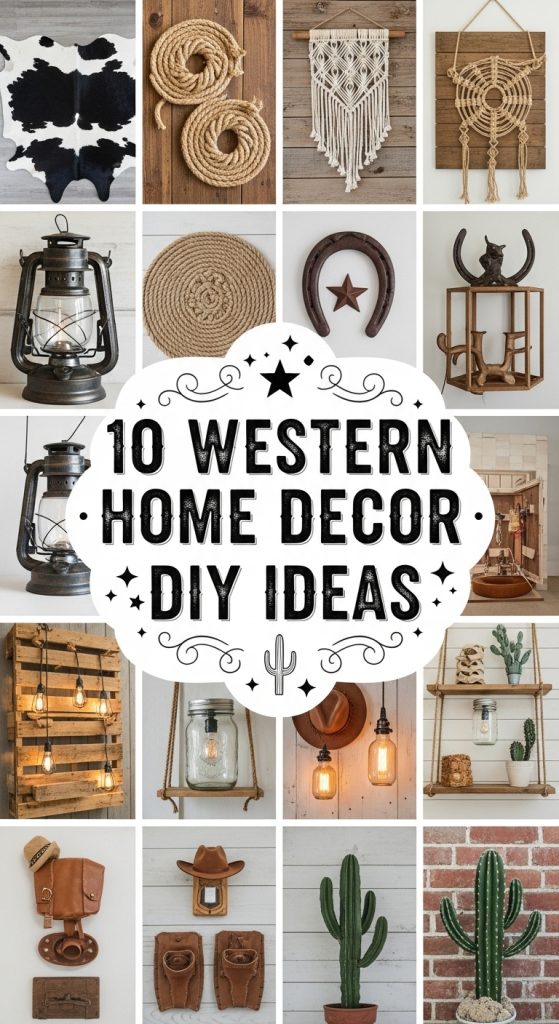
Before You Begin: 3 Things I’d Check First
- Work with dry wood only: Pallet boards and reclaimed planks must feel dry to the touch and sit indoors for a week before you cut them, or they will warp after you finish.
- Test your stain on a scrap piece: The same stain looks darker on pine than on oak, so I always brush a test patch and wait a full day before I stain the real piece.
- Plan where each piece will live: A heavy mirror or a chandelier needs a solid wall anchor or ceiling hook, so check the fixing before you start building, not after.
1. Rustic Wooden Signs with Ranch Lettering

My first western project was a wooden sign for our hallway, and I made it from a single pine board I bought at the hardware store for about 8 euros. I sanded it smooth with 120 grit paper, brushed on a walnut stain, and let it dry overnight before I added the lettering. For the letters I used a printed template and carbon paper to trace the words onto the wood, then I filled them in with a white paint pen, which cost about 4 euros and gave me far more control than a brush. The whole sign took me one relaxed afternoon, and it still hangs by our front door, slightly imperfect around the edges, which is exactly why I love it.
The trick I learned is to keep the wording short, because a long sentence in ranch lettering is hard to read from across the room. I stick to three or four words, like “Home Sweet Home” or “Welcome to the Ranch”, and I leave plenty of empty wood around the letters so the sign can breathe. I seal the finished board with a clear matte varnish, two thin coats with four hours of drying time between them, so the hallway dust wipes off easily. If you want a more weathered look, you can drag a dry brush with a little grey paint across the surface before you seal it, which gives the wood a lovely sun-bleached feeling without any extra cost.
Try this: Make a small sign for a friend’s housewarming using their family name and the year they moved in. It takes one afternoon and about 15 euros in materials, and it makes a thoughtful gift for a new home or a housewarming party in any season.
2. Faux Cowhide Pillows for the Sofa
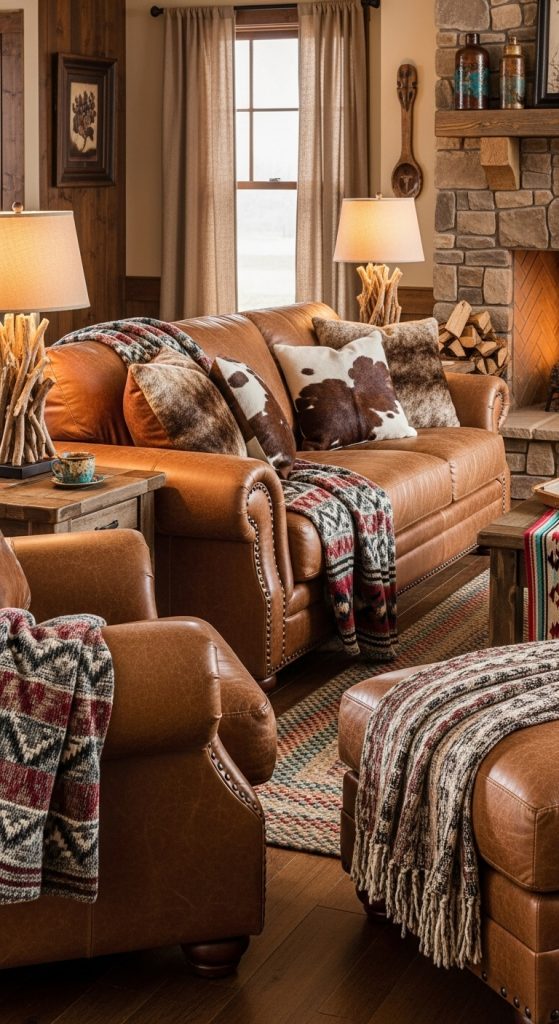
I have always loved the look of cowhide in western homes, but real hide is expensive and I was not comfortable with it in our living room, so I tried faux cowhide fabric instead and I have never looked back. I bought a metre of printed faux hide for about 18 euros, cut two squares of 45 by 45 centimetres, and sewed them into simple envelope covers on my old sewing machine in under an hour. I had been collecting ranch-style western home decor ideas for months before I started, and the pattern is bold, black and white patches, and against our plain linen sofa it adds exactly the rugged touch the room needed. I filled the covers with feather inserts I already had, so the whole project cost less than a single ready-made western cushion from a shop.
When I sewed the covers, I learned to use a slightly longer stitch length than usual, because the faux hide fabric is thicker than cotton and a tight stitch can pucker the seams. I also used a hidden zip on the back of one cushion and an envelope fold on the other, and honestly the envelope fold is easier and looks just as tidy once the cushion is on the sofa. I spot-clean the covers with a damp cloth and a drop of mild soap, and I keep them out of direct sun so the black patches do not fade. One cushion is enough if your sofa is small, but two, one on each end, frame the seating area nicely and make the living room feel pulled together.
Good to know: Faux cowhide fabric sheds a little when you first cut it, so shake the pieces outside before you sew. These pillows suit a living room sofa all year round, and they also look wonderful on a reading chair in a bedroom corner during the colder months.
3. Mason Jar Lanterns Wrapped in Rope
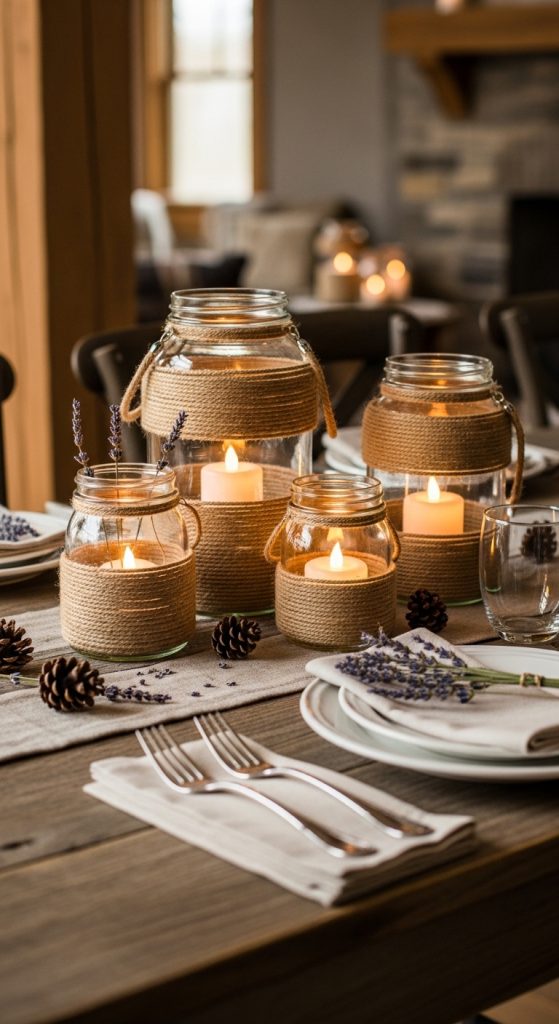
Our balcony evenings changed completely the summer I made my first set of mason jar lanterns, because suddenly our little outdoor table glowed like a ranch porch instead of a plain city balcony. I used three large mason jars I already had in the kitchen, wrapped the necks with natural jute rope, about 6 millimetres thick, and secured each wrap with a dot of hot glue as I went around. I tied a simple loop handle from the same rope so the jars could hang from small hooks on the balcony rail, and I dropped a battery tea light into each one, which cost about 5 euros for a pack of six. The whole set took me less than an hour, and I still use those same jars three summers later.
I learned quickly that real candles and rope do not mix well, which is why I only use battery lights in these lanterns, and I never leave them burning when I go inside. The rope will darken a little in the rain, so I bring the jars indoors when a storm is coming, and I replace the rope once a year, which takes ten minutes and costs almost nothing. If you want a warmer glow, use a tea light with a warm white setting rather than a cool white one, because the warm light makes the glass look like honey. I also tried adding a few dried lavender stems inside one jar, which smells lovely on a warm evening and looks beautiful in the daylight too.
Budget tip: Ask at your local market for empty jam jars, since they work just as well as new mason jars and cost nothing. These lanterns suit a summer balcony dinner or a garden party perfectly, and they make a cosy centrepiece on a dining table in winter too.
4. Leather-Wrapped Vases for the Sideboard
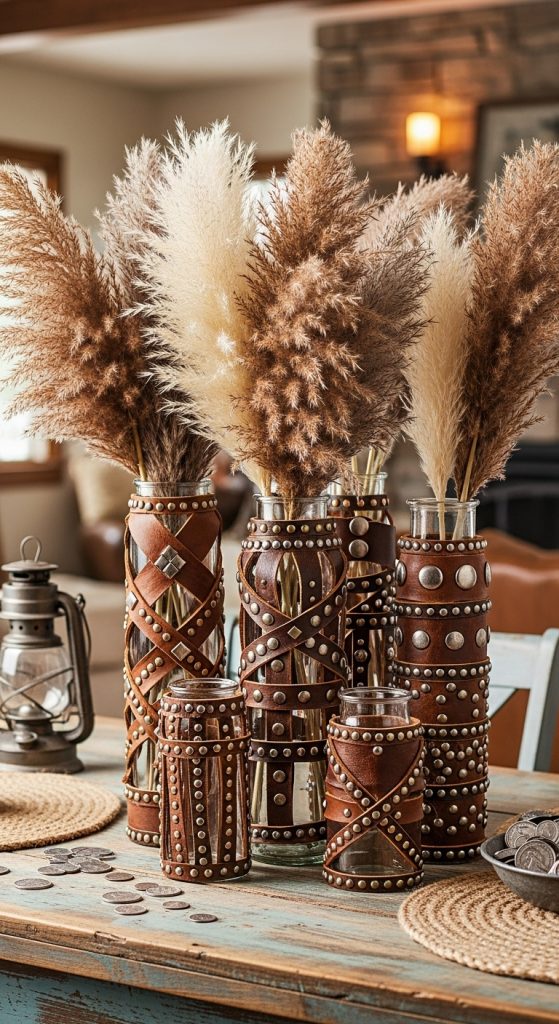
I had a pair of plain glass vases that sat empty on our sideboard for months, looking dull and a little sad, until I wrapped them in thin leather offcuts and they became the most complimented pieces in the room. I bought a bag of leather remnants at a craft market for about 12 euros, chose two pieces in a warm tan, and cut strips about 4 centimetres wide. I wrapped each strip around the vase in a slow spiral, overlapping the edges slightly and fixing the start and the end with a small dab of strong craft glue, then I let them dry flat overnight so nothing slipped. The leather softens over time and takes on a lovely patina, which means the vases look better now than they did the day I made them.
The detail that makes the biggest difference is the finish at the top and bottom edges, because a ragged leather edge can make the whole vase look unfinished. I fold the ends under by about a centimetre and press them flat with a bone folder, which gives a clean line that looks almost professional. I fill the vases with dried grasses in autumn and fresh eucalyptus in spring, and the tan leather works with both. If you cannot find leather offcuts, a thrifted leather belt cut into strips works just as well, and I have done exactly that for a smaller bud vase that now sits on my desk. Just make sure the glass is clean and dry before you start, because glue will not hold on a dusty surface.
Make it yours: Stamp your initials into the leather with a simple metal stamp set before you wrap it, which costs about 10 euros and turns the vase into a personal piece. These vases suit a sideboard or a dining table centrepiece, and they make a lovely handmade gift for a wedding or an anniversary.
5. A Pallet Wood Coffee Table
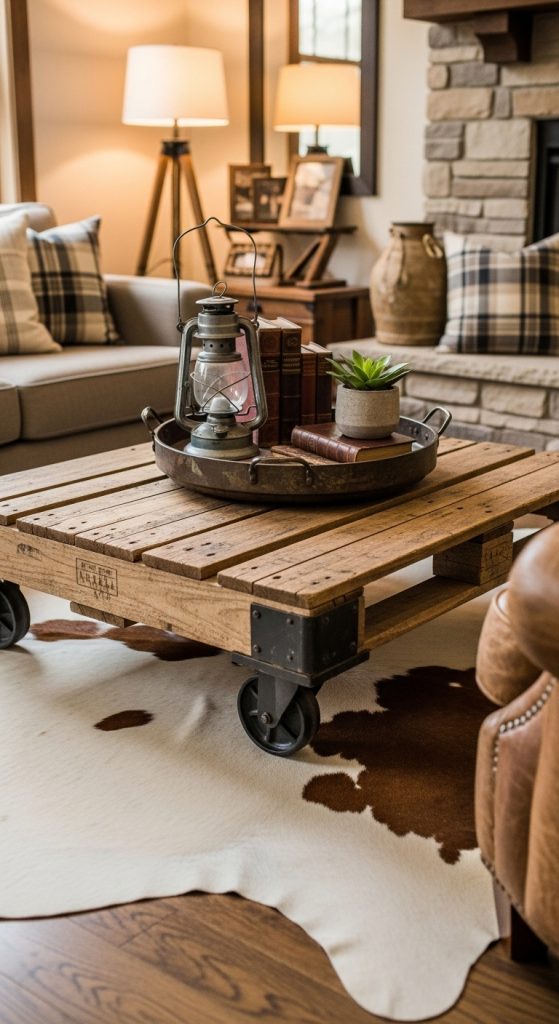
The pallet coffee table in our living room is the biggest project I have ever finished, and it is also the one I am proudest of, because it started as two discarded pallets I found behind a shop and ended up as the centrepiece of the room. I checked the pallets first for the heat-treated stamp, which tells you the wood is safe for indoor use, then I pulled them apart with a pry bar, removed every nail with pliers, and sanded each board with 80 grit paper followed by 150 grit until the surface felt smooth. I built a simple rectangular frame, screwed the boards on top with a small gap between them, and added four short hairpin legs I ordered online for about 35 euros. The whole build took me two weekends, and the total cost came to under 70 euros.
I finished the table with two coats of clear hardwax oil, letting each coat dry for a full day, which brought out the warm tones in the wood and protected it from coffee rings. I will be honest: the sanding was the hardest part, and my arms ached for days, but it was worth it, because a well-sanded pallet table feels like a proper piece of furniture instead of a rough garden project. I also learned to measure the height carefully, because a coffee table should sit about 5 centimetres lower than your sofa seat, so your knees do not bump into it when you sit down. Ours is 45 centimetres high and it is comfortable for reading, eating and putting your feet up after a long day.
Beginner tip: If you have never worked with pallets before, start by building a small side table from a single pallet first, so you learn the sanding and screwing on a small scale. A full coffee table suits a spacious living room best, and it becomes the natural gathering spot for family evenings and weekend coffee with friends.
6. Horseshoe Hooks by the Door
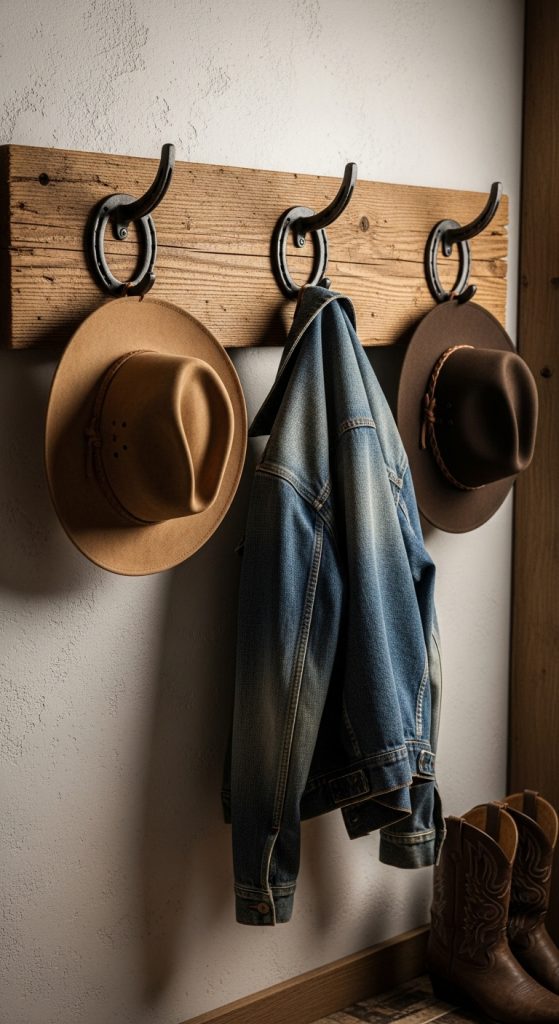
I found three old horseshoes at a flea market in Bavaria for 5 euros each, and they now hang by our front door as hooks for coats, dog leads and my husband’s favourite cap. I cleaned them first with a wire brush and warm soapy water, dried them thoroughly so they would not rust, and sprayed them with a clear rust-proof lacquer, which took about ten minutes and cost 7 euros for the can. Then I screwed each horseshoe to a small wooden backboard with short wood screws, and I mounted the board to the wall with two heavy-duty wall plugs, because horseshoes are heavier than they look and I did not want them pulling out of the plaster. The whole project took one afternoon, and every guest who visits asks about them.
The placement matters more than you might think, because a hook that is too high is useless for children and a hook that is too low lets coats drag on the floor. I mounted our board so the centre of each horseshoe sits about 150 centimetres from the floor, which works for adults and for our teenage nephew when he visits. I also left about 25 centimetres between the horseshoes so bulky winter coats do not crowd each other. If you cannot find real horseshoes, craft shops sell cast iron replicas for about 10 euros each, and they look just as good once they are mounted. I keep one hook free for visitors, which is a small gesture, but it makes people feel welcome the moment they step inside.
Where it works: A horseshoe hook board belongs in an entryway or a mudroom where coats and keys need a home, and it also works beautifully in a hallway near the back door, where it keeps dog leads and garden hats tidy all year round.
7. Navajo-Inspired Wall Art, Made by Hand
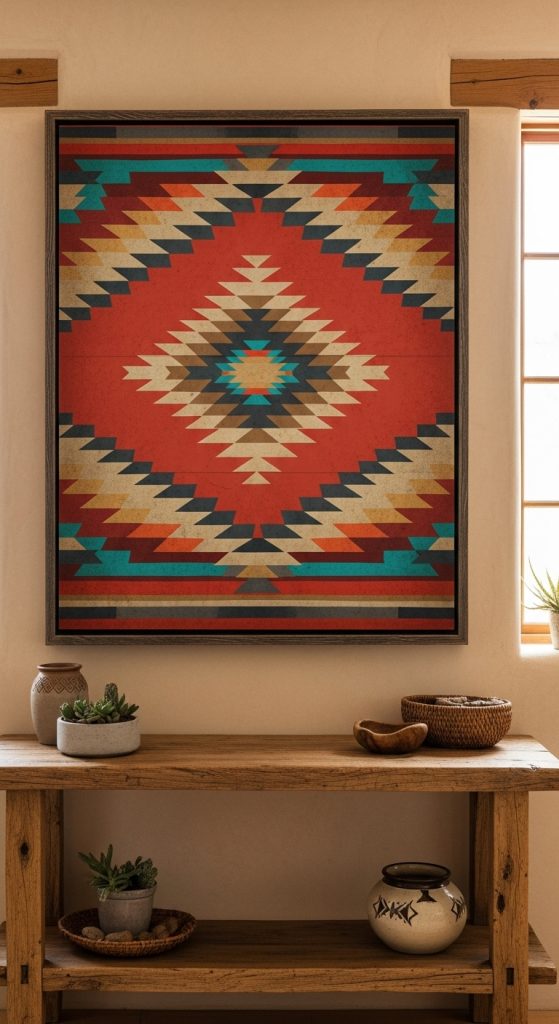
The woven wall hanging above our sofa is the piece I get asked about most, and people are always surprised when I tell them I made it myself from yarn and a wooden dowel. I started with a simple frame of two dowels, one across the top and one to hold the bottom edge straight, and I wove rows of wool yarn in terracotta, cream, black and sand, following a simple diamond pattern I sketched on paper first. The weaving itself was slow and calming work, about three evenings in front of the television, and the materials cost me under 20 euros. When I hung it up, the geometric pattern and the earthy colours pulled the whole living room together in a way no shop-bought poster ever had.
I learned to keep the tension even as I wove, because loose rows sag and tight rows pull the edges in, and I checked the shape every few rows by laying the piece flat on the table. I also left long tassels at the bottom, about 15 centimetres, which give the hanging a soft, finished edge and move gently when the window is open. If weaving feels too slow for you, the same look works as a painted canvas: I painted a smaller version for our bedroom using acrylic paints and masking tape to get clean diamond shapes, and it took a single afternoon, much like a unique DIY wall painting project that uses tape for crisp lines. Either way, the key is the palette, so stick to warm earth tones and one strong dark colour, and the pattern will do the rest.
Try this: Sketch your diamond pattern on graph paper first, using just four colours, and weave or paint exactly what you sketched. This wall art suits a living room wall above a sofa, and a smaller version makes a lovely feature in a bedroom or a home office too.
8. A Rope-Wrapped Mirror for the Hallway
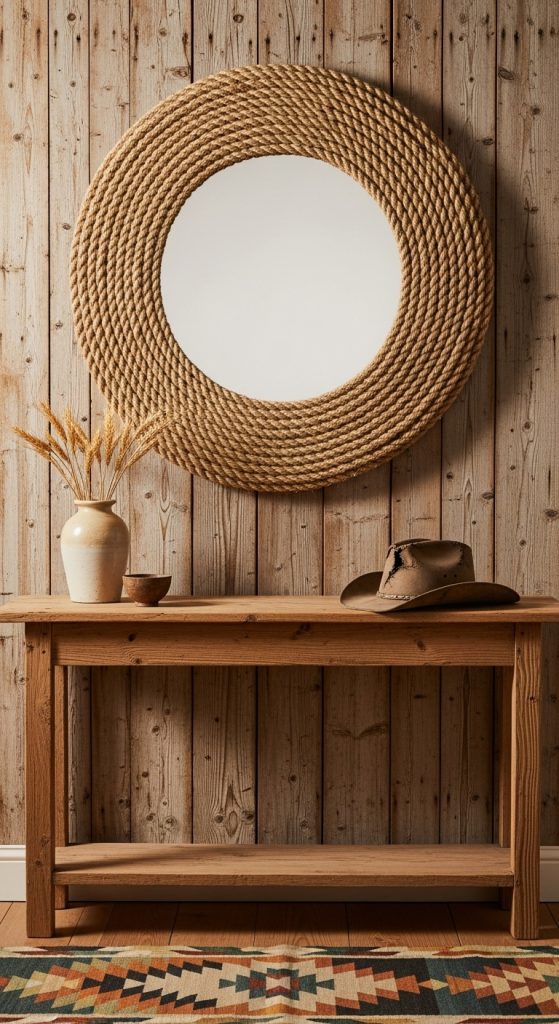
Our hallway mirror used to be a plain round mirror with a thin black frame, and it did nothing for the space until I wrapped the frame in thick natural rope and turned it into a proper western statement piece. I bought 10 metres of jute rope, about 12 millimetres thick, for 14 euros, and I wound it tightly around the frame, fixing it every few centimetres with a small dot of hot glue on the back so no glue showed from the front. The winding took about two hours and a good podcast, and I worked slowly around the circle, keeping each loop tight against the last so no black frame peeked through. When I hung it back up, the hallway suddenly felt warm and intentional, and the rope texture catches the light beautifully in the morning.
The most important lesson I learned is to start the rope at the bottom of the mirror, where the join will be least visible, and to finish there too, tucking the cut end under the last loop with a generous drop of glue. I also weighed the finished mirror before I hung it, because rope adds more weight than you expect, and I used a proper mirror hook rated for 10 kilos rather than a picture nail. I hung it opposite our DIY accent wall in the hallway, so the rope texture and the painted wall play off each other nicely. I clean the rope with a soft brush once a month to keep the dust out, and I keep it away from the bathroom door, because damp air can make natural rope smell musty over time. If you love the look but want something lighter, a thinner 8 millimetre rope gives the same effect with less bulk, and it is easier to wind around a smaller frame.
Good to know: Hot glue sets in seconds but softens in heat, so keep a rope mirror out of direct sun and away from radiators. This mirror suits a hallway or an entryway where you check your outfit before leaving, and it also works well above a dresser in a bedroom.
9. A Wagon Wheel Chandelier for the Dining Room
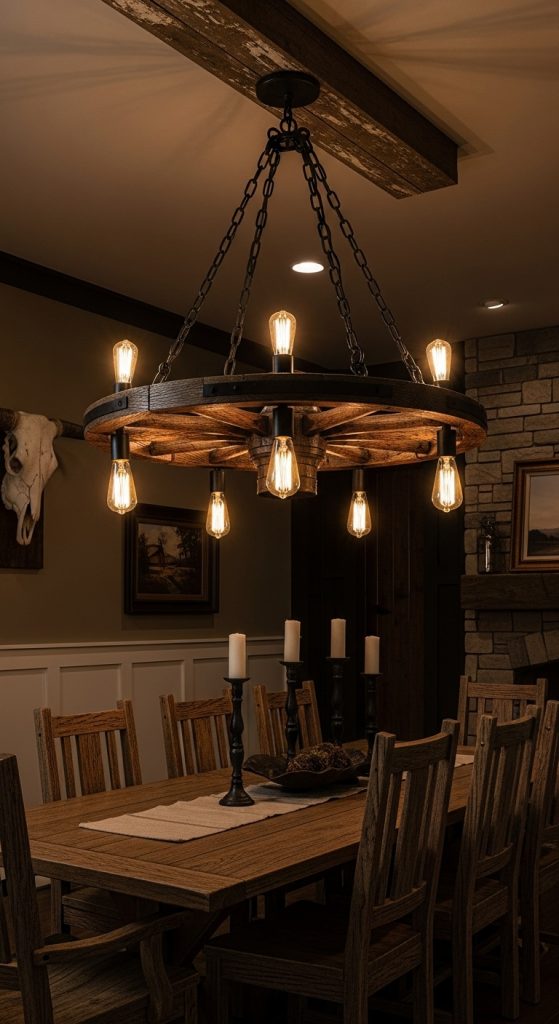
The wagon wheel chandelier above our dining table is the boldest project in this list, and it is the one that makes guests stop and stare when they sit down for dinner. I found a decorative wooden wagon wheel, about 70 centimetres across, at a farm auction for 40 euros, and I fitted it with four small Edison-style bulb holders and a central chain, using a kit I ordered online for about 55 euros. My husband handled the ceiling wiring, because that part needs someone who knows what they are doing, and we hung the wheel so the bottom edge sits about 75 centimetres above the table surface, which is low enough to feel intimate but high enough that nobody bumps their head. The warm glow from the exposed bulbs makes every dinner feel like a special occasion, and in winter it turns an ordinary Tuesday meal into something memorable.
I will be honest that this project needs patience and a second pair of hands, because the wheel is heavy and awkward to hold up while you fix the chain. We used a ceiling hook rated for 20 kilos and a safety chain as a backup, and we tested the fixing by hanging a heavy bag from it overnight before we wired anything. I dust the wheel with a feather duster once a week, because the spokes collect dust quickly, and I use dimmable LED filament bulbs, which give the old-fashioned look without the heat or the electricity bill of real filament bulbs. If a full wagon wheel feels too big for your room, a half wheel mounted on the wall with two bulb holders gives a similar ranch feeling at half the weight and half the cost.
Watch out: Never wire a chandelier yourself unless you are confident with household electrics, and always switch off the circuit at the fuse box first. This chandelier suits a dining room or a large kitchen where the table is the heart of the home, and it shines brightest at family dinners and festive gatherings.
10. A Denim Patchwork Throw for Chilly Evenings
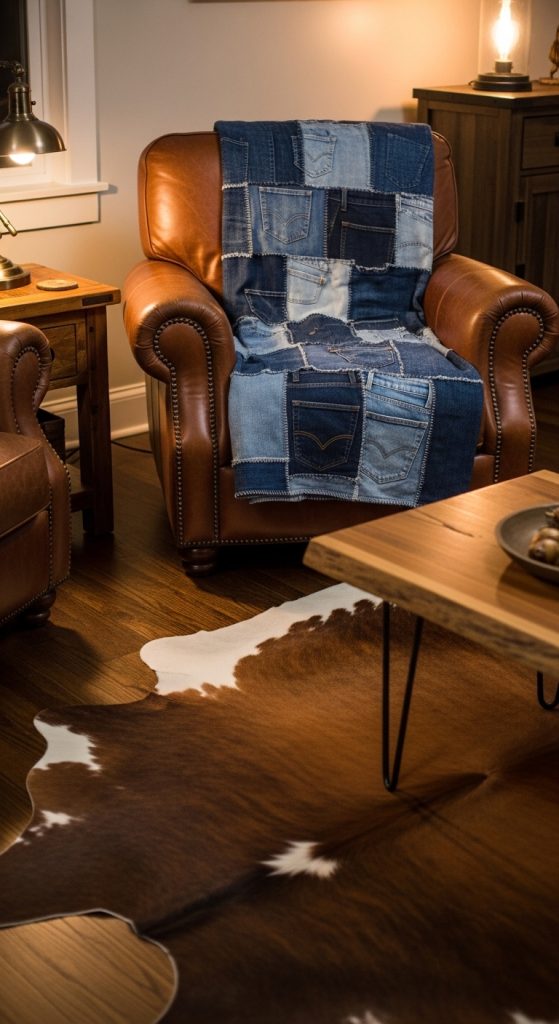
The denim throw on our sofa started as a pile of old jeans that had been sitting in the back of our wardrobe for years, and it is now the blanket we reach for every single evening from October to March. I cut the jeans into squares of 20 by 20 centimetres, mixing dark indigo, faded blue and one pair of black jeans for contrast, and I sewed them together in rows on my machine, using a strong denim needle and a slightly longer stitch. I backed the whole blanket with a soft cotton flannel in a warm cream, which makes it cosy against the skin, and I finished the edges with a simple folded binding. The sewing took me about four evenings, and the only cost was the flannel backing and thread, about 22 euros, because the jeans were free.
I learned to press each seam open with a hot iron as I went, because denim seams are bulky and they will not lie flat on their own, and a flat seam makes the finished blanket look tidy instead of lumpy. I also washed the finished throw once before I used it, which softened the denim and the flannel together and gave it that lived-in feeling right away. The throw is heavy enough to feel substantial but not so heavy that it slides off the sofa, and it has survived countless washes without losing its shape. If you do not have old jeans at home, thrift shops sell them for a few euros each, and you only need four or five pairs for a good-sized throw.
Budget tip: Ask friends and family for their worn-out jeans before you buy any fabric, since most people have a pair or two they are happy to give away. This throw suits a living room sofa on cold evenings, and it also makes a wonderful picnic blanket in summer, when the denim side faces the grass and the flannel side stays soft on top.
Conclusion
Looking around our home now, I can point to almost every western piece and remember the afternoon I made it, the mistake I fixed, and the moment it finally looked right. That is the real joy of western decor for me: the pieces carry stories, not just price tags, and they make a rented flat in Munich feel like a home with roots.
If you are new to this style, start with the sign or the lanterns, because they are quick, cheap and forgiving, and they will give you the confidence to try the bigger builds. I hope one of these ten projects finds its way into your home, and that it makes your evenings a little warmer.