The closet under our basement stairs had one job, and it failed at it for years: every time I opened the door, a tower of mismatched shoeboxes leaned out at me, and whatever I actually needed was always at the very bottom, under three layers of ribbon I had forgotten I owned. I finally emptied the whole thing onto the floor one rainy Saturday, counted nine half-used rolls of the same red grosgrain ribbon, and decided the closet needed a system instead of another pile. What follows are the ten storage ideas I have built, tested, or stolen from cleverer friends since then, and the mistakes I made along the way.
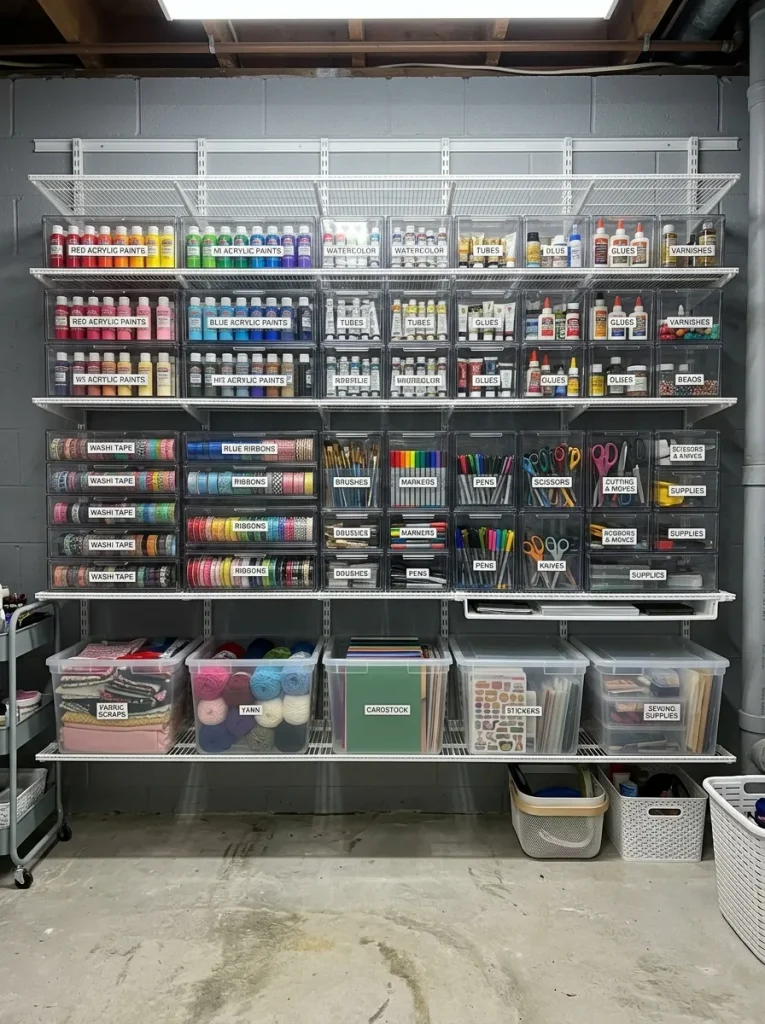
1. Clear Acrylic Drawer & Stackable Bin Wall Array
This is where I started, because it solved my biggest problem in one move: I could finally see what I owned. I fitted adjustable steel standards to the back wall, added clear acrylic drawers for paints and ribbons, and stacked matching clear bins above for yarn and fabric. The first thing I noticed was how much money I stopped wasting, because I no longer bought a third bottle of the same teal acrylic paint when I could see two sitting right there. I keep everything in rainbow order inside the drawers, which sounds fussy but makes finding a colour genuinely fast, and the clear fronts mean I never have to open five lids to find one spool. My mistake was mixing two brands of bins at the start, and their lids did not stack properly, so pick one family of containers and stick to it, because a uniform size is what makes the whole wall feel calm instead of chaotic.
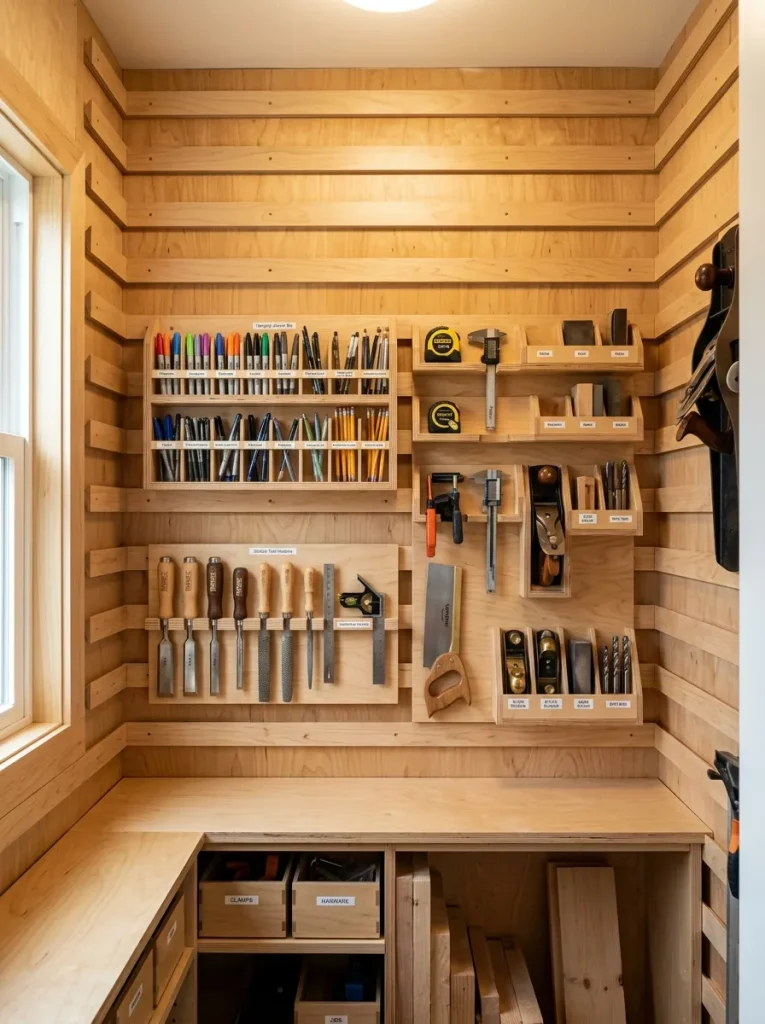
2. French Cleat Modular Bin & Caddy System
I love the look of wood in a craft room, and the French cleat wall I built from birch plywood is the prettiest storage I own, even though it took the longest to make. Horizontal rails with a 45-degree bevel run along the back and side walls, and each caddy, bin and tool holder hooks onto them, so I can lift a whole box of markers off the wall, carry it to my table, and hang it back when I am done. I painted small chalkboard panels on the front of each caddy and label them with liquid chalk, which means renaming a bin takes ten seconds when my projects change. The beveled rails need to be cut accurately or the caddies sit crooked, and I ruined two boards learning to set the saw angle properly, so test the cut on scrap first. Once it is up, though, nothing else I have built rearranges as easily, and that flexibility is worth the slow start.
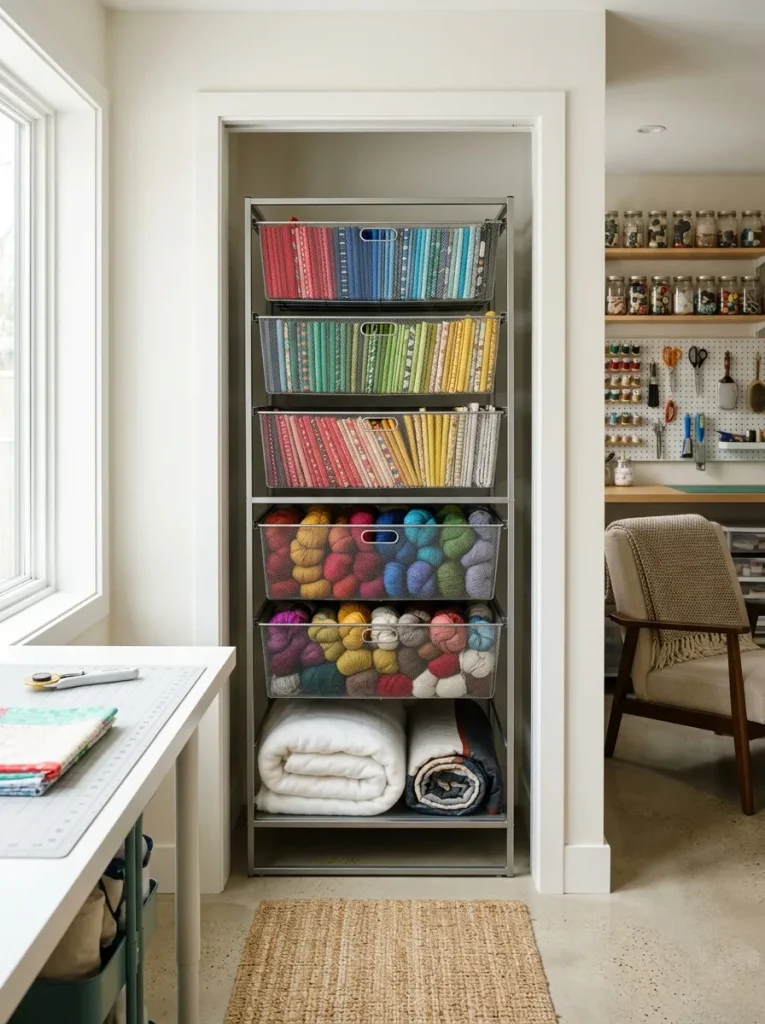
3. Pull-Out Sliding Wire Basket & Fabric Bin Tower
Deep closets have a black hole problem, and mine was so bad that I once found a bag of wool I had been looking for for six months hiding behind a stack of batting. The sliding wire basket tower fixed it: full-extension mesh baskets glide out on ball-bearing runners, so the back of the closet comes to me instead of me reaching blindly into the dark. The open mesh lets air move around the yarn, which matters in a basement, because my wool used to come out smelling faintly musty after a damp winter. I sort the skeins by weight and colour down the tower, and the whole thing looks rather lovely when the door is open. Do not overload the top baskets, though, because I did that in the first month and a runner bent under the weight of a full load of denim scraps, so keep the heavy fabric low and the light yarn high.
4. Tilt-Out Hardware & Embellishment Bins on Closet Doors
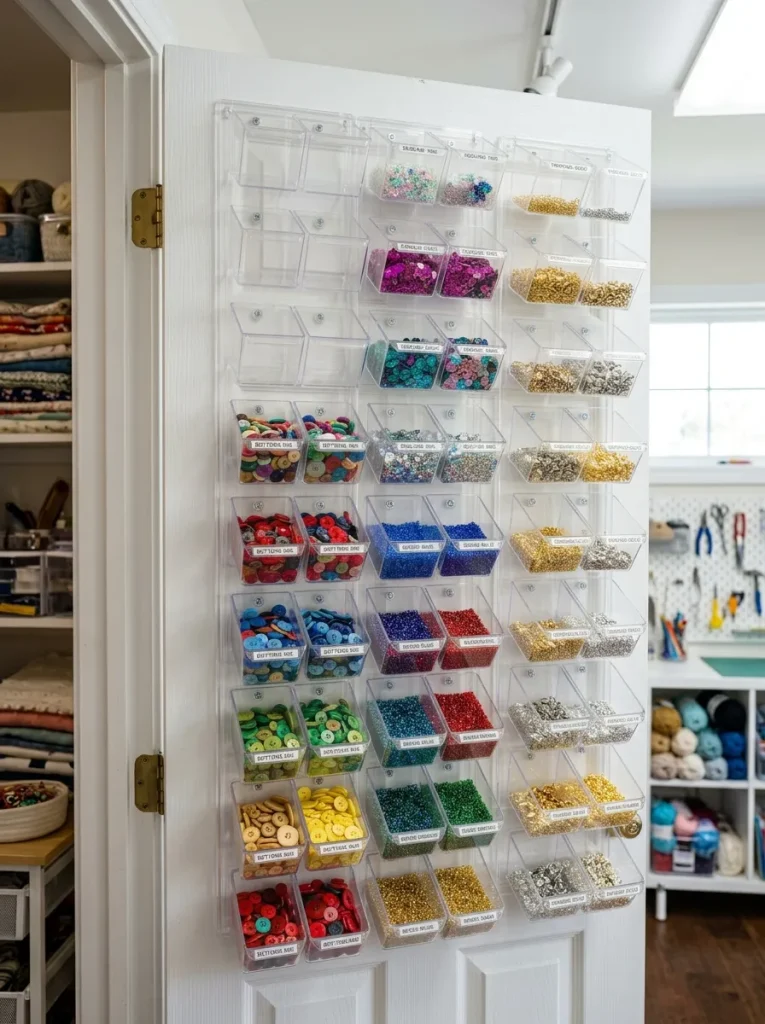
The inside of a closet door is free storage that most people ignore, and I fitted mine with clear tilt-out bins that hold thousands of buttons, beads and eyelets in plain sight. A light touch tips a bin forward at an angle, I scoop out what I need, and it clicks back flush, which means the door still closes properly and nothing rattles. I grouped the small things by colour, so the door looks like a mosaic when it is open, and finding the right shade of blue button now takes seconds instead of a hunt through a jam jar. The bins are screwed into the door with short screws and washers, and I learned to check the screw length twice, because my first attempt poked through the front of the door and left two small marks I still notice. Keep the heaviest bins low on the door, or the hinges will sag over time.
5. Labeled Color-Coded Fabric & Scrap Canvas Cube System
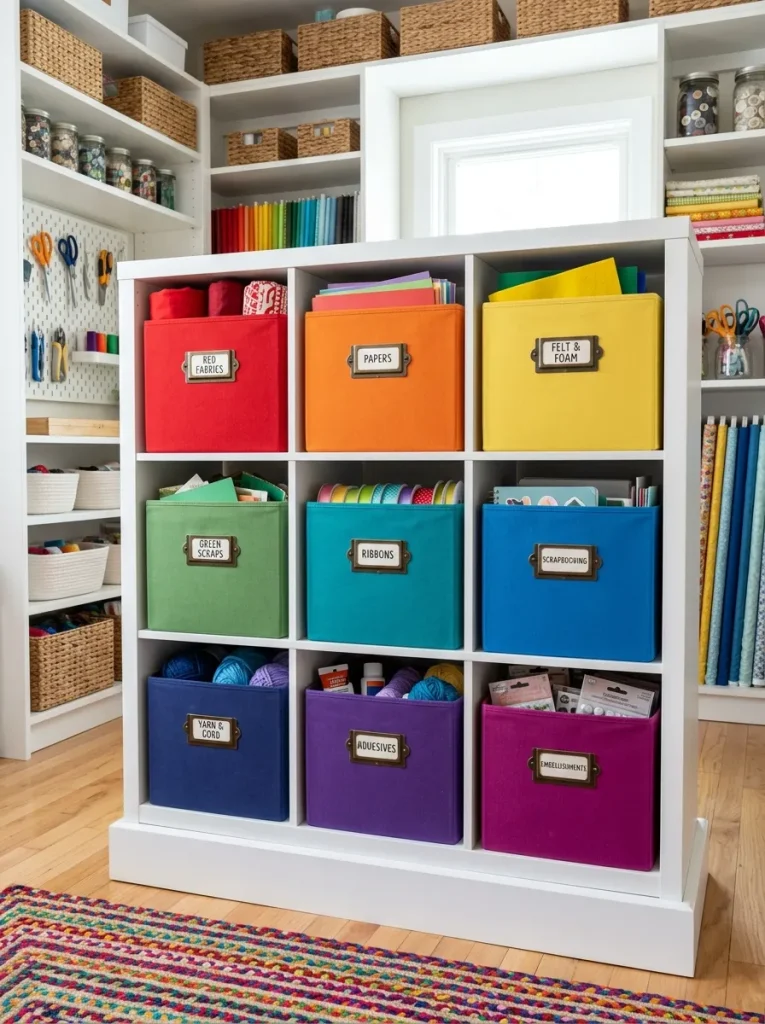
Scraps were my shame: I kept every offcut, told myself I would use them, and then never could find the right one, so they lived in a tangled bag that I avoided opening. The cube system changed that completely. A nine-cube frame sits inside the closet, each cube holding a uniform fabric bin assigned to one colour family, with a brass label holder on the front so I can read what is inside without pulling the bin out. When the door opens, the closet looks tidy and calm, because the bins are all the same soft grey on the outside and the colour lives inside where it belongs. I use the same bins for paper scraps, sorted the same way, and the rule I set for myself is simple: if a colour bin is full, something has to leave before anything new goes in. That one rule has kept the closet manageable for two years.
6. Heavy-Duty Latching Weather-Tight Totes for Bulk Storage
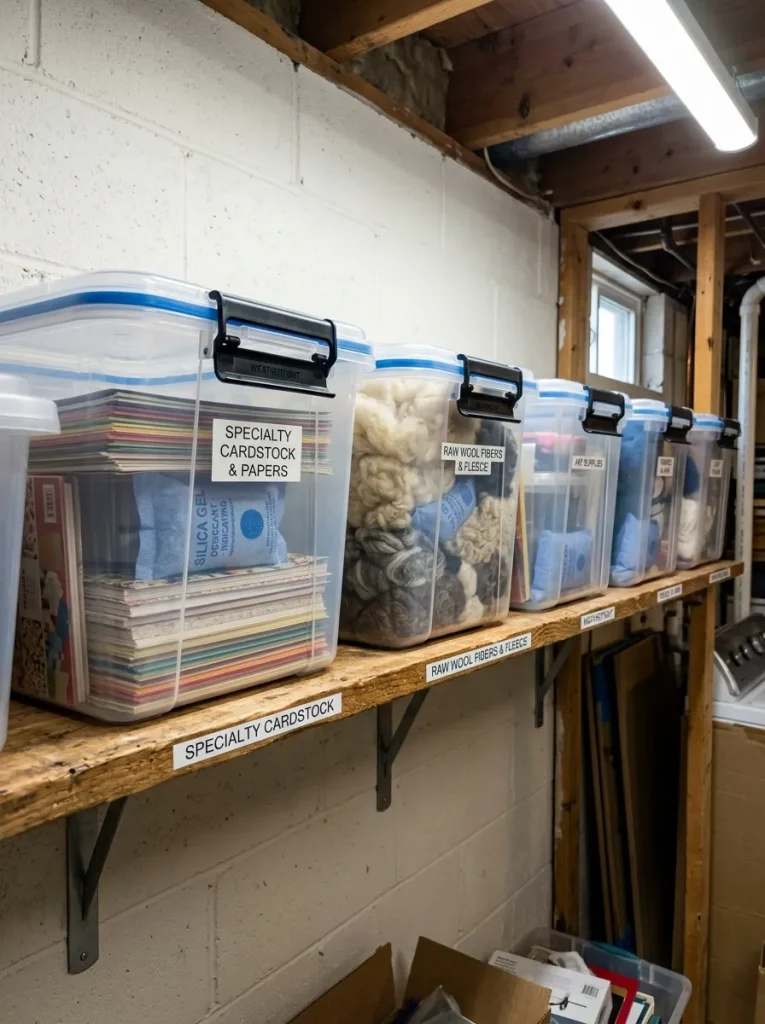
Our basement flooded once, only a few centimetres from a blocked drain, and it was enough to ruin a box of watercolour paper and a bag of raw wool that I had stored in ordinary cardboard. After that I moved everything precious into gasketed totes with foam seals and snap latches, and I have never lost another sheet. The totes sit on heavy steel shelving with a proper gap above the concrete floor, and each one has a colour-changing silica gel pack inside, blue when it is dry and pink when it needs recharging in the oven. I keep archival paper, embossing powders and good wool in these, and the cheaper everyday supplies in the open bins, because the sealed totes cost more and I do not need a gasket on a bag of googly eyes. Label the lids as well as the fronts, because you will be reading them from above when the totes are stacked.
7. Slide-Out Rolling Cart Caddies Under Shelving
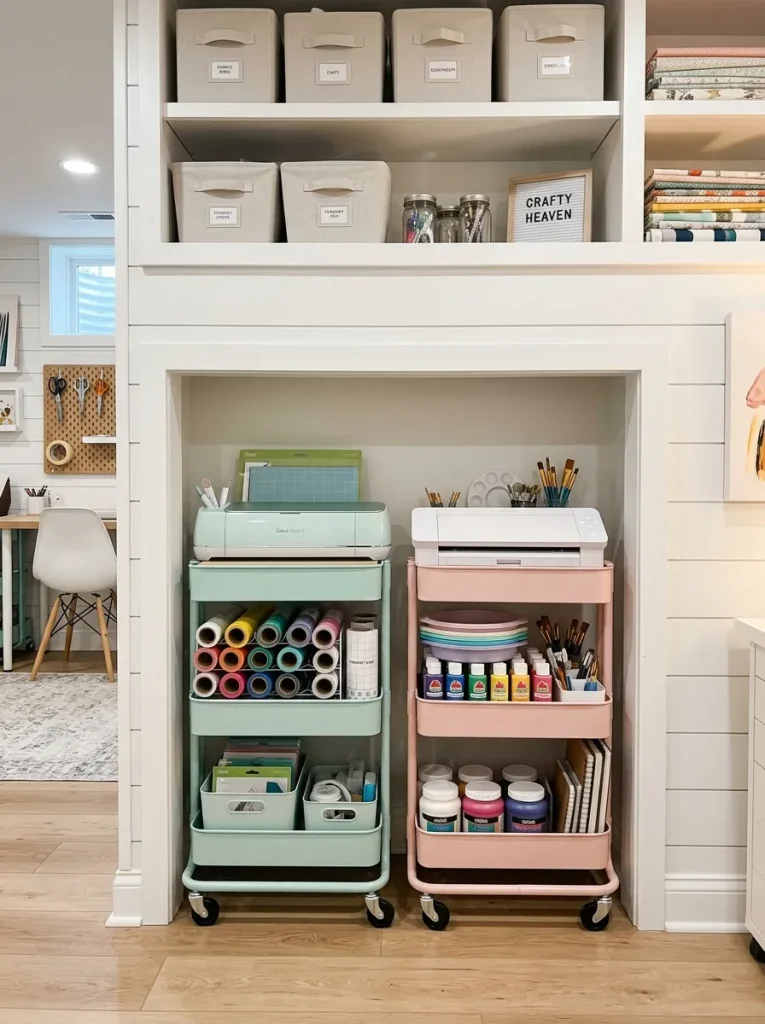
My rolling carts used to live wherever I last abandoned them, usually blocking the path to the dryer, so I built them a parking bay inside the closet under the lowest fixed shelf. Two three-tier steel carts roll in there neatly, one holding my cutting machine and its mats, the other holding paints and brushes, and I pull out whichever one the project needs. The carts are different colours, black for the machine and mint green for the paints, which sounds silly until you realise you never have to read a label to grab the right one. I measured the bay twice and still got it wrong the first time, because I forgot to allow for the caster height, so measure the cart with its wheels on and add two centimetres for clearance. Now the floor stays clear, the carts stay dust-free behind the closed door, and I wonder why I waited so long to give them a home.
8. Vinyl & Wrapping Paper Roll Vertical Drop-In Dividers
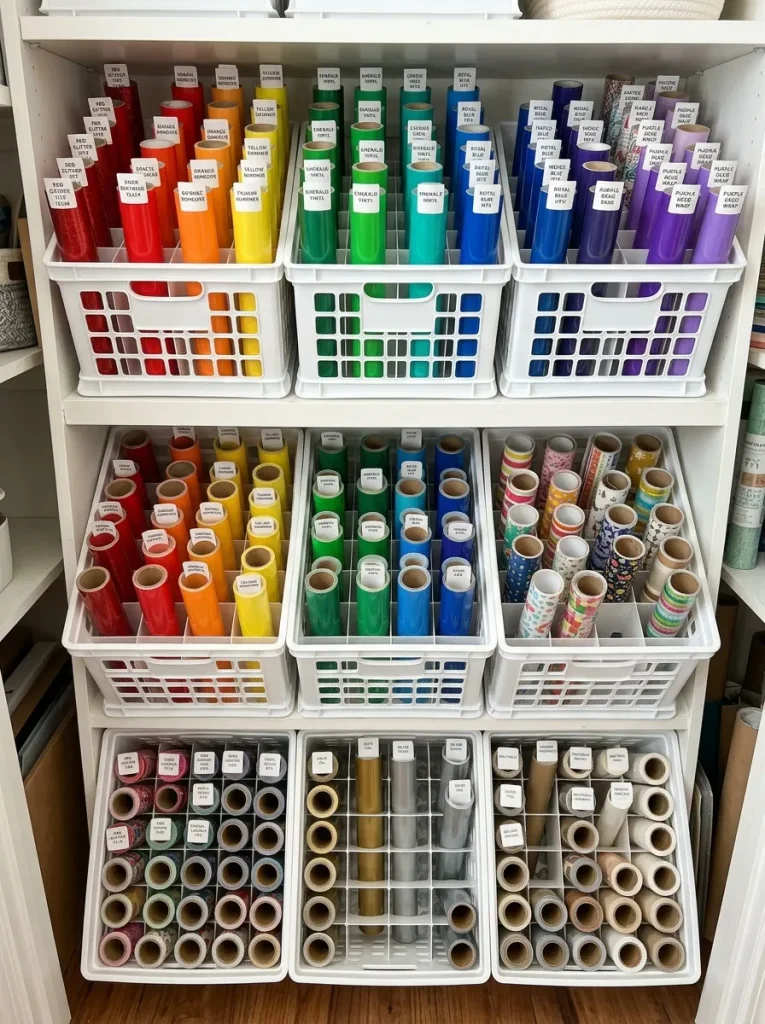
Rolls of vinyl and wrapping paper are the worst things to store flat, because they roll off shelves, unravel, and get their ends crushed, and I lost more than one good roll of heat-transfer vinyl to a dented corner. The fix was a deep crate with a honeycomb grid insert at the base of the closet, so every roll stands upright in its own slot and I can see the colours from above like a paint chart. I use snap-on roll clips instead of rubber bands now, after learning that bands leave a sticky ring on vinyl that transfers onto the finished design. The rolls are grouped in colour order, and the long wrapping paper tubes stand at the back where they cannot topple forward. It is a small, cheap idea, and it is the one I recommend first to anyone starting a craft closet, because it solves a daily irritation for the price of a crate and an insert.
9. Pegboard-Backed Modular Open-Bin Hanging Wall
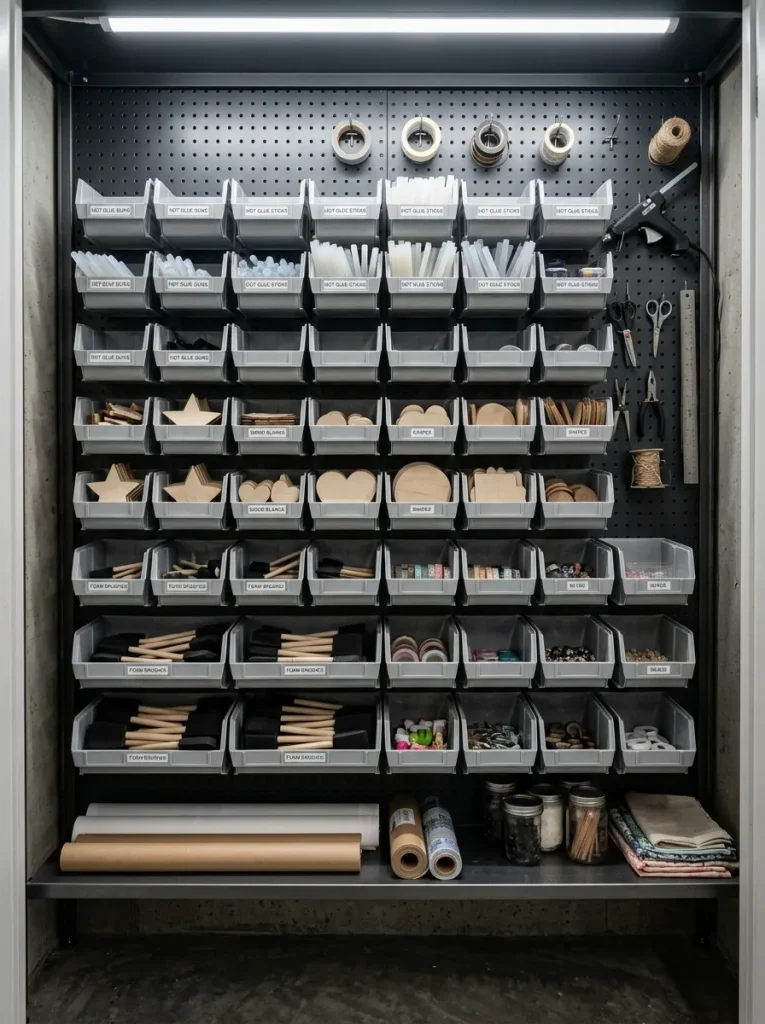
For the messy supplies, the glues, the wood blanks, the foam brushes and the rolls of tape, I lined the back wall of my shallow closet with steel pegboard and hung open-front hopper bins on it. I can reach straight into a bin and grab what I need without lifting a lid or unstacking anything, which matters when my hands are already sticky with glue. I kept all the bins in one colour, a plain slate grey, because a wall of mixed bright bins looked chaotic even when it was organised, and the uniform colour makes the whole closet feel calmer. The pegboard itself is screwed into studs, not just drywall, after I learned that lesson the hard way when a fully loaded row of bins pulled its anchors out of the plaster. Wipe the bins out every few months, because glue drips and glitter migrate everywhere, and a quick clean keeps the system pleasant to use.
10. Multi-Drawer Hardware Cabinet Towers for Micro-Supplies
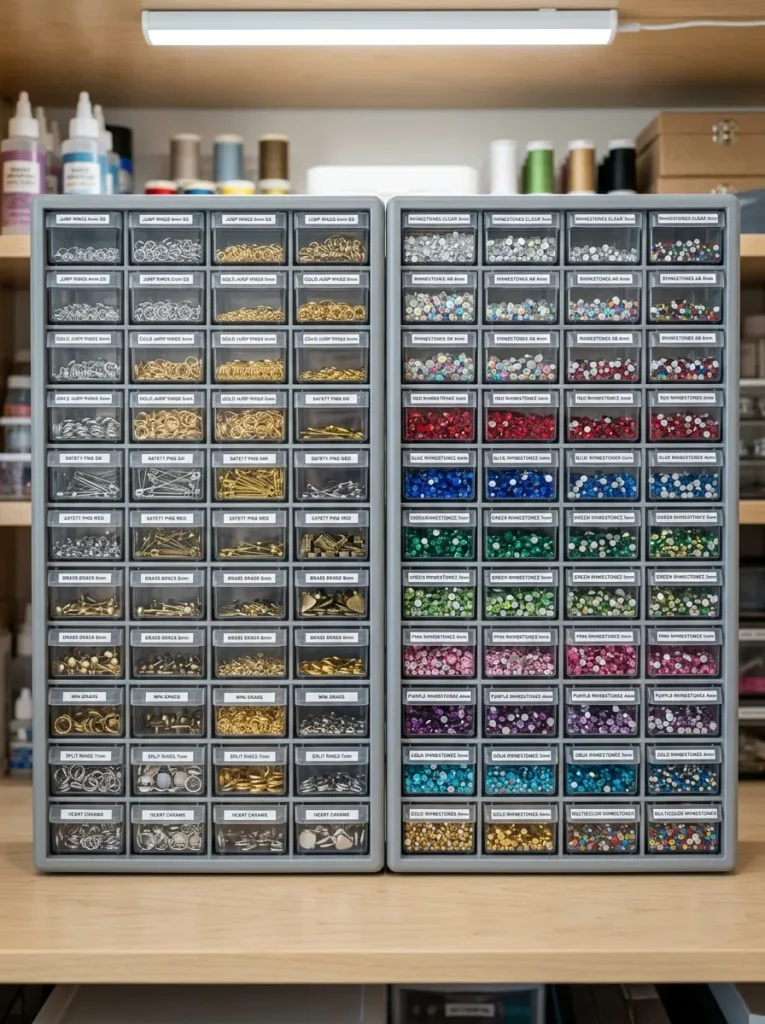
The tiniest supplies caused the biggest mess in my old system, because a single spilled jar of seed beads could take an hour to clean up, and jump rings vanished into carpet for months. I now keep two 64-drawer plastic cabinets side by side on a closet shelf, each drawer holding one kind of tiny thing, with a white foam insert in the bottom so small parts show up clearly through the clear front. Every drawer has a printed label, and I keep a paper index taped inside the closet door, because with 128 drawers I will never remember which one holds the 4-millimetre silver jump rings. The cabinets are light enough to lift off the shelf and carry to the table, which I do for jewellery projects, and I always close the drawers before moving them, a rule I wrote after scattering a full drawer of sequins across the basement floor. It was a long afternoon with a dustpan, and I have never repeated it.
Conclusion
My closet is not perfect, and it never will be, because every new craft brings new supplies with it, but it is a system now instead of a pile, and that makes all the difference. I can open the door, see everything I own, pull out one bin and start working within a minute, and when I am done everything has a place to go back to. Start with clear bins and one standard size, keep the bottom shelf off the floor, and label everything, because a closet you can trust is the quiet foundation of every project that follows.