I used to think stackable rings were only for people with long, elegant fingers, until a friend handed me a tiny wire ring she had made and I realised how much I had been missing. That first little band cost almost nothing in materials, took less than an hour, and yet I wore it every day for months, stacking it with other slim bands and changing the combination to suit my mood. Since then I have made stacks for myself, for gifts, and for quiet evenings when I just want to make something small and satisfying with my hands. These ten minimalist designs are my favourites, because each one is simple enough for a beginner, comfortable enough for daily wear, and pretty enough that people notice the details up close.

1. The Micro-Solitaire Beaded Stacker
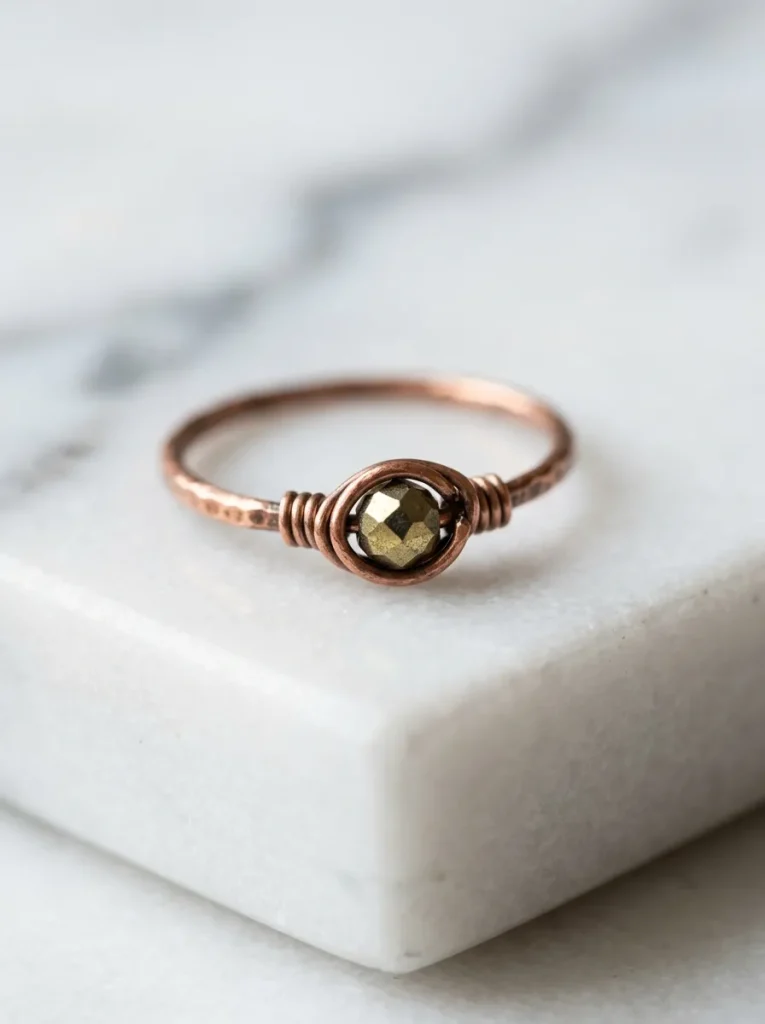
This is the ring I recommend to anyone who has never wrapped wire before, because it is small, quick, and almost impossible to get badly wrong. I form a slim band from round wire, then wrap a single tiny bead, usually a three-millimetre crystal or pearl, right at the centre front, securing it with a few neat wraps on either side.
What makes this stacker so useful is its quiet versatility. On its own it looks delicate and intentional, and in a stack it acts like a little full stop between plainer bands, drawing the eye without shouting. I have made them in silver with clear crystals for weddings, in gold-filled wire with warm pearls for everyday wear, and in copper with deep garnet beads for autumn. If you only ever make one wire ring, make this one first, because it teaches sizing, wrapping, and finishing in a single satisfying project.
2. The Classic Chevron / V-Point Stacker

I love the clean geometry of a chevron, that sharp little V that points either up or down the finger, and it translates beautifully into a wire ring. I shape the band so the front dips into a gentle point, then wrap the point firmly so it holds its angle, finishing the ends neatly at the back. My early chevrons were too shallow and looked like a wobbly band, so now I bend the point over a mandrel edge and check the angle before I wrap, and the V reads clearly from across the room.
It also stacks wonderfully: place it between two plain bands and the point creates a little peak in the middle of the stack, or wear two chevrons facing each other for a diamond shape. I keep the wire slim and the point modest, because a bold, oversized V can feel costume-like, while a refined one feels modern and considered.
3. The Twisted Rope Band Stacker

There is a lovely tactile quality to a twisted rope band, like a tiny piece of cord made from metal, and I find the twisting itself deeply satisfying. I take two lengths of wire, anchor them together, and twist them evenly until they form a tight, regular rope, then shape the rope into a band and finish the join at the back.
This band has a warm, slightly rustic feel that pairs well with both casual and dressy outfits, and it catches the light in a soft, shifting way that a plain band never does. It is also surprisingly comfortable, because the twisted surface gives the ring a little grip without digging into the skin. I often make it in gold-filled wire for a classic look, or in mixed metals for a more contemporary stack, and it is the band I reach for when I want texture without beads or stones.
4. The Minimalist Infinity / Figure-8 Knot Stacker

I made my first infinity ring as a gift for a friend going through a difficult year, and the symbolism of the endless loop felt just right for the occasion. The design is formed by looping the wire into a figure-eight at the front of the band, with the two loops sitting side by side like a sideways eight, then wrapping the centre crossing neatly so the knot holds its shape.
Keeping the loops small and even is the whole challenge, and I shape each loop around the same mandrel section so they match. Worn alone, the infinity ring is a sweet, meaningful piece, and in a stack it adds a lovely sculptural detail that breaks up a run of plain bands. I have made it in silver for a cool, modern feel and in rose gold-toned wire for a warmer, more romantic look, and both versions have become firm favourites in my own jewellery box.
5. The Double-Bypass Spiral Stacker
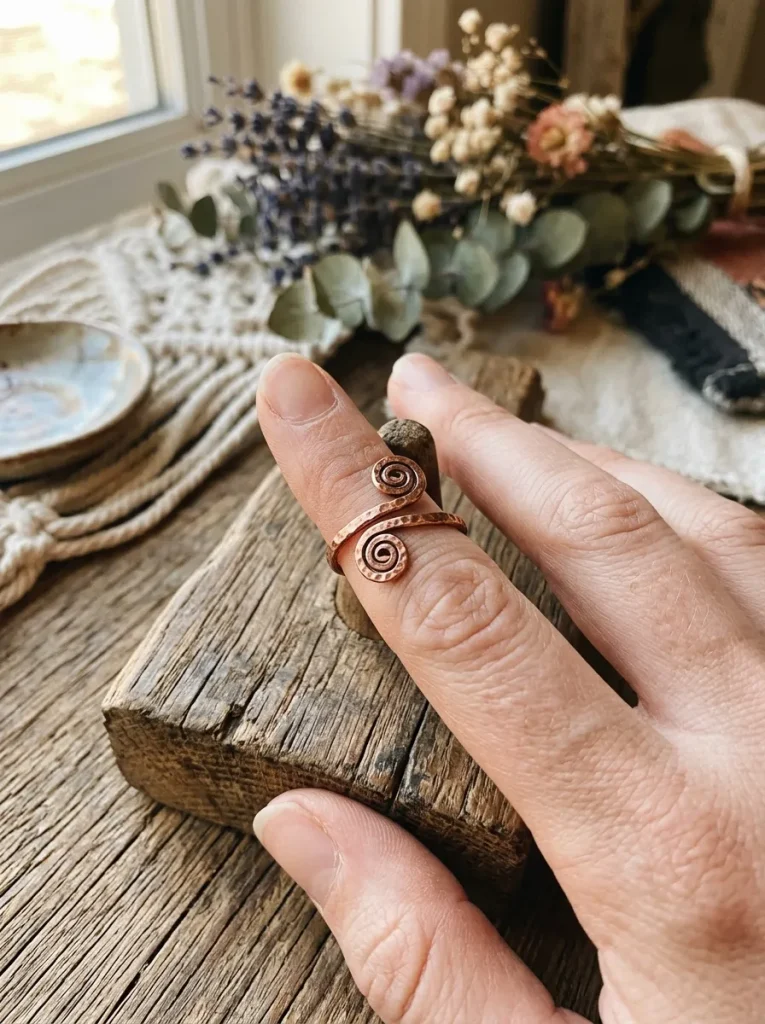
A bypass ring is one where the two ends of the band pass each other instead of meeting, and the double version wraps that idea into a gentle spiral around the finger. I shape the wire so it coils twice, with the ends finishing in tiny spirals that sit gracefully on either side of the finger, and the open design means it adjusts slightly to fit, which is forgiving if your fingers change size through the day.
I love how this ring looks from every angle, because the spiral creates movement and shadow that a flat band cannot match. It is also a wonderful design for a small bead or crystal at each spiral end, turning the open ends into a feature rather than an afterthought. Worn on its own, it makes a quiet statement, and in a stack it adds height and dimension, sitting beautifully beside slimmer, simpler bands that let the spiral take centre stage.
6. The Arc / Hammered Crescent Stacker
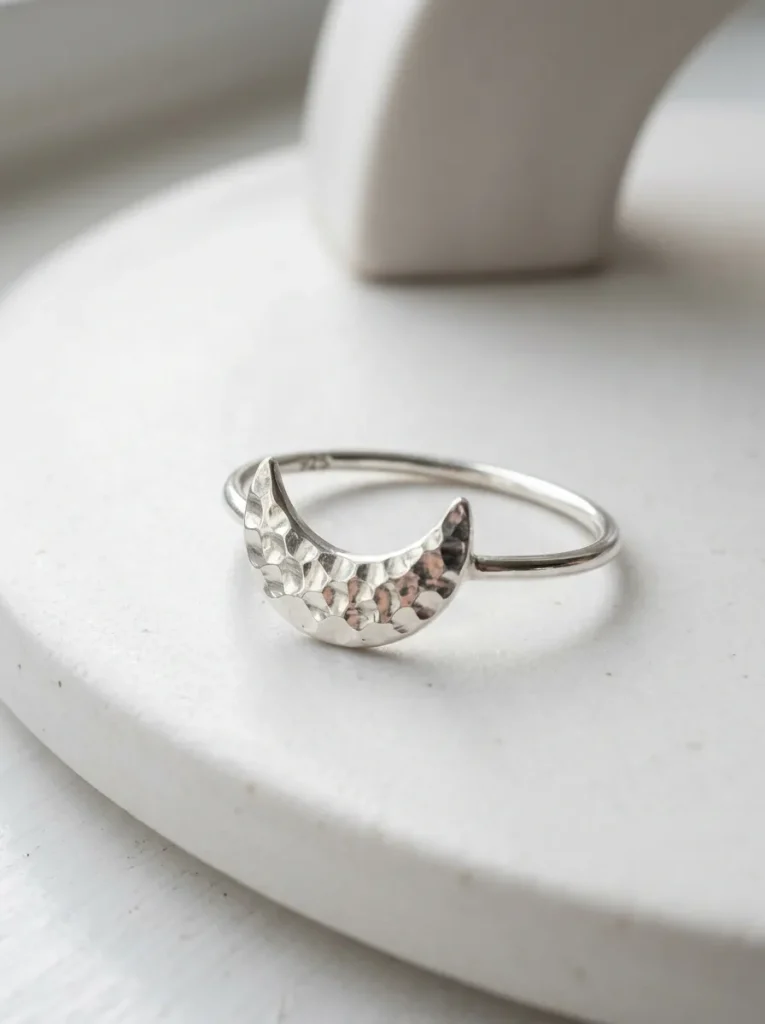
Hammering wire is one of those techniques that feels a little alarming the first time you try it, and then completely addictive once you see the result. For this ring, I shape a slim band, then gently hammer the front section into a flattened crescent, creating a small arc that catches the light with a soft, dappled texture.
The hammered crescent has an organic, moonlit quality that I find very appealing, and it is a lovely contrast to the smooth bands in a stack. Because hammering hardens the wire, the ring also holds its shape well over time, which is a practical bonus. I finish the edges carefully so there are no sharp spots, and I polish the crescent to a soft shine, leaving the hammer marks visible as texture. It is a simple design, but the hand-hammered surface makes every single one unique.
7. The Triple-Bead Balance Stacker
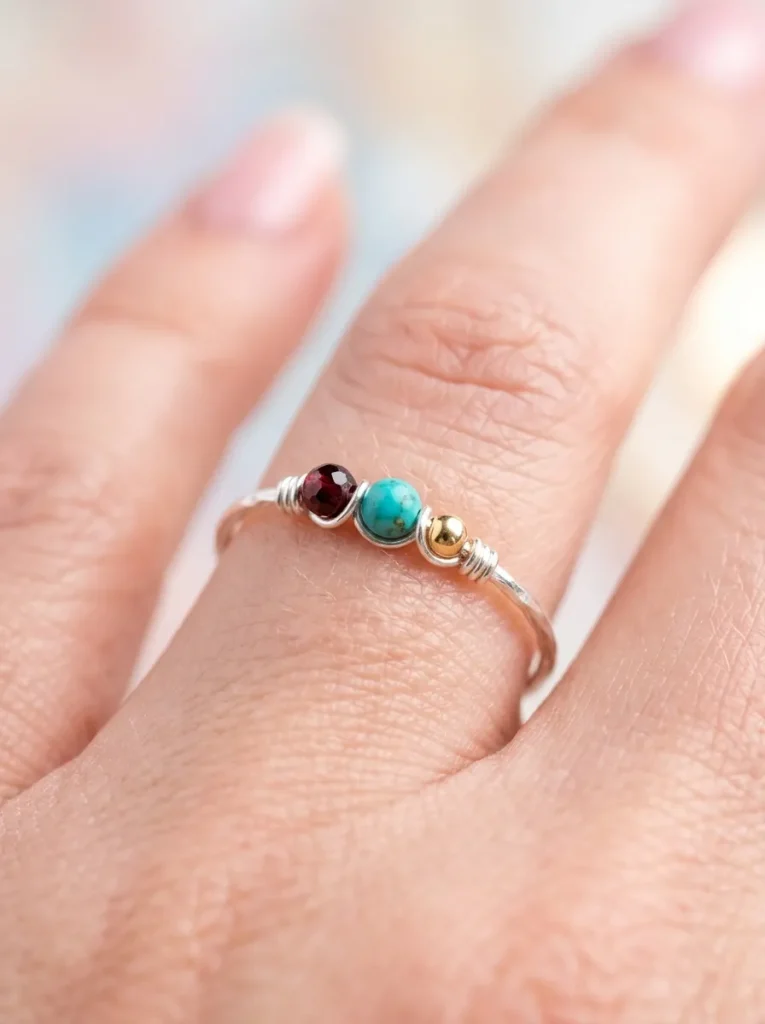
Three beads, evenly spaced and carefully balanced, give this ring a rhythm that a single bead cannot quite achieve. I wrap three small beads across the front of the band, usually graduating them slightly, with the middle bead a touch larger than the two beside it, which creates a gentle arc that follows the curve of the finger.
This stacker is wonderfully adaptable to colour stories: three pearls for a classic bridal feel, three tiny garnets for a rich, warm accent, or three mixed stones in a gradient from pale to deep. In a stack, it acts as a focal point, so I usually place it in the middle, flanked by plainer bands that let the beads shine. It is also a forgiving design for beginners, because small spacing differences are far less noticeable across three beads than they are with a single central stone.
8. The Wave / Squiggle Contour Stacker

This is the playful one in the collection, and I smile every time I make it. Instead of a straight band, the front of the ring ripples into a gentle wave, like a tiny squiggle drawn in wire, and the movement gives the ring a lighthearted, modern feel. I shape the wave freehand over a mandrel, bending the wire in smooth, even curves, and I have learned to keep the waves shallow and regular, because deep, erratic squiggles look messy and can snag on fabric.
Worn alone, the wave ring is a conversation starter, and people often ask how it was made, which is always fun. In a stack, it adds a sense of motion, especially when paired with a chevron or a straight band, because the contrast between the wave and the straight lines is so pleasing. I make it in bright silver for a crisp, contemporary look, and I always smooth the inside of the band thoroughly, so the decorative front never comes at the cost of comfort.
9. The Minimalist Hook & Eye Clasp Stacker

I borrowed this idea from bracelet clasps, and it works surprisingly well as a ring. The band opens at the front, where one end forms a small hook and the other forms a tiny eye loop, and the two close together with a satisfying little click. It is adjustable, which makes it a wonderful gift ring, because you do not need to know the exact size, and it has a clever, engineered feel that I find very appealing.
The beauty of this design is its honesty: the closure is the decoration, and there is no need for beads or stones to make it interesting. It looks modern and a little architectural, and it stacks well with closed bands, because the open front creates a pleasing break in the stack. I make it in sturdy wire so the hook keeps its spring, and I always round the hook tip carefully, so it closes smoothly and feels comfortable against the neighbouring finger.
10. The Wrapped Micro-Bar Stacker

This last design is the quiet minimalist of the group, and sometimes quiet is exactly what a stack needs. A tiny horizontal bar sits across the front of the band, wrapped securely at both ends with fine wire, like a miniature ingot resting on the finger. I keep the bar short, around eight millimetres, and the wraps tight and even, because at this scale any unevenness shows. The first bar I made was too long and looked heavy, so shortening it transformed the ring from clunky to refined.
I love this ring as a grounding piece in a stack, the calm, architectural element that lets busier rings beside it shine. It also engraves beautifully if you want to personalise it, and it makes a thoughtful gift for someone who prefers understated jewellery. In silver it looks crisp and modern, in gold it feels warm and classic, and either way it is the ring I wear when I want my hands to look polished without drawing too much attention to themselves.
Conclusion
Stackable rings have taught me that small does not mean insignificant, and that a ring made in an evening can become a daily favourite for years. Start with one simple band, learn how your wire behaves, and build your stack slowly, one design at a time, until you have a combination that feels like you. The best stacks, in my experience, are not the ones with the most rings, but the ones where each ring has a reason to be there, and where the whole group feels comfortable, personal, and quietly beautiful.