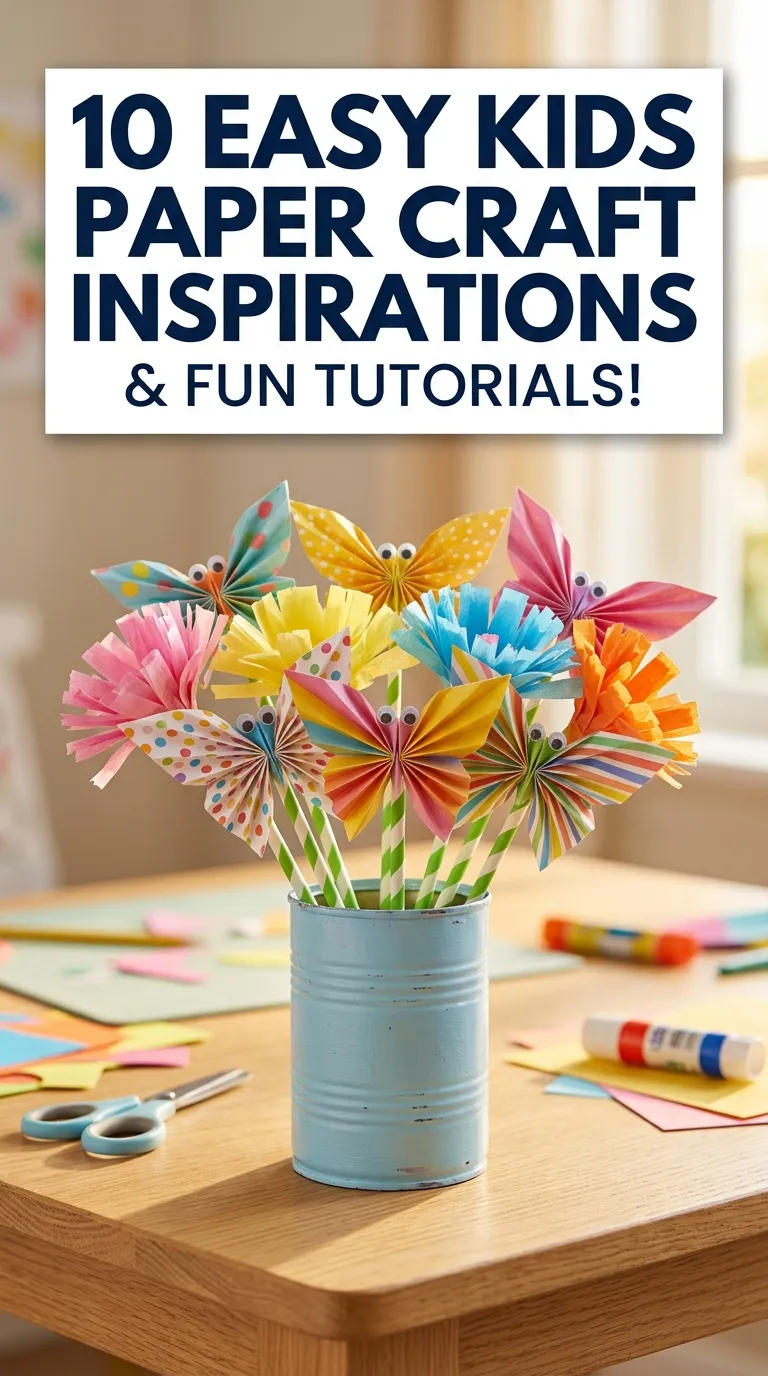

Crafting with paper is one of the most timeless, accessible, and enriching activities you can share with children. It requires minimal investment, virtually zero preparation time, and utilizes simple materials already sitting in your kitchen drawer or recycling bin.
Yet, beneath its simplicity, paper crafting opens up a universe of imagination, motor development, and hands-on learning.
From vibrant construction paper animals and flying origamis to interactive pop-up greeting cards and woven decorations, paper crafts teach children how flat, two-dimensional sheets can transform into dynamic, three-dimensional creations.
Whether you are a parent looking for rainy-day entertainment, a teacher structuring classroom art stations, or a caregiver seeking low-mess hands-on activities, this ultimate guide covers everything you need to know.
Explore ten detailed, engaging paper craft ideas designed to inspire kids of all ages while keeping setup simple and creativity boundless.
Why DIY Paper Crafts Are Essential for Child Development
Paper crafts are far more than just a quick way to pass the time on a quiet afternoon. They play an active role in early childhood cognitive and physical development.
          [ DIY Paper Crafts for Kids ]
                        │
       ┌────────────────┼────────────────┐
       ▼                ▼                ▼
[ Motor & Spatial ] [ Creative &  ]  [ Accessible & ]
[ Skill Growth    ] [ Cognitive   ]  [ Eco-Friendly ]
Fine Motor Control & Hand Strength
Cutting with safety scissors, folding precise creases, peeling stickers, and controlling glue bottles all build the small muscles in a child’s hands and fingers. These fine motor skills directly support everyday tasks like holding a pencil, buttoning a shirt, and writing clearly.
Bilateral Coordination & Spatial Reasoning
Paper crafts require children to use both hands simultaneously for different tasks—holding a sheet steady with one hand while cutting or folding with the other. Visualizing how a flat piece of paper transforms when folded or curved strengthens spatial awareness and early geometry understanding.
Low-Cost, Eco-Friendly Versatility
Unlike expensive plastic craft kits, paper is affordable, widely available, and easily recyclable. Teaching children to use scrap paper, old newspapers, and cardboard encourages resourcefulness and environmental mindfulness early on.
Materials, Preparation & Setup Guide
Setting up an organized, kid-friendly paper crafting station makes the experience smooth, safe, and enjoyable for everyone involved.
Essential Paper Crafting Tool Kit
| Material / Tool | Best Specification | Primary Use in Paper Crafts |
| Construction Paper | Multi-color heavy pack (9×12 inch) | Base structure for animals, cards, and shapes |
| Origami Paper | Lightweight square sheets (6×6 inch) | Crisp, precise folding without tearing |
| Cardstock | Heavyweight 65lb – 80lb stock | Rigid bases, pop-up mechanisms, and masks |
| Safety Scissors | Blunt-tip stainless steel blades | Safe cutting for little hands |
| Glue Sticks | Washable purple-to-clear glue sticks | Quick, mess-free paper bonding |
| PVA / School Glue | Non-toxic liquid white glue | Securing heavy embellishments (buttons, pom-poms) |
| Markers & Crayons | Washable broad line markers | Adding faces, patterns, and colorful details |
| Embellishments | Googly eyes, pipe cleaners, tissue paper | Adding personality and tactile depth |
Workspace Prep & Safety Protocol
- Protect the Surface: Cover your table with a washable plastic tablecloth, butcher paper, or silicone craft mats to protect against accidental glue drips or marker stray marks.
- Pre-Cut for Younger Kids: Toddlers and preschoolers (ages 2–4) love assembling, but can get frustrated cutting complex shapes. Pre-cut basic circles, strips, and animal ears ahead of time so they can jump straight into gluing and decorating.
- Manage Glue Usage: Teach children the “small dabs, big hold” technique. For liquid glue, encourage using a small paintbrush or craft stick to apply a light coat so the paper doesn’t warp or get soggy.
10 Detailed DIY Paper Crafts for Kids
1. Colorful Paper Loop Caterpillars

A delightful, tactile craft where kids turn simple strips of paper into a bouncy, three-dimensional caterpillar body.
      (o.o)  <-- Head (Circle + Googly Eyes & Pipe Cleaner Antennae)
     (  ) (  ) (  ) (  )  <-- Interlocking / Glued Paper Loops
Concept Overview & Aesthetic Appeal
This project focuses on looping, sequencing, and color recognition. By gluing paper strips into rings and joining them in a line, kids create a flexible, springy caterpillar that sits upright on a table.
Step-by-Step Execution Guide
- Cut Paper Strips: Cut 5 to 7 strips of colorful construction paper, each about 1 inch wide and 6 inches long.
- Form Paper Rings: Take one strip, apply a dab of glue stick on one end, overlap the edges, and press together to form a paper loop. Repeat for all strips.
- Join the Body: Glue the side seams of the loops together in a horizontal line, alternating colors to create a rainbow pattern.
- Create the Head: Cut a circle slightly larger than the loops from a bright piece of paper. Glue two googly eyes onto the face and draw a big smiling mouth with a marker.
- Add Antennae: Tape two small pieces of folded pipe cleaner to the back of the head circle, then glue the head to the front ring of the caterpillar body.
Pro Tips & Variations
- Draw a large green leaf shape on green cardstock and glue your caterpillar on top so it looks like it is crawling across a leaf!
Common Mistakes to Avoid
- Using Heavy Cardstock for Loops: Rigid cardstock springs open when folded into small loops. Use standard construction paper or origami paper so the loops stay glued easily.
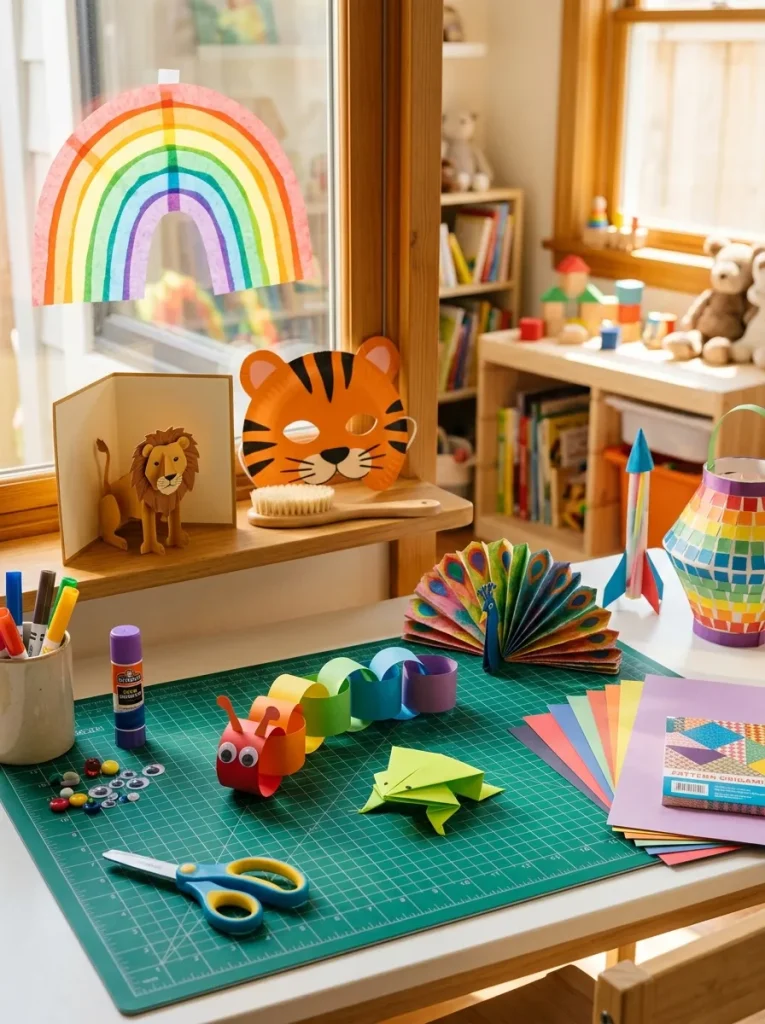
2. Classic Origami Flapping Birds & Frogs
Introduce children to the ancient Japanese art of paper folding by making simple jumping frogs or traditional flapping birds.
Concept Overview & Aesthetic Appeal
Origami requires no glue or scissors—just patience, focus, and precise folds. Watching a single flat square turn into an interactive toy that hops or flaps its wings feels like magic to kids.
Step-by-Step Execution Guide (Jumping Frog)
- Start with a Square: Take a 6×6-inch sheet of origami paper. Fold it in half horizontally, then unfold to leave a center crease.
- Form the Top Triangle: Fold the top two corners diagonally down to the opposite sides, unfolding after each fold to make an “X” crease pattern on the top half. Push the side edges inward along the creases to collapse the top into a triangle.
- Fold the Front Legs: Fold the bottom corners of the top triangle upward at an angle to create the frog’s front legs.
- Fold the Body: Fold the outer vertical edges of the bottom half inward toward the center line.
- Fold the Back Legs: Fold the bottom rectangle up to meet the base of the triangle, then fold the bottom half of that back down to form an accordion spring hinge.
- Play: Flip the frog over and press down gently on the rear accordion fold with a finger—release it to watch the frog hop!
Pro Tips & Variations
- Draw tiny eyes and spots on the paper frog using fine-tip markers once all folds are complete.
Common Mistakes to Avoid
- Lining Up Edges Sloppily: Origami requires clean, flat alignment. Encourage kids to smooth every fold down firmly using their thumbnail or the side of a craft stick.
3. Vibrant Tissue Paper Rainbow Suncatchers

Catch the afternoon light with these radiant window decorations made from colorful tissue paper squares layered on clear contact paper or paper plates.
    ┌───────────────────────────┐
    |  ( Red ) ( Yellow ) (Blue)| <-- Translucent Layered Tissue Squares
    |   [ PAPER PLATE FRAME ]   |     Stuck onto Clear Contact Paper
    └───────────────────────────┘
Concept Overview & Aesthetic Appeal
Suncatchers explore translucency, light diffusion, and color mixing. When hung on a sunny window, overlapping primary-colored tissue squares glow and reveal secondary colors like orange, green, and purple.
Step-by-Step Execution Guide
- Prepare the Frame: Cut out the inner center of a white paper plate, leaving a sturdy 1-inch ring frame.
- Apply Sticky Base: Cut a circle of clear self-adhesive contact paper slightly larger than the frame cutout. Peel off the backing paper and stick it firmly to the back of the paper plate frame so the sticky side faces up through the center opening.
- Cut Tissue Squares: Cut tissue paper into small 1-inch squares in a full rainbow of colors.
- Fill the Mosaic: Let children press tissue paper squares onto the sticky contact paper until the entire opening is completely covered with overlapping colors.
- Seal & Trim: Stick another layer of clear contact paper over the top to seal the tissue paper flat. Trim away any excess contact paper around the frame edge.
- Hang: Punch a single hole at the top of the paper plate frame, thread a piece of ribbon through, and tape it to a sunny window!
Pro Tips & Variations
- Cut out silhouette shapes from black cardstock (like butterflies, hearts, or stars) and lay them down on the sticky sheet before adding tissue paper for a faux-stained-glass look.
Common Mistakes to Avoid
- Using Construction Paper Instead of Tissue: Regular construction paper is too opaque to let light pass through. Stick strictly to lightweight tissue paper.
4. Interactive Pop-Up Animal Greeting Cards
Create charming, 3D greeting cards featuring pop-up mouth mechanisms that open and close when the card is folded.
Concept Overview & Aesthetic Appeal
Pop-up cards introduce basic paper engineering principles. Kids learn how cuts, folds, and spatial alignment can create dynamic 3D elements inside a standard card.
Step-by-Step Execution Guide
- Prepare the Base Card: Fold a sheet of heavy cardstock in half to form a standard greeting card.
- Make the Pop-Up Slits: Along the folded spine of the card, make two parallel 1-inch cuts about 1 inch apart using scissors.
- Push the Tab Inward: Open the card slightly and push the cut paper tab inward toward the inside crease so it forms a rectangular step. Flatten the card and press down firmly to set the new folds.
- Design the Pop-Up Element: On a separate sheet of paper, draw and cut out an animal face, flower, or heart (e.g., a lion or bird).
- Attach the Character: Apply glue stick to the front surface of the pop-up step tab inside the card, then press your cut-out character firmly onto it.
- Decorate: Glue a second sheet of cardstock around the outside of the card to hide the back slit holes, then write a sweet message inside!
Pro Tips & Variations
- Draw a bird or frog head where the pop-up tab forms the opening beak or mouth whenever the recipient opens the card!
Common Mistakes to Avoid
- Gluing Pop-Ups Over the Main Spine: If you glue parts directly across the middle spine crease instead of on the pop-up tab, the card will fold stiffly or tear when closed.
5. Accordion-Folded Paper Fan Peacocks

Transform flat paper sheets into a stunning, fanned-out peacock tail using simple accordion-folding techniques.
       /\/\/\/\/\/\/\/\  <-- Accordion-Folded Paper Fan Tail
      (    (o.o)       )
     (      / \         )
           || ||         <-- Cardstock Body Base
Concept Overview & Aesthetic Appeal
Accordion folding is a foundational paper craft skill. Combining a fan-folded paper tail with a cardstock bird body creates a rich, textured craft with great visual impact.
Step-by-Step Execution Guide
- Accordion Fold the Tail: Take a sheet of bright blue or green construction paper. Starting from the short edge, fold a 1/2-inch strip forward, flip the paper over, fold 1/2-inch back, and repeat all the way down the sheet to form a paper accordion.
- Form the Fan: Pinch the accordion strip in half down the middle, fold it into a “V” shape, and glue the two inner meeting edges together to create a wide semi-circular fan.
- Draw & Cut the Body: On a sheet of cardstock, draw a simple bowling-pin shape for the peacock’s body and head. Cut it out and paint or color it deep royal blue.
- Add Facial Details: Glue small googly eyes and a yellow cardstock triangle beak onto the head.
- Attach the Fan Tail: Apply a generous amount of glue to the back lower portion of the cardstock body and press it onto the center of the accordion fan tail until fully secured.
Pro Tips & Variations
- Use decorative edge scissors to cut along the long edge of the paper before accordion-folding to give the peacock tail feathered, lace-like edges!
Common Mistakes to Avoid
- Unfocused Pleat Spacing: Making folds too wide or uneven causes the fan to droop. Keep pleat widths consistent at around 1/2 inch to 3/4 inch.
6. Whimsical Woven Paper Placemats & Fish

A classic childhood craft that teaches over-under weaving patterns to create vibrant geometric grids or textured paper animals.
Concept Overview & Aesthetic Appeal
Paper weaving is an engaging way to develop hand-eye coordination, pattern recognition, and fine motor precision while building colorful woven mats, bookmarks, or tropical fish.
Step-by-Step Execution Guide
- Prepare the Weaving Loom: Take a 9×12-inch piece of construction paper (the “loom”) and fold it in half length-wise.
- Cut Slits: Starting from the folded edge, cut straight parallel slits 1 inch apart toward the outer edge, stopping 1 inch before the top border so the sheet stays connected. Unfold the paper.
- Cut Weaving Strips: Cut several 1-inch wide strips from a contrasting color of paper.
- Weave the Pattern: Show your child how to weave the first strip through the loom: Over the first warp bar, Under the next, Over, Under, all the way across.
- Alternate Rows: Take the second strip and reverse the pattern (Under, Over, Under, Over). Push the woven strips snug against one another.
- Secure the Edges: Glue the loose ends of the strips along the outer border of the loom sheet to lock the woven pattern in place.
Pro Tips & Variations
- Once woven into a solid sheet, cut out a large fish outline from the woven paper to create a tropical fish display!
Common Mistakes to Avoid
- Cutting Slits All the Way to the Edge: Cutting slits through the top border destroys the loom frame. Keep a 1-inch border intact around the perimeter.
7. Modular Paper Plate & Construction Paper Animal Masks
Turn simple paper plates and cardstock into wearable animal masks for costume play, theatrical games, and birthday parties.
       / \_______/ \  <-- Cutout Cardstock Ears
      |  (O)   (O)  | <-- Punched Eyeholes
      |     \v/     | <-- Painted Snout & Whisker Features
Concept Overview & Aesthetic Appeal
Mask making merges visual art with dramatic pretend play. Kids design and customize their favorite animals—from foxes and bears to tigers and lions—and wear them during imaginative games.
Step-by-Step Execution Guide
- Prepare the Mask Base: Take a sturdy paper plate and cut it in half, or leave it whole depending on the animal face size.
- Measure & Cut Eyeholes: Hold the plate up to your child’s face, mark the eye positions with a pencil, and cut out two 1-inch eyeholes using scissors (adult help recommended).
- Paint the Face: Coat the plate in tempera paint matching your chosen animal (e.g., orange for a tiger, brown for a bear, or white for a panda).
- Add Features: Cut out cardstock ears, snouts, whisker strips, or teeth, and glue them onto the plate frame.
- Attach Handle or Strap: Glue a sturdy wooden ice cream stick to the bottom side as a hand-held mask handle, or punch holes on both sides and attach an elastic band.
Pro Tips & Variations
- Glue soft cotton balls around a white paper plate mask to build a fluffy sheep or polar bear face!
Common Mistakes to Avoid
- Misaligned Eyeholes: Cutting eyeholes without measuring first makes the mask uncomfortable or impossible to see through. Always trace eye spots while holding the mask in place.
8. Flying Straw & Paper Aerodynamic Rockets
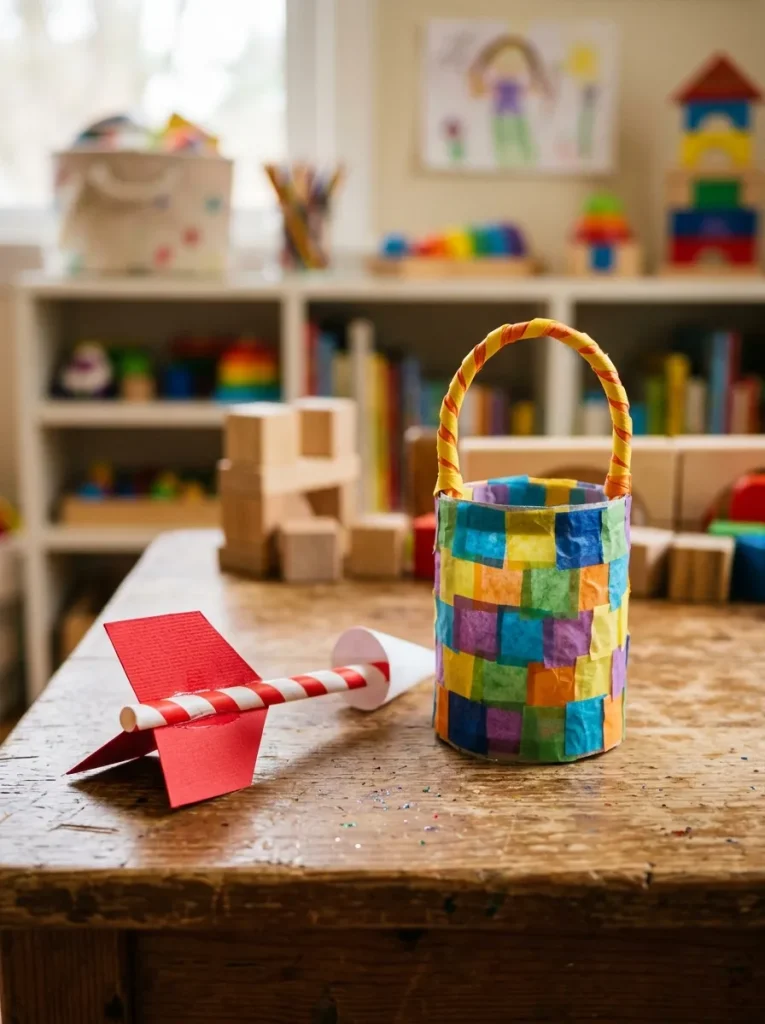
An active STEM-based craft that lets kids design lightweight paper rockets and launch them across the room using air pressure through a drinking straw!
Concept Overview & Aesthetic Appeal
This interactive project bridges science and art. Kids learn about aerodynamics, propulsion, and trajectory while decorating sleek paper space rockets.
Step-by-Step Execution Guide
- Roll the Rocket Body: Cut a 3×5-inch piece of paper. Wrap it loosely around a plastic drinking straw, apply a piece of clear tape along the long seam to form a hollow paper tube, and slide it off the straw. (Note: Make sure it slides easily off the straw without being too loose!)
- Seal the Nose Cone: Pinch one end of the paper tube flat, fold it over 1/2 inch, and tape it tightly shut so no air can escape through the top.
- Add Fins: Cut two small right-angle triangles from cardstock and tape them to the bottom sides of the paper tube as rocket fins.
- Decorate: Use markers to draw NASA logos, windows, or colorful fire patterns on the body tube.
- Launch: Slide the open end of the paper rocket onto your drinking straw, point it upward in a safe direction, and blow hard through the straw to launch it high into the air!
Pro Tips & Variations
- Experiment with different rocket lengths and fin shapes to see which design flies the farthest across the room!
Common Mistakes to Avoid
- Leaky Nose Cones: If the top fold isn’t sealed tightly with tape, air will leak out when blown into, preventing the rocket from launching.
9. Intricate Folding Paper Snowflakes & Starbursts

A winter classic that teaches radial symmetry! Folding paper into triangles and making small edge cutouts produces intricate, geometric snowflakes when unfolded.
       /\      Folded Triangle
      /  \  <-- Cut Small Notches Along
     /____\     Both Folded Edges
Concept Overview & Aesthetic Appeal
Unfolding a paper snowflake offers instant delight. No two snowflakes are ever identical, giving children infinite room to experiment with shapes, notches, and geometric patterns.
Step-by-Step Execution Guide
- Square the Paper: Start with a square piece of white paper or thin origami paper.
- First Fold: Fold the square diagonally in half to form a triangle.
- Second Fold: Fold the triangle in half again to create a smaller triangle.
- Thirds Fold: Fold the left and right sides of the triangle inward across each other in overlapping thirds (like a cone), pressing the creases flat. Trim off the bottom uneven points so you are left with a neat wedge.
- Cut Patterns: Use scissors to snip small triangles, half-circles, and notches along both folded sides of the paper wedge. (Keep the cuts small so the snowflake stays connected!)
- The Big Reveal: Carefully unfold the paper to reveal an intricate, symmetrical 6-pointed starburst or snowflake!
Pro Tips & Variations
- Flatten finished paper snowflakes under a heavy book, then brush them with a light coat of glitter glue or hang them in windows with clear fishing line.
Common Mistakes to Avoid
- Cutting Away the Entire Spine Edge: Cutting completely across from one side of the folded wedge to the other will sever the paper, causing the snowflake to fall apart into tiny scraps when unfolded.
10. Colorful Mosaic Paper Lanterns

Build glowing, festive paper lanterns by slicing construction paper and wrapping it around an inner decorative paper core.
Concept Overview & Aesthetic Appeal
Paper lanterns are a staple for cultural celebrations, summer parties, and bedroom decorations. They teach structural slitting, rolling, and volume creation.
Step-by-Step Execution Guide
- Prepare the Outer Shell: Take a 9×12-inch piece of construction paper, fold it in half lengthwise (like a hot dog bun).
- Cut Lantern Slits: Cut straight parallel slits from the folded edge toward the open edge, stopping about 1 inch before reaching the top margin.
- Unfold & Roll: Unfold the sheet flat. Roll the sheet into a cylinder so the cuts run vertically, and overlap the top and bottom edges.
- Secure the Cylinder: Staple or glue the top and bottom meeting edges together. Press down gently on the top of the cylinder to bow the slit strips outward in a rounded lantern curve!
- Add Inner Core (Optional): Slide a contrasting cylinder of yellow or white tissue paper inside to form a glowing inner core.
- Attach Handle: Glue a 1-inch wide paper strip across the top rim to act as a lantern hanging handle.
Pro Styling & Application Tips
- Place a battery-operated flameless LED tea light inside the base of the lantern to make it glow safely at night! (Never use real candles).
Common Mistakes to Avoid
- Cutting Through the Top Rim: Slitting all the way to the outer edge cuts the lantern into loose strips. Always leave a 1-inch solid border at the top and bottom.
Common Beginner Mistakes & How to Avoid Them
Paper crafts are simple, but small technique adjustments keep activities fun and frustration-free:
    [ Common Paper Crafting Pitfalls ]
                    │
  ┌─────────────────┼─────────────────┐
  ▼                 ▼                 ▼
[ Excessive Liquid ] [ Thick Paper    ] [ Rushing Glue  ]
[ Glue Warping     ] [ Folding Blunders] [ Dry Times     ]
1. Drenching Paper in Excess Liquid Glue
- The Problem: Soaking paper with liquid school glue breaks down paper fibers, causing wrinkling, warping, and wet tears.
- The Solution: Use glue sticks for flat paper-to-paper connections. When liquid glue is required, use the “dot, dot, not a lot” rule or apply glue using a small brush.
2. Using the Wrong Paper Weight for the Job
- The Problem: Attempting complex origami with thick cardstock leads to torn folds, while building pop-up mechanisms with flimsy tissue paper causes structural collapse.
- The Solution: Match the paper to the task:
- Origami / Folding: Lightweight origami or printer paper.
- Pop-Ups / Masks / Bases: Heavyweight cardstock.
- Looping / Weaving / Lanterns: Standard construction paper.
3. Cutting Unsupported Creases
- The Problem: Young children often hold paper loosely in the air while cutting, leading to bent edges and jagged cuts.
- The Solution: Encourage kids to rest the bottom elbow or hand on the table to stabilize the paper while guiding scissors smoothly through the sheet.
Pro Tips, Maintenance & Display Strategies
Showcase and preserve your child’s artwork to build confidence and keep your living spaces organized:
- Create a Dedicated Gallery Wall: Display paper artwork using wooden clothespins clipped along a piece of twine stretched across a playroom or bedroom wall.
- Seal Display Pieces: Apply a thin layer of Mod Podge or clear acrylic craft sealer over flat paper mosaics or suncatchers to protect paint and prevent paper colors from fading over time.
- Store Flat Creations in Portfolios: Keep flat crafts, origami creations, and woven placemats organized inside simple plastic expanding accordion folders or art portfolios labeled by year.
Budgeting & Time Planning
Paper crafts are unmatched in cost-efficiency and quick setup time:
| Project Name | Average Prep Time | Crafting Time | Estimated Material Cost | Recommended Age |
| Paper Loop Caterpillar | 5 mins | 15–20 mins | $0 – $2 (using paper scraps) | Ages 3–6 |
| Origami Jumping Frog | 2 mins | 10–15 mins | $0 – $1 | Ages 6–10 |
| Tissue Suncatcher | 5 mins | 20–30 mins | $1 – $3 | Ages 3–8 |
| Pop-Up Animal Card | 5 mins | 20–30 mins | $1 – $2 | Ages 6–12 |
| Mosaic Paper Lantern | 5 mins | 15–25 mins | $0 – $2 | Ages 5–10 |
Pro Savings Tip: Save colorful paper scraps, wrapping paper remnants, clean junk mail envelopes, and magazine pages inside a “Scrap Bin.” Reusing scraps for small features (like animal ears, eyes, and mosaic squares) keeps costs virtually zero!
Creative Expansion & Advanced Inspiration
When your young crafters master these foundational activities, take their skills further with these creative expansions:
- Incorporate Micro LED Lights: Add battery-operated micro fairy lights inside paper lanterns or behind suncatchers to make glowing nightlights.
- Build 3D Paper Sculptures: Challenge older kids to combine several crafts—such as building a complete paper jungle with accordion trees, woven fish, and paper loop animals.
- Integrate Stop-Motion Animation: Use finished paper characters and origami creations as puppets in a simple stop-motion animation video made using a smartphone app!
Frequently Asked Questions (FAQs)
What is the best glue to use for children’s paper crafts?
For almost all paper-to-paper crafts, purple washable glue sticks are best. They apply smoothly, go on purple so kids can see where they are applying it, dry clear, and do not cause paper to warp or buckle.
How do I teach young kids to use scissors safely?
Start with blunt-tip safety scissors. Teach children the “Thumbs Up” rule—always keep the thumb pointing upward in the smaller loop of the scissor handle while cutting away from the body. Practice first on thick paper strips, playdough, or index cards before moving to fine craft paper.
How can I make paper crafts last longer without tearing?
Using heavier paper stock (like 65lb cardstock) for base structures instantly increases durability. You can also laminate flat paper art or cover both sides with clear contact paper for long-lasting play.
What can I do with old paper crafts when my kids finish them?
Take a photo of your child holding their creation to keep in a digital memory album! Display the physical craft on a gallery wall for a few weeks, and when ready to make room for new projects, recycle paper crafts that don’t contain plastic embellishments or tape.